This part of the Z-SUITE 2 manual shows how to add support structures to models in the FDM and UV LCD technology. There are two support types in both technologies: automatic and editable. See the instructions below for details. The remaining parts of the manual are available at: Basic Features, Working with Models, Print Preparation, Tips & Tricks.
Support Adjustments (FDM)
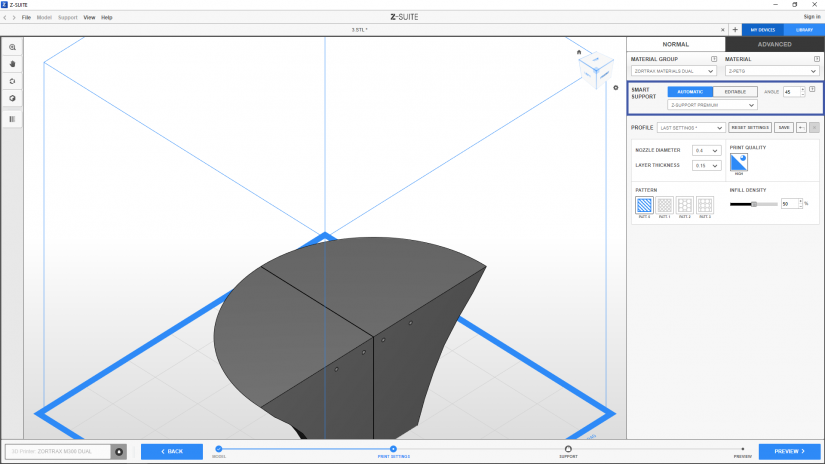
1. To add automatic support structures to your model, select AUTOMATIC in the Print settings menu. Next, set an angle at which you want the support to be generated. The support structures will be automatically generated in the Preview step.
Automatic Support
1. To add automatic support structures to your model, select AUTOMATIC in the Print settings menu. Next, set an angle at which you want the support to be generated. The support structures will be automatically generated in the Preview step.
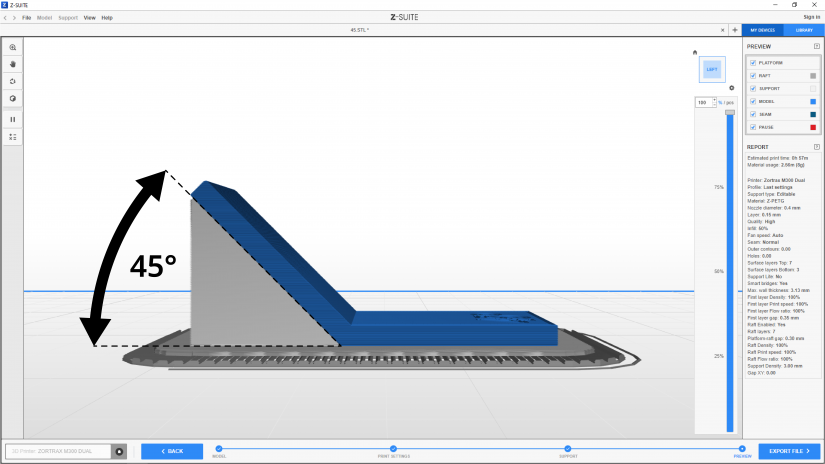
2. In order to successfully add support to your model, you have to determine the angle between the slope of a model and the platform. The graphic shows which angle should be considered*.
*The default angle is 30° for the single-extrusion mode and 45° for the dual-extrusion mode.
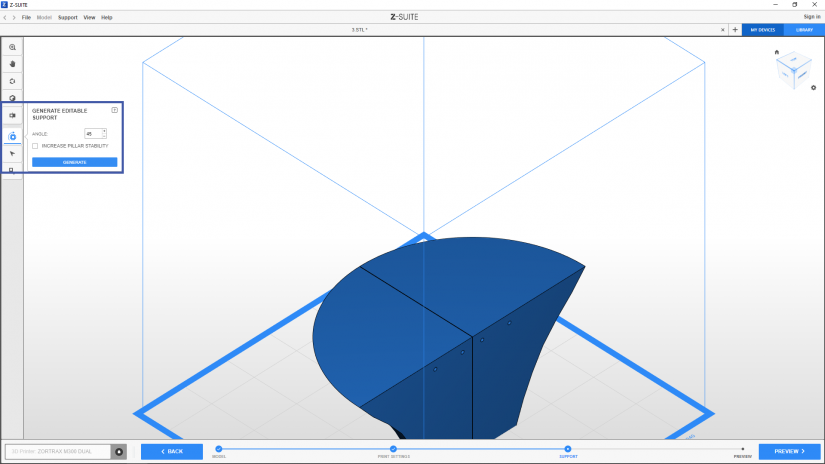
2. The GENERATE EDITABLE SUPPORT option automatically adds support structures to your model once you click GENERATE. You can adjust the angle at which the support should be generated. The default angle is 30° for the single-extrusion mode and 45° for the dual-extrusion mode.
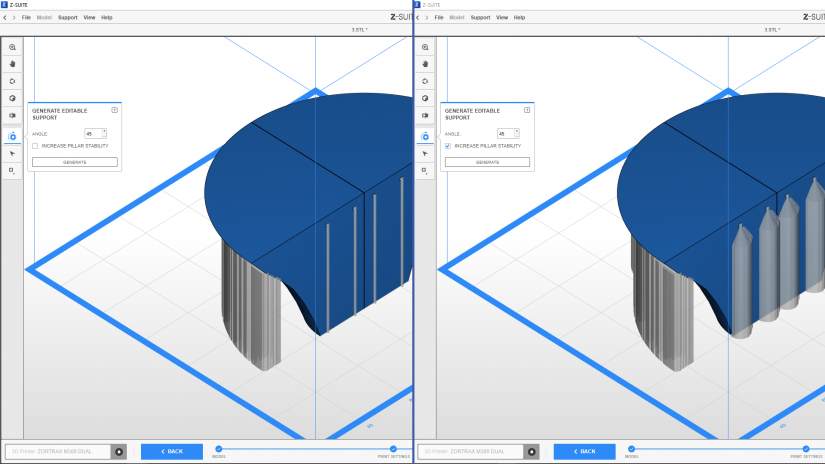
3. The INCREASE PILLAR STABILITY option enlarges small blocks of support so that they have a wider bottom part and increased contact with the platform.
The right image shows pillars with increased stability.
Editable Support
1. Select EDITABLE in the Print settings menu to add generate editable support in the Support step.
2. The GENERATE EDITABLE SUPPORT option automatically adds support structures to your model once you click GENERATE. You can adjust the angle at which the support should be generated. The default angle is 30° for the single-extrusion mode and 45° for the dual-extrusion mode.
3. The INCREASE PILLAR STABILITY option enlarges small blocks of support so that they have a wider bottom part and increased contact with the platform.
The right image shows pillars with increased stability.
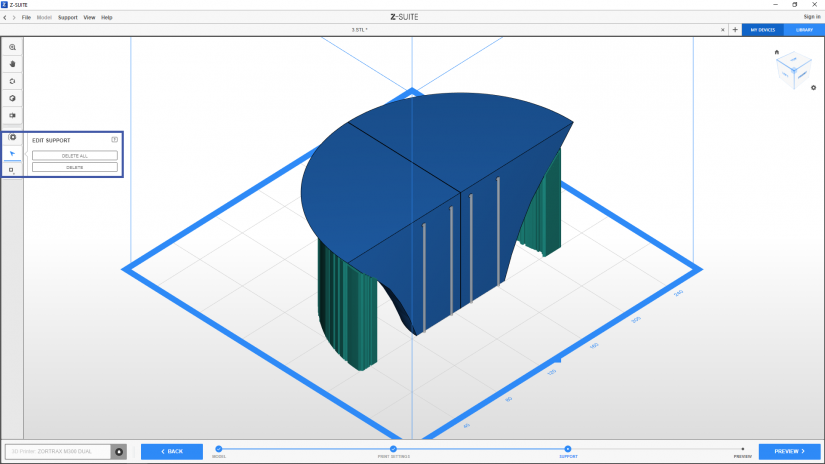
4. If you decide that the generated support structures are misplaced or unnecessary, you can delete them all at once or individually.
If you decide to add support manually, there are four types to choose from: POINT, SURFACE, SINGLE SURFACE and AREA.
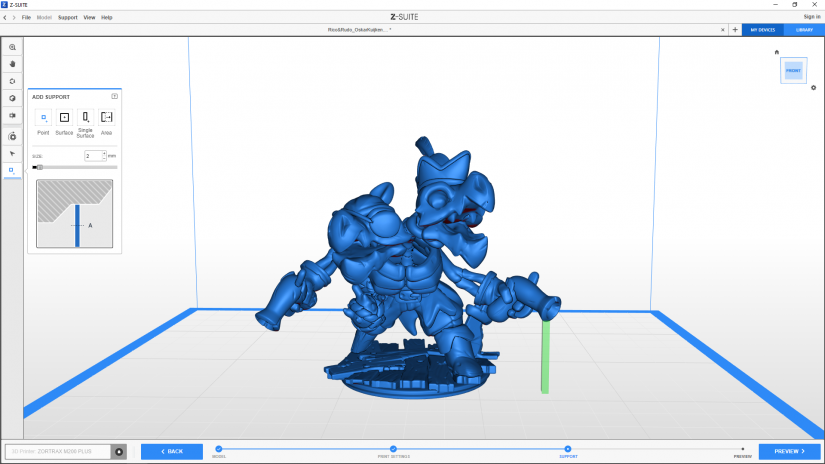
Point – you can add a support block at any selected place of a model. It is also possible to increase a block’s size with the Size option,
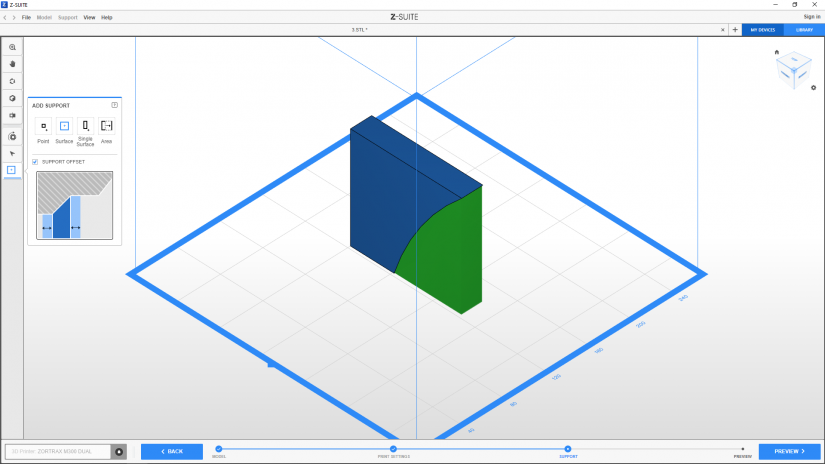
Surface – creates a support block for the whole slope or any flat surface in a model,
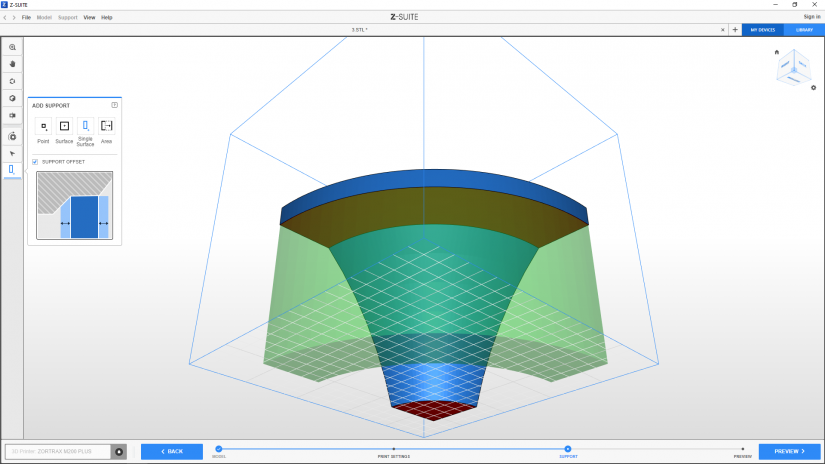
Single surface – adds a support block to any single overhanging layer in a model,
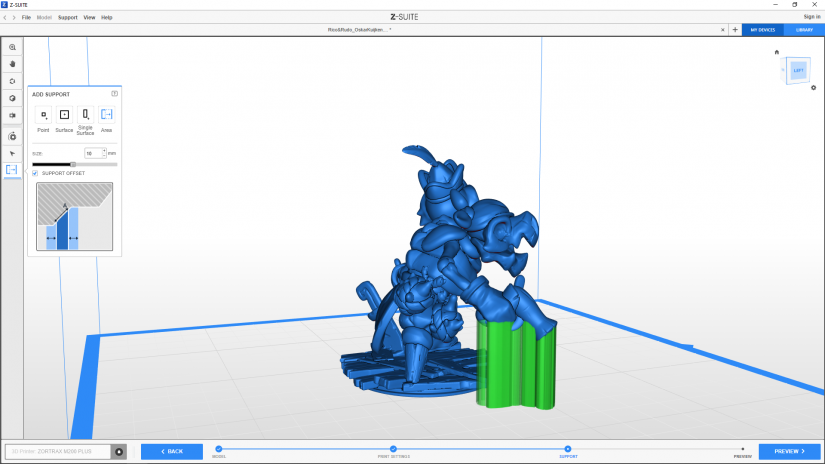
Area – adds a support block for a selected range of overhanging layers in a model. This type can be enlarged to surrounding layers with the Size option. It is particularly recommended for figurines and models with organic shapes.
The Offset option (available for Surface, Single surface and Area type) enlarges the support structure, making it easier to remove. Support offset is useful when Z-SUITE generates the support in hard-to-reach areas, for example, holes and gaps.
Choose the support type and click on a selected place on your model to add the support. You can mix all support types and use them multiple times for one model.
After you add the support structures manually and decide that they are unnecessary or placed in the wrong spot, you can delete them all at once or individually.
Advanced Support Settings
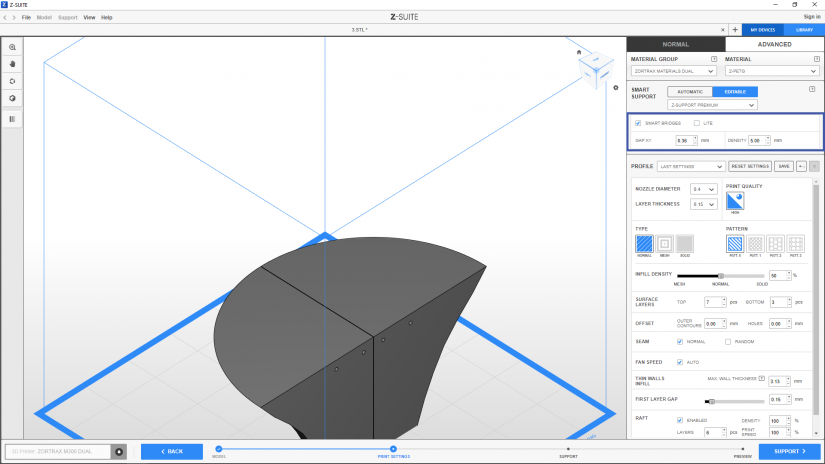
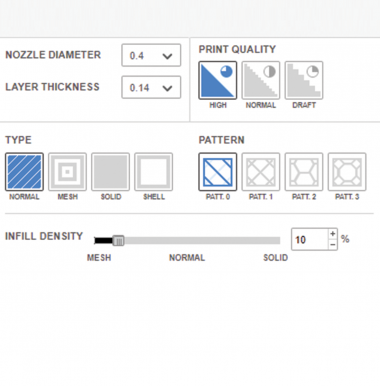
In the Advanced print settings menu for both Automatic and Editable support, you can also enable/disable smart bridges (see a Tips&Tricks article for more details) and enable/disable support LITE which is printed with a smaller amount of material, but is slightly weaker than the regular support.
There two additional options in this menu:
XY GAP – allows you to set a gap between the block of support and the model in the XY plane. This will make it easier for you to remove supports from the model once the printing process is finished.
DENSITY – allows you to set the spacing between paths of infill in blocks of support. Once you decrease the spacing, blocks of support will be more stable, but once you increase the spacing, the printer will use less material to print support.
Support Adjustments (UV LCD)
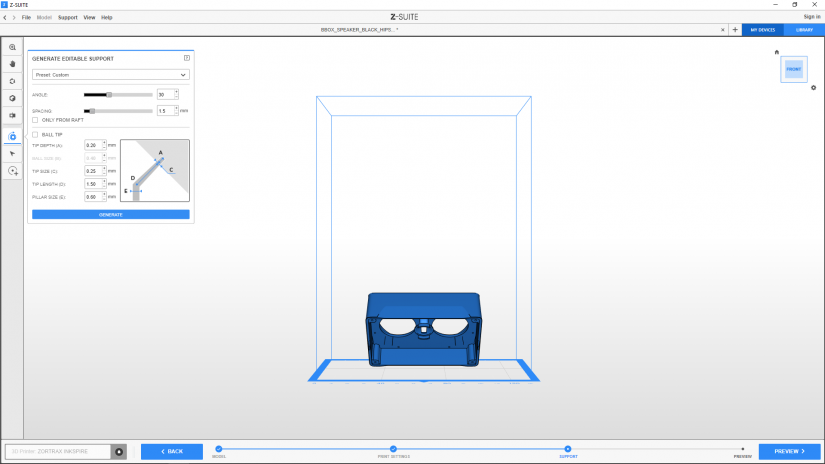
1. For the UV LCD technology, you can generate AUTOMATIC EDITABLE support in the Support step. In this technology, the support structures are in the form of pillars, each ended with a tip that adheres to the model and ensures that a model doesn’t fall into the resin tank during the printing process
First, set an angle at which you want the support to be generated. Determine the Spacing between individual pillars and click Generate. Smaller value of spacing adds more pillars.
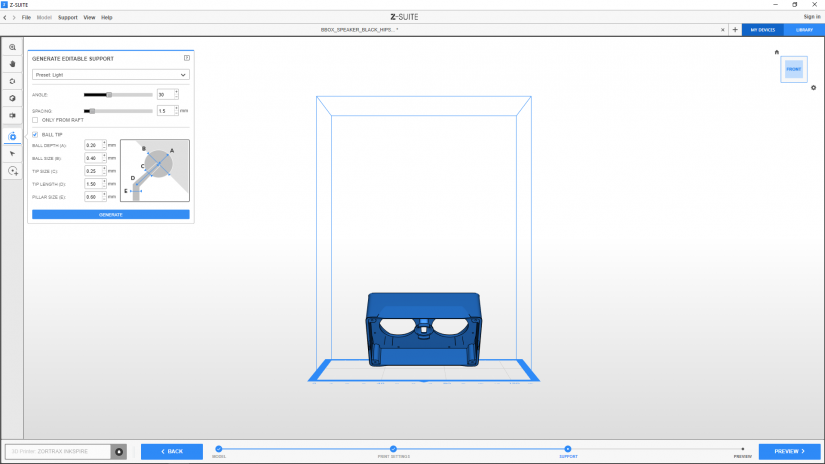
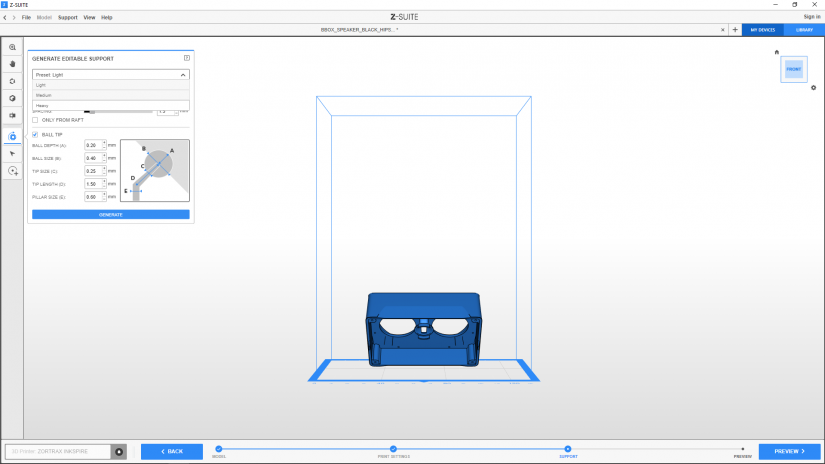
2. In this menu, you can also select the Ball tip for pillars. This tip type makes it easier to remove pillars from the model, and at the same time, the ball tips leave smaller marks on the surface of prints.
1. For the UV LCD technology, you can generate AUTOMATIC EDITABLE support in the Support step. In this technology, the support structures are in the form of pillars, each ended with a tip that adheres to the model and ensures that a model doesn’t fall into the resin tank during the printing process
First, set an angle at which you want the support to be generated. Determine the Spacing between individual pillars and click Generate. Smaller value of spacing adds more pillars.
2. In this menu, you can also select the Ball tip for pillars. This tip type makes it easier to remove pillars from the model, and at the same time, the ball tips leave smaller marks on the surface of prints.
3. The Preset option allows you to customize the type of support to particular models. Light support is recommended for smaller prints, whereas Medium/Heavy support is recommended for prints with thick sections.
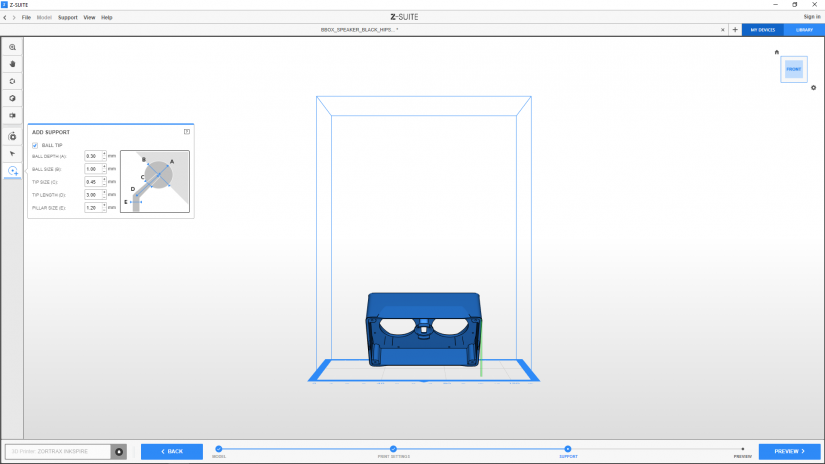
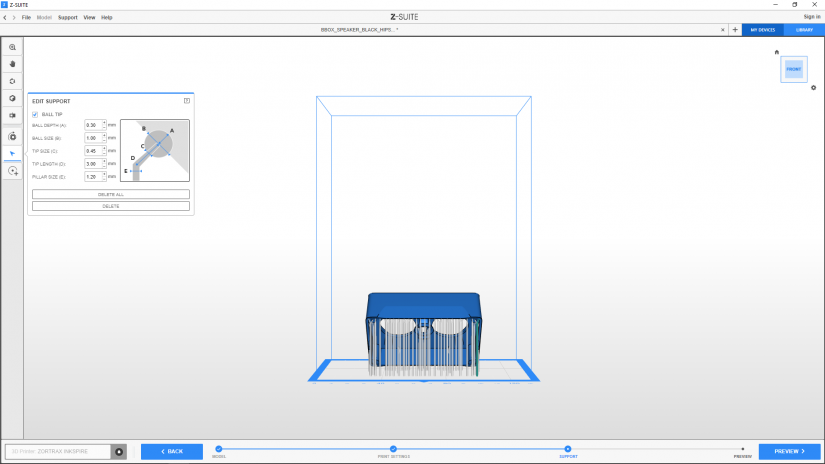
1. You can still add more pillars manually and modify them at any point of preparing supports for your model. It's possible to change the tip type, its depth, size and length as well as change the pillar size.
1. You can still add more pillars manually and modify them at any point of preparing supports for your model. It's possible to change the tip type, its depth, size and length as well as change the pillar size.
2. If you consider that all or some of the generated pillars are misplaced or redundant, you can delete them all at once or individually.

