Z-SUITE is an application created specifically for Zortrax devices. The program prepares models for 3D printing by saving projects in the .zcode/.zcodex format. Apart from that, Z-SUITE allows you to change and adjust print settings, such as the size of the model, layer thickness, the type of infill or how many support structures will be generated. The Z-SUITE 2 manual is divided into several parts which are available at: Working with Models, Print Preparation, Support Adjustments, Tips & Tricks. This part describes the basic options and shows how to navigate through the program.
| Minimum system requirements: | |
|---|---|
| Central Processing Unit | Intel i3-i7 or equivalent AMD (3,0+ GHz) |
| Graphics Processing Unit | GeForce GT 730+ / AMD R7 series+ |
| RAM Memory | 8GB+ |
| Operating System | Windows (10/11) 64-bit / macOS |
| Supported File Formats* | |
| .STL, .OBJ, .PLY, .3MF**, .DXF** |
*In the case of computers that do not comply with the hardware requirements, problems can occur when loading models over 100-150MB
**Some models may not be correctly read because of the limits of this file format
Welcome Screen

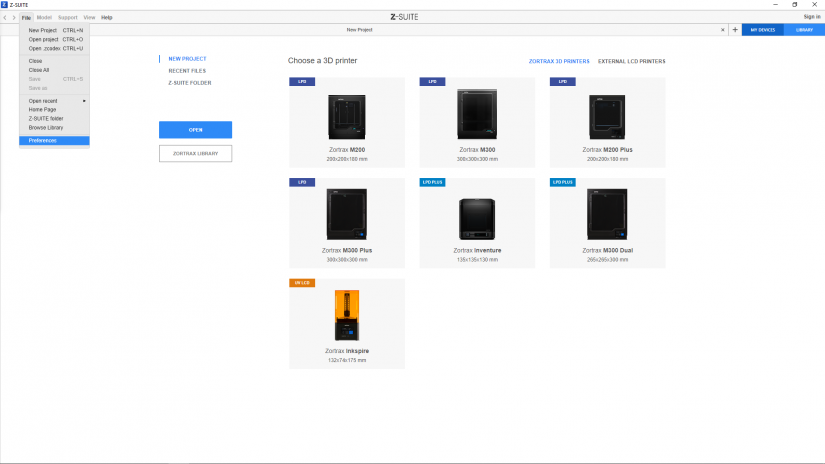
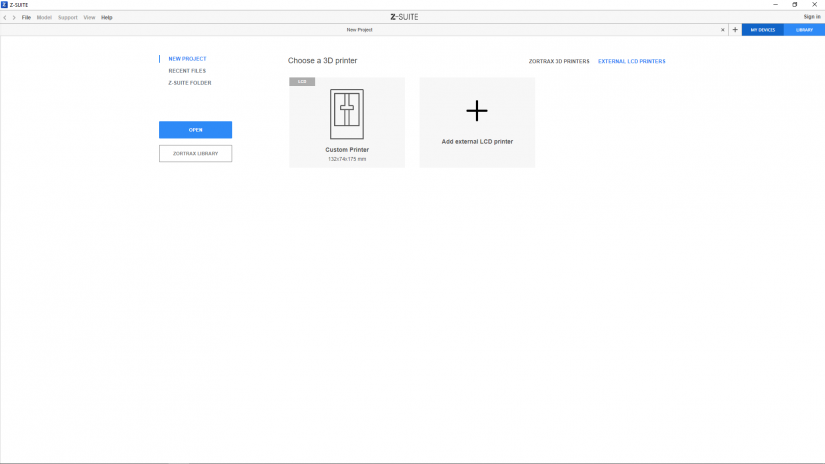
1. The Z-SUITE 2 welcome screen* shows the menu for selecting the printer model. Each Zortrax printer is represented by a photo and workspace dimensions. Once you move the mouse over the technology label in the top left corner, the program will display the most important information on the chosen 3D printing technology.
*The welcome screen will not be displayed once you choose the default printer in the

2. Also, you can add an external LCD printer. to the program's panel and prepare files for the resin printer of your choice. More details on how to add other LCD printers are available in Step 3.
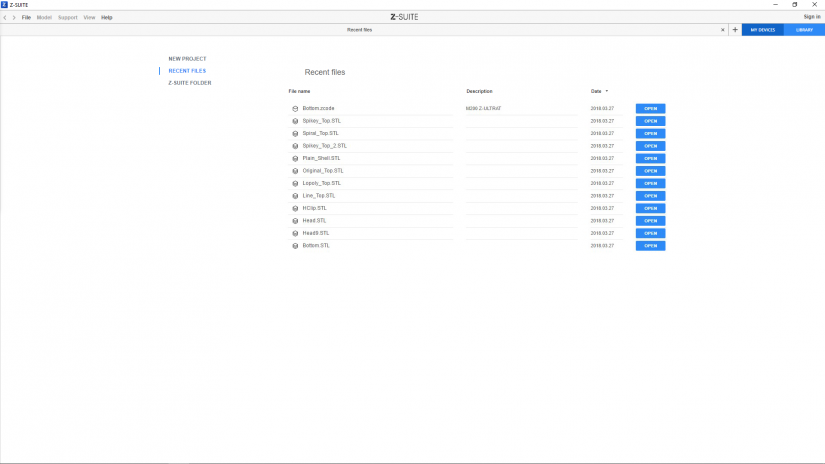
3. You can quickly open the previously added files from the list in the RECENT FILES section available in the menu on the left.
1. The Z-SUITE 2 welcome screen* shows the menu for selecting the printer model. Each Zortrax printer is represented by a photo and workspace dimensions. Once you move the mouse over the technology label in the top left corner, the program will display the most important information on the chosen 3D printing technology.
*The welcome screen will not be displayed once you choose the default printer in the
2. Also, you can add an external LCD printer. to the program's panel and prepare files for the resin printer of your choice. More details on how to add other LCD printers are available in Step 3.
3. You can quickly open the previously added files from the list in the RECENT FILES section available in the menu on the left.
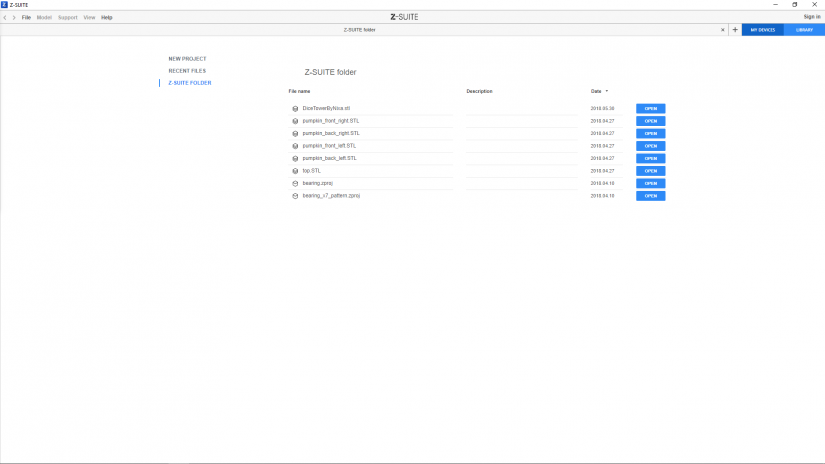
4. All files that you download from the Zortrax Library are stored in the Z-SUITE FOLDER available in the menu on the left.
Preferences Menu
1. The Preferences menu allows you to change the program’s basic settings and customize its performance according to your needs and hardware parameters of your computer. In the main window, select File -> Preferences to access one of the three sections: Options, Notifications, Preview and Performance.
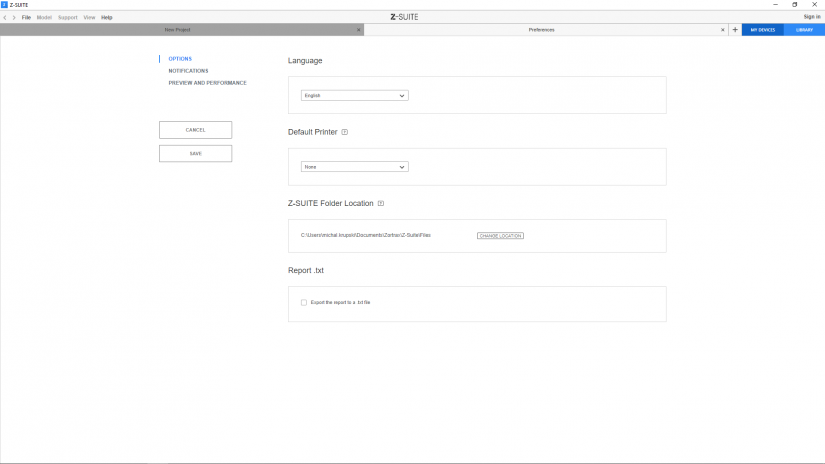
2. In the Options menu, you can change the language of the program, choose the default printer, change the location of Z-SUITE folder (only on Windows), and enable/disable exporting .zcode(x) reports to a .txt file.
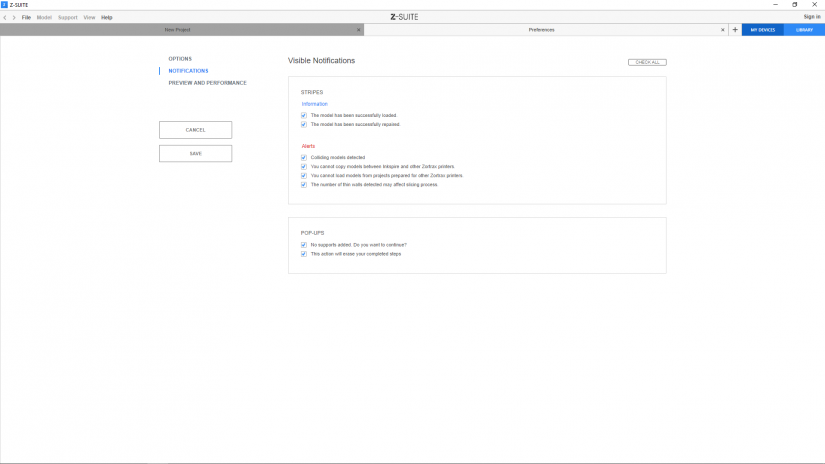
3. In the Notifications menu, you can enable/disable notifications and pop-ups visibility. This menu shows full list of notifications that can appear while using the program. Check or uncheck the boxes next to the notification you want to show or hide.
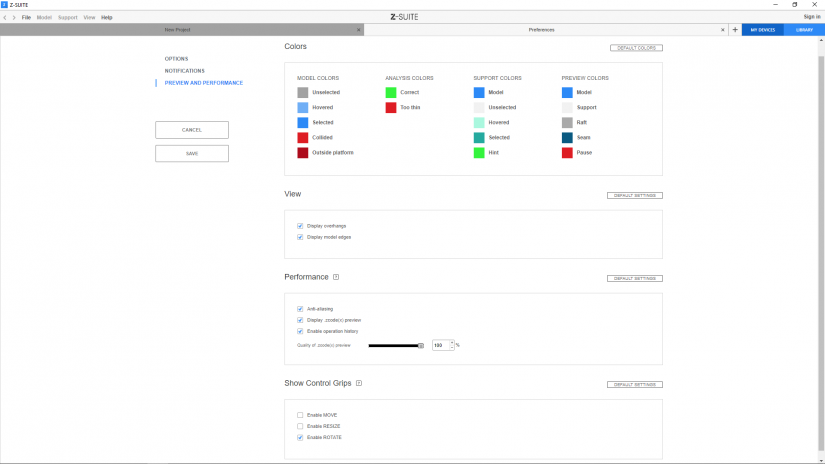
4. In the Preview and Performance menu, you can change the color of models and supports in all steps, enable/disable the control grips for Move, Resize and Rotate tools, enable/disable the Anti-aliasing option (it increases/decreases the quality of model’s preview in all steps), enable/disable displaying .zcode(x) preview, enable/disable operation history, change the quality of .zcode(x) preview.
1. The Preferences menu allows you to change the program’s basic settings and customize its performance according to your needs and hardware parameters of your computer. In the main window, select File -> Preferences to access one of the three sections: Options, Notifications, Preview and Performance.
2. In the Options menu, you can change the language of the program, choose the default printer, change the location of Z-SUITE folder (only on Windows), and enable/disable exporting .zcode(x) reports to a .txt file.
3. In the Notifications menu, you can enable/disable notifications and pop-ups visibility. This menu shows full list of notifications that can appear while using the program. Check or uncheck the boxes next to the notification you want to show or hide.
4. In the Preview and Performance menu, you can change the color of models and supports in all steps, enable/disable the control grips for Move, Resize and Rotate tools, enable/disable the Anti-aliasing option (it increases/decreases the quality of model’s preview in all steps), enable/disable displaying .zcode(x) preview, enable/disable operation history, change the quality of .zcode(x) preview.
Navigation
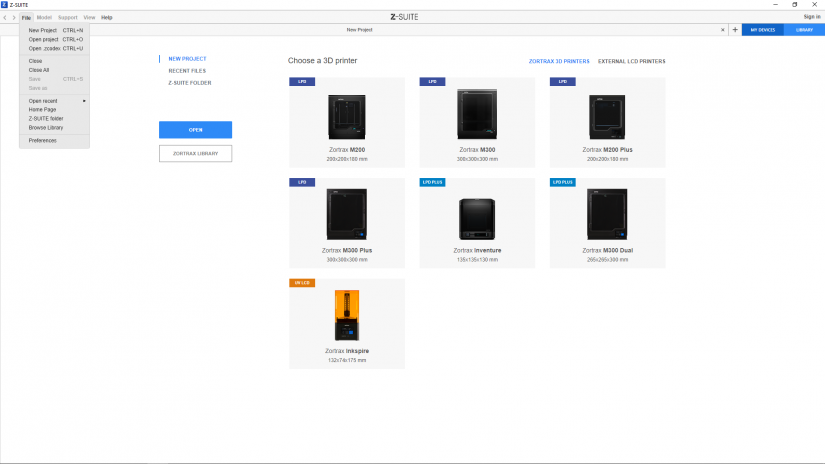
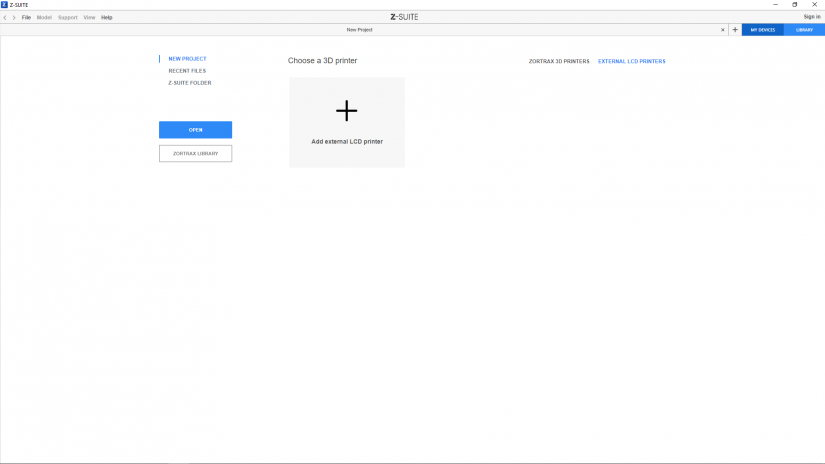
1. On the welcome screen, you can easily access Z-SUITE 2 basic features. On the main bar at the top of the screen, there is the File menu where you can start work on a new project (in a new tab), load a model or a .zcode(x), or choose a file from the list of recently open files.
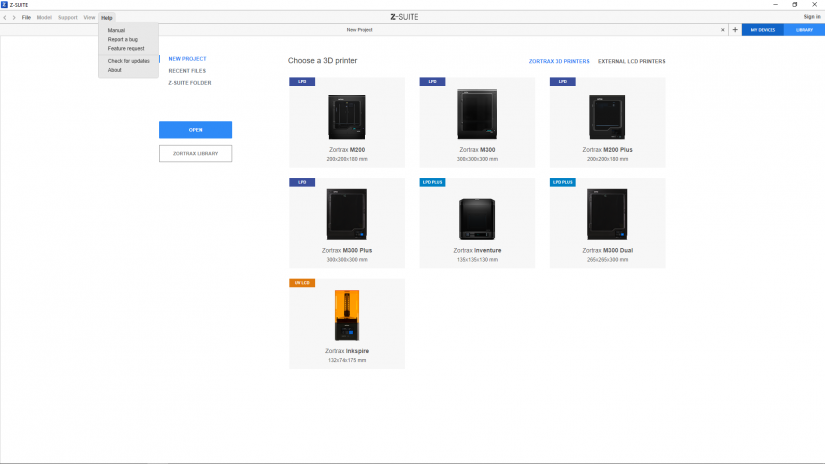
2. On the main menu bar, there is also the Help section through which you can Report a bug or submit a Feature request.

1. On the welcome screen, you can easily access Z-SUITE 2 basic features. On the main bar at the top of the screen, there is the File menu where you can start work on a new project (in a new tab), load a model or a .zcode(x), or choose a file from the list of recently open files.
2. On the main menu bar, there is also the Help section through which you can Report a bug or submit a Feature request.
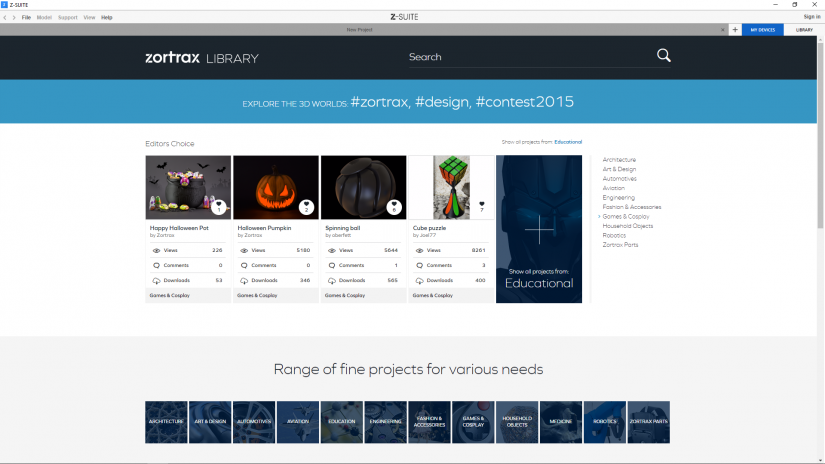
3. You can also access the Zortrax Library and browse through the available models.
4. You can also select the printer model which you are going to use.
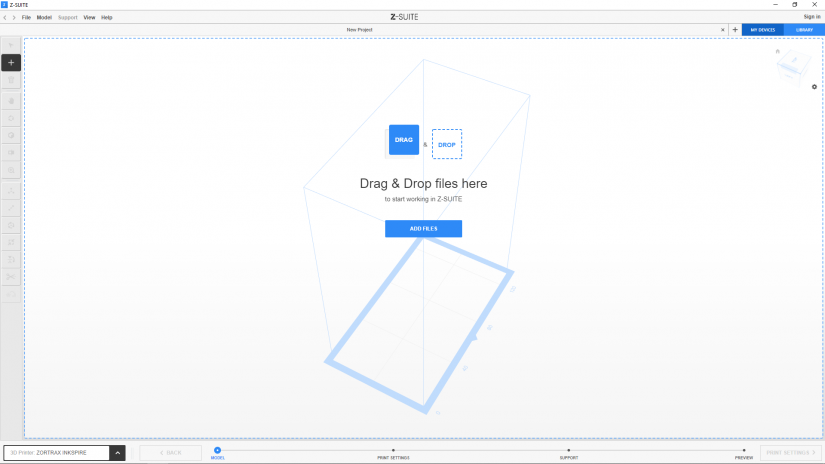
5. Once you select the printer, you can add files using the drag and drop option or the “+” icon, or ADD FILES TO PRINT button.

Adding an External LCD Printer
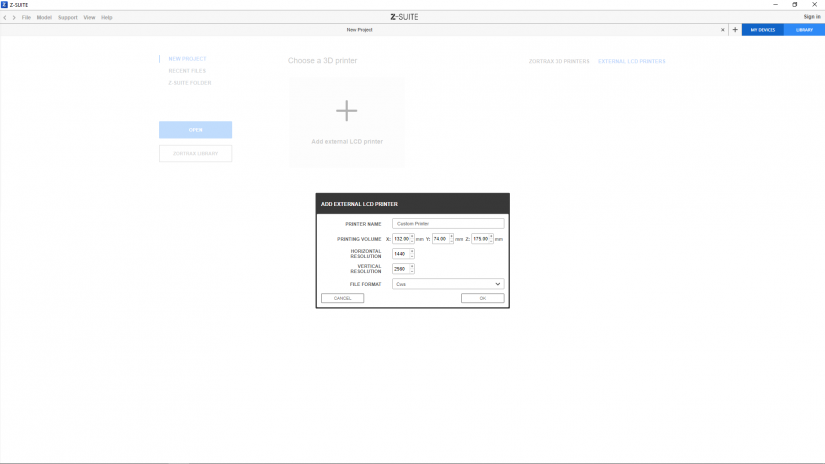
Go to the EXTERNAL LCD PRINTERS tab on the right side of the welcome screen and select Add external LCD Printer.
In the pop-up window, enter the following information:
–Printer name,
–Printing volume (X, Y, Z),
–Horizontal resolution,
–Vertical resolution,
–File format.
Accept the parameters with the OK button. The added printer will appear on the list.
NOTE: Some Z-SUITE options may not be available when preparing a model for an external resin printer.
Tabs
At any point of preparing a model you can add a new tab and either start work on a completely different project or try other print settings for the same model. As with any website browser, you can add a tab by clicking the “+” icon next to the already open tab.
It’s easy to switch between multiple tabs. They function independently so it’s possible for you to work with several 3D printers at the same time.
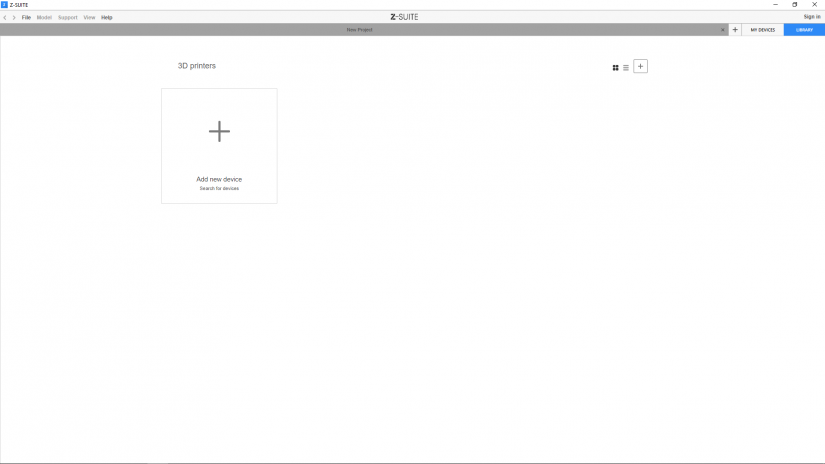
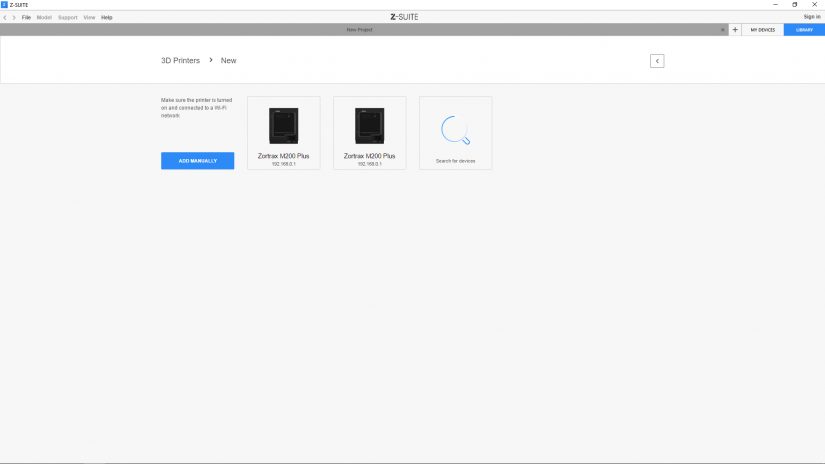
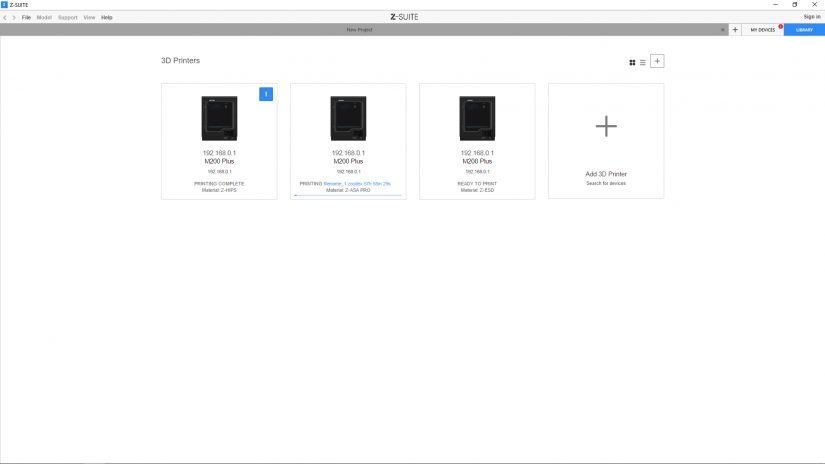


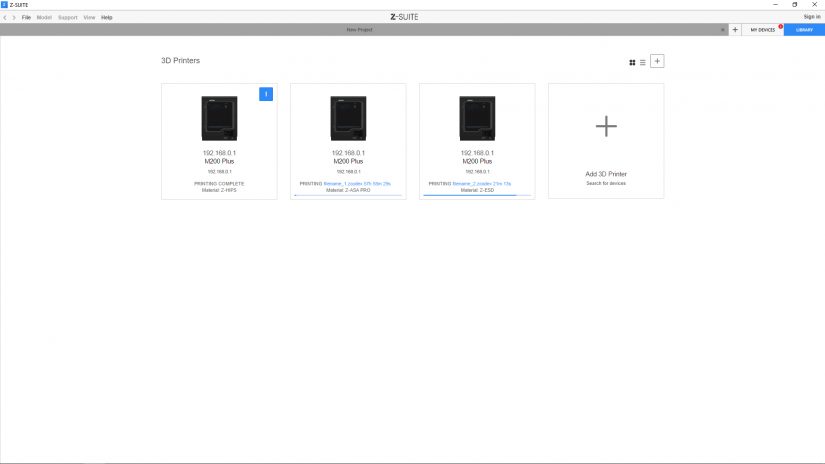
My Devices Panel
The My Devices panel allows you to work with one or more Zortrax device (M Series Plus and Inkspire printers, or Zortrax Apoller) that are connected to the local network (using either Wi-Fi or the Ethernet cable).
Once you open this tab, you can search for devices available in the local network and add them to the program’s panel. Select the icon with your devices’s IP address and click on it to add the device to the panel. You can also add a device manually by typing its IP address.
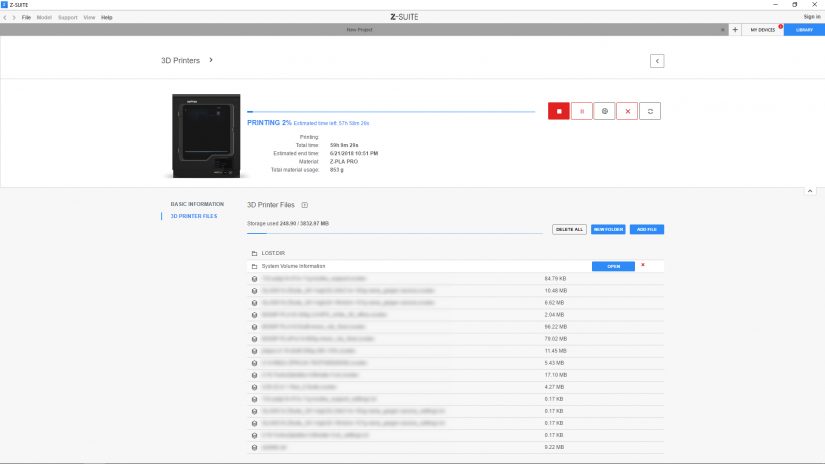
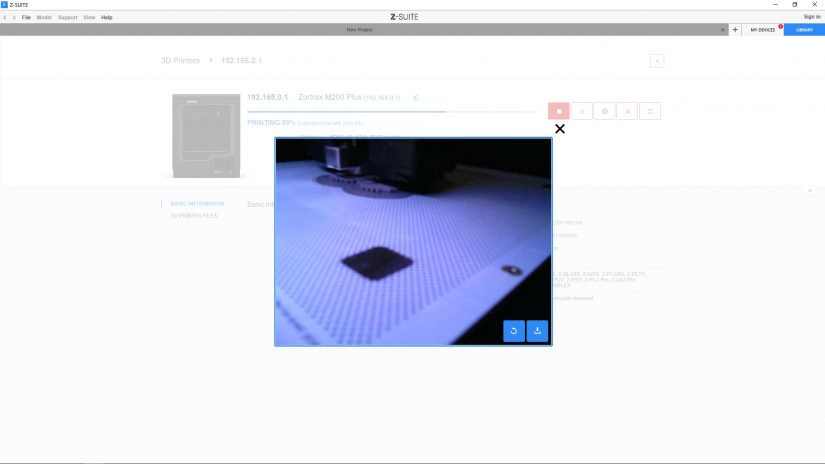
Each added device can easily be managed within Z-SUITE. You can start, stop, and pause the printing process (M Series Plus), see the device’s current state, change the name of your device, preview basic information about the device, or display the preview from the printer’s camera (M Series Plus).
Each time your added device finishes the printing or smoothing process, you get a notification in the panel. The notification is displayed in the top right corner of the device’s icon (blue question mark) and on the bar with tabs (red circle).
In the 3D Printer Files tab, you can preview all .zcodex files that are stored on the USB flash drive. The .zcodex files can be directly transferred from the computer to the printer over Wi-Fi or Ethernet cable.
Step by Step
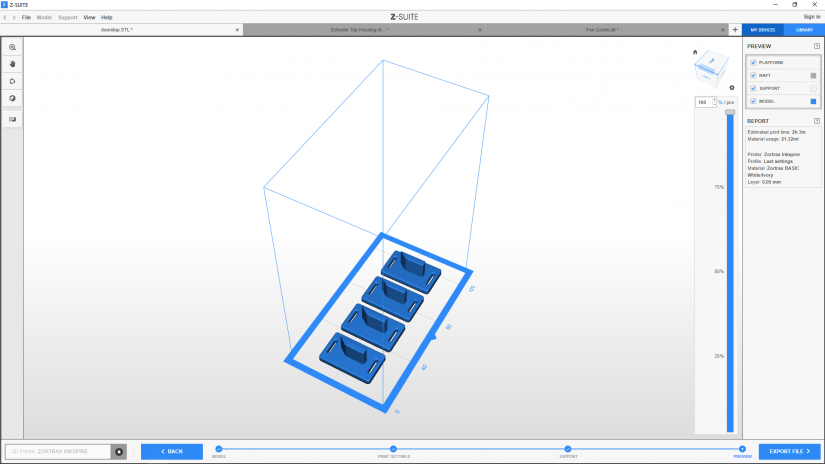
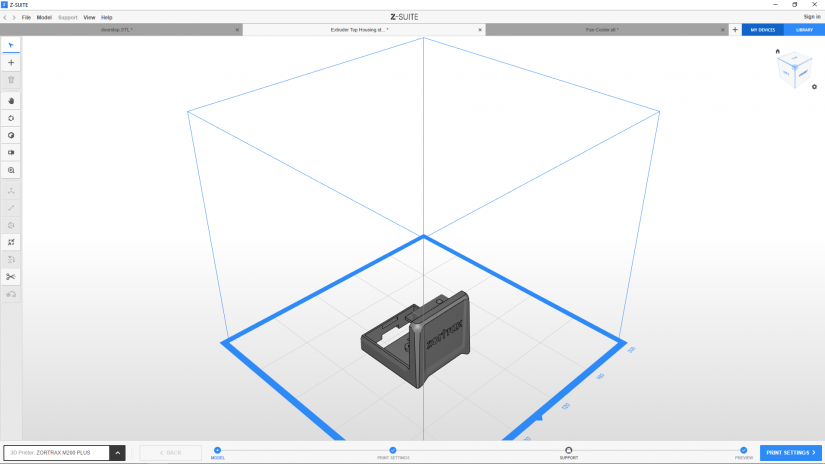
The whole process of preparing a model is divided into four individual steps: MODEL, PRINT SETTINGS, SUPPORT and PREVIEW.
1. The MODEL step allows you to change the model’s basic settings, such as its position, size or arrangement in the workspace view. You can also move the workspace view around the screen, rotate or change it to a different one. In this step, it is possible to undo or redo any actions connected to the model's editing with the arrows in the left top corner.

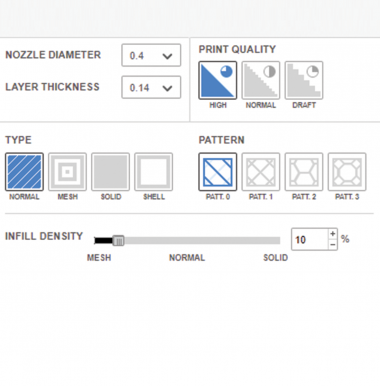
2. In the PRINT SETTINGS step, you can adjust normal and advanced settings and parameters influencing a model's quality and durability.
NOTE! If you are preparing a model for the Inventure, there are only three steps to follow. Support structures are always generated automatically.
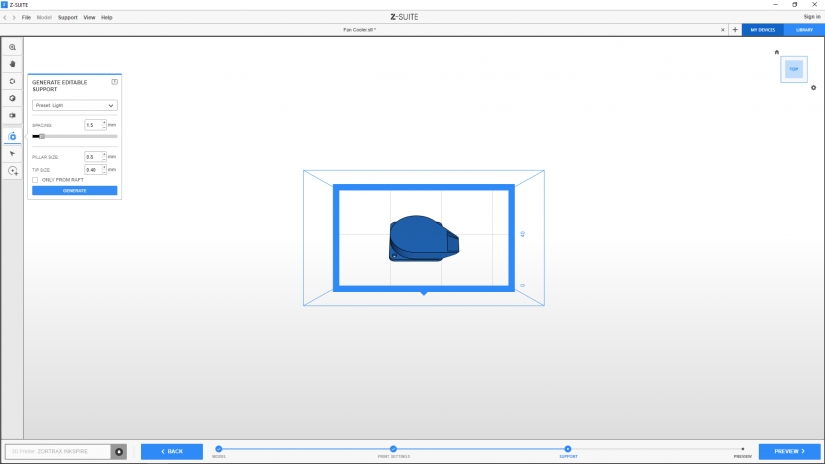
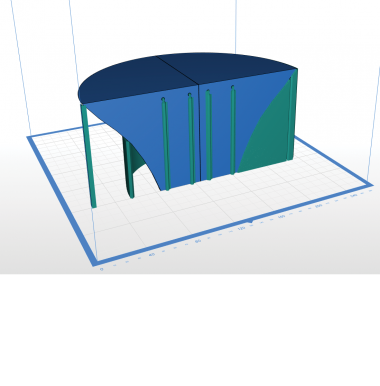
3. The SUPPORT step is only available if you choose the Editable support option in the PRINT SETTINGS step.
This step allows you to manipulate the position and amount of the support structures on your 3D prints. At any point, you can undo or redo any actions connected with adding/removing supports with the arrows in the left top corner.
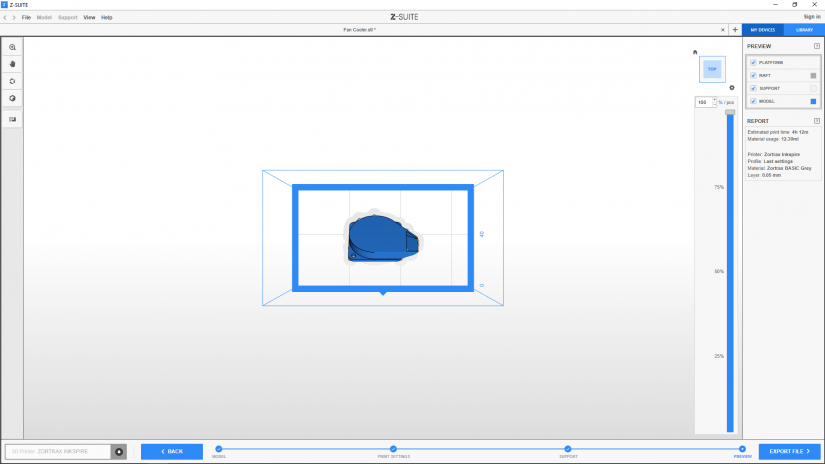
4. In the PREVIEW step, the program slices a model and displays the ready-to-print .zcode/.zcodex file.
Each step is described in detail in the other parts of the Z-SUITE 2 manual.
1. The MODEL step allows you to change the model’s basic settings, such as its position, size or arrangement in the workspace view. You can also move the workspace view around the screen, rotate or change it to a different one. In this step, it is possible to undo or redo any actions connected to the model's editing with the arrows in the left top corner.
2. In the PRINT SETTINGS step, you can adjust normal and advanced settings and parameters influencing a model's quality and durability.
NOTE! If you are preparing a model for the Inventure, there are only three steps to follow. Support structures are always generated automatically.
3. The SUPPORT step is only available if you choose the Editable support option in the PRINT SETTINGS step.
This step allows you to manipulate the position and amount of the support structures on your 3D prints. At any point, you can undo or redo any actions connected with adding/removing supports with the arrows in the left top corner.
4. In the PREVIEW step, the program slices a model and displays the ready-to-print .zcode/.zcodex file.
Each step is described in detail in the other parts of the Z-SUITE 2 manual.
Keyboard shortcuts
This section lists keyboard shortcuts which you can use with Z-SUITE 2 to make your work easier and faster:
| Left mouse button (pressed) | Camera rotate |
| Right mouse button (pressed) | Move view |
| Middle mouse button (pressed) | Zoom |
| Mouse wheel up | Zoom |
| Mouse wheel down | Unzoom |
| CTRL + SHIFT + NUM 0 | Fit to all |
| CTRL + NUM 0 | Fit to selected |
| CTRL + S | Save |
| CTRL + I | Import |
| CTRL + C | Copy |
| CTRL + V | Paste |
| DEL/BACKSPACE | Delete |
| ESC | Close tool box |
| CTRL + N | New Project |
| CTRL + O | Open Project |
| CTRL + U | Open zcode |
| CTRL + A | Select all |
| CTRL + Q | Selected objects |
| CTRL + W | Move |
| CTRL + E | Scale |
| CTRL + R | Rotate |
| CTRL + L | Rotation Optimization |
| CTRL + H | Center all |
| CTRL + T | Split |
| CTRL + Z | Undo |
| CTRL + Y | Redo |
| CTRL + NUM 8 | Top |
| CTRL + NUM 4 | Left |
| CTRL + NUM 5 | Front |
| CTRL + NUM 6 | Right |
| CTRL + NUM 2 | Bottom |
