The Z-axis cover is mainly responsible for protecting the Z-axis screw and other components of the printer’s drive system. It also prevents these components from becoming dirty during the printing process and being reached when the printer is running. The cover is divided into three individual parts that are secured in the printer.
You can easily remove the cover to access the Z-axis screw, X/Y axis motors, or short belts for maintenance or repairs. Also, once the cover in your printer becomes worn and dirty, you can replace it with a new one. This manual shows how to replace one part of the cover. The other two parts are replaced in the same way.
| The following manual shows the M200 Plus repair work. For the M300 Plus, these procedures are the same. |
Unplugging the Power Cable
Turn off the printer and unplug the power cable.
Unplugging the Heatbed Cable (from the Z-Axis Cover)
Unplug the heatbed cable from the Z-axis cover.
Platform Removal
Remove the platform with the heatbed cable from the printer.
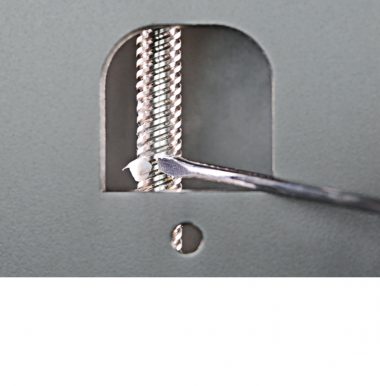
Unscrewing the Z-Axis Cover, part 1
Unscrew the screw that secures one part of the Z-axis cover inside the printer.
Unscrewing the Z-Axis Cover, part 2
Unscrew the screw that secures one part of the Z-axis cover at the back of the printer.
Z-Axis Cover Removal
Remove the Z-axis cover from the printer.
Z-Axis Cover Installation
Install the Z-axis cover back in the printer.
Securing the Z-Axis Cover, part 1
Secure the cover by fixing the screw at the back of the printer.
Securing the Z-Axis Cover, part 2
Secure the cover by fixing the other screw inside the printer.
Platform Installation
Place the heatbed cable behind the heatbed mount and install the platform back in the printer.
Plugging the Heatbed Cable (into the Z-Axis Cover)
Plug the heatbed cable into the Z-axis cover.
Plugging the Power Cable
Plug the power cable in.