Since the 20025 firmware version, the Inkspire supports printing files that have been prepared in third-party slicers: ChiTuBox and PrusaSlicer. The printer can read two new file extensions: SL1 and ZIP. This manual will guide you through preparing both file types in the corresponding slicers.
Disclaimer
The following materials, including the names of companies and graphical user interfaces featured in the screenshots, have been used for educational purposes only. All intellectual property rights belong to respective companies.
ChiTuBox (version 1.4.0)
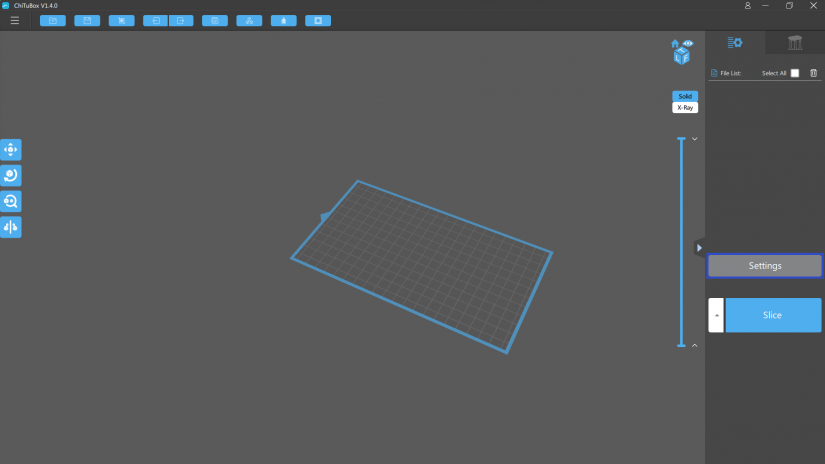
1. Click Settings in the menu on the right.
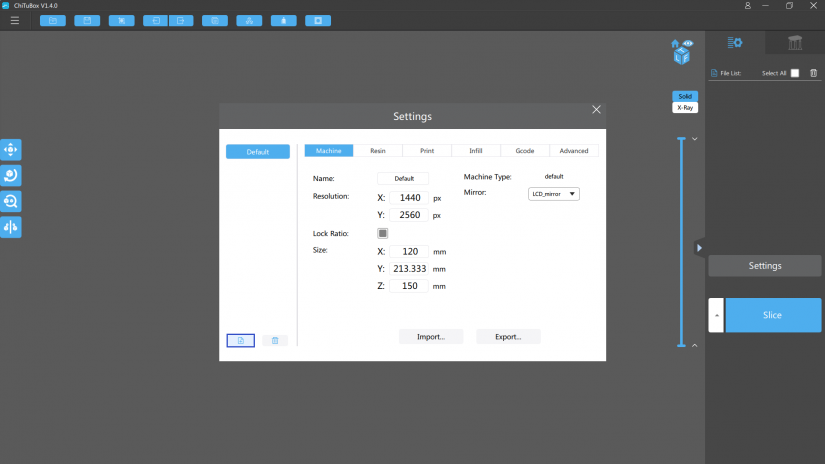
2. In the pop-up window, click on the button in the bottom left corner to create a new printing profile.
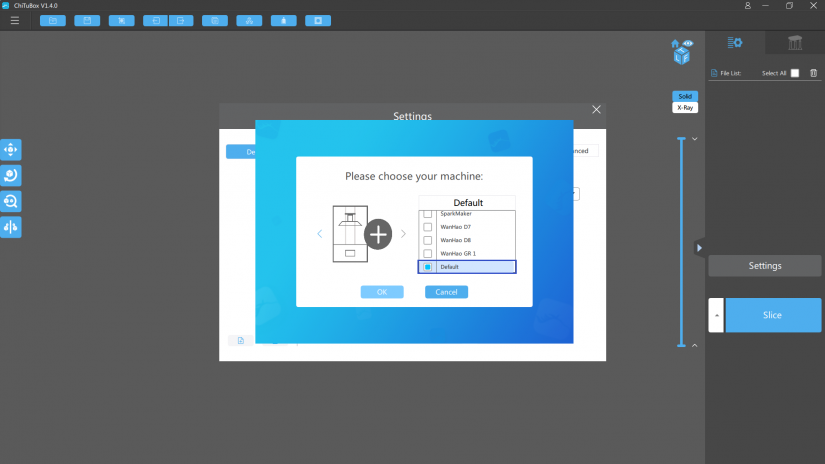
3. Select Default from the list of printers and click OK.
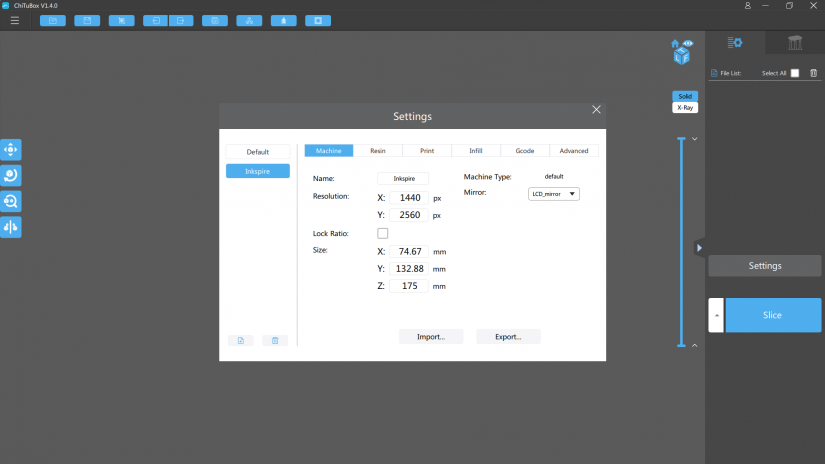
1. In the Machine tab, enter the necessary information:
- Name: Inkspire
- Resolution:
X: 1440 px
Y: 2560 px
- Size:
X: 74.67 mm
Y: 132.88 mm
Z: 175 mm
Uncheck the Lock Ratio option.

2. In the Print tab, set the printing parameters for your model: Layer Height, Bottom Layer Count, Exposure Time, Bottom Exposure Time, Light-off Delay, Lifting Distance, Lifting Speed, Retract Speed.
The parameters that have been crossed out in the screenshot are not available with the Inkspire.
1. In the Machine tab, enter the necessary information:
- Name: Inkspire
- Resolution:
X: 1440 px
Y: 2560 px
- Size:
X: 74.67 mm
Y: 132.88 mm
Z: 175 mm
Uncheck the Lock Ratio option.
2. In the Print tab, set the printing parameters for your model: Layer Height, Bottom Layer Count, Exposure Time, Bottom Exposure Time, Light-off Delay, Lifting Distance, Lifting Speed, Retract Speed.
The parameters that have been crossed out in the screenshot are not available with the Inkspire.
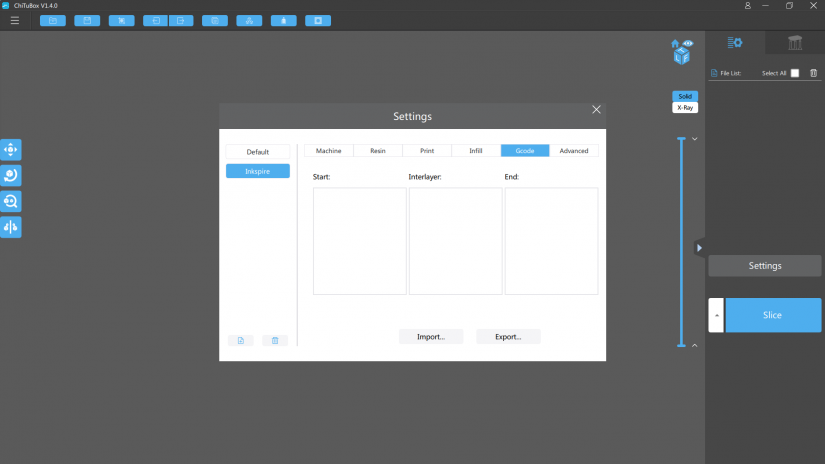
3. In the Gcode tab, delete the contents of the three columns. They have to be empty.
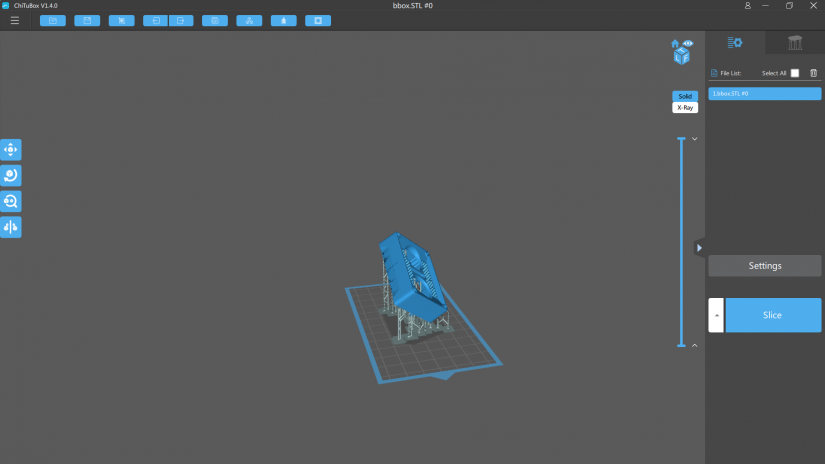
1. Upload a model into the workspace and adjust its basic settings, including size, orientation, and position of supports. Next, click Slice in the menu on the right.
1. Upload a model into the workspace and adjust its basic settings, including size, orientation, and position of supports. Next, click Slice in the menu on the right.
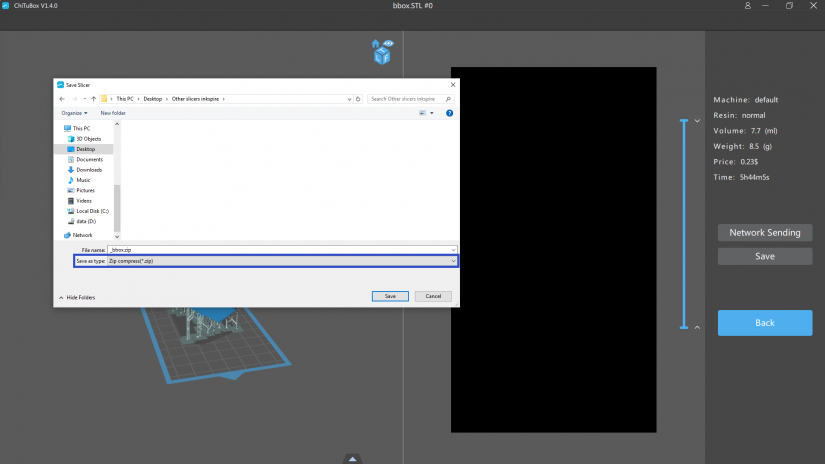
2. Once the model has been sliced, click Save in the menu on the right. When saving the file, choose the ZIP saving format from the drop-down list. Your file is ready to print.
Save the ZIP file on the USB flash drive, and then plug the USB drive into the port at the front of the device.
PrusaSlicer (2.0.0)
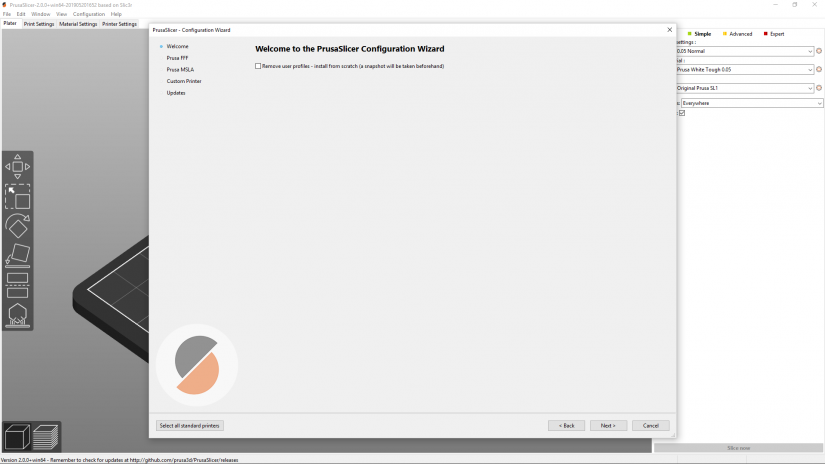
1. To start printer configuration, you have to open the Configuration Wizard.
Select Configuration, and then Configuration Wizard. It opens automatically the first time you start the program.
1. To start printer configuration, you have to open the Configuration Wizard.
Select Configuration, and then Configuration Wizard. It opens automatically the first time you start the program.
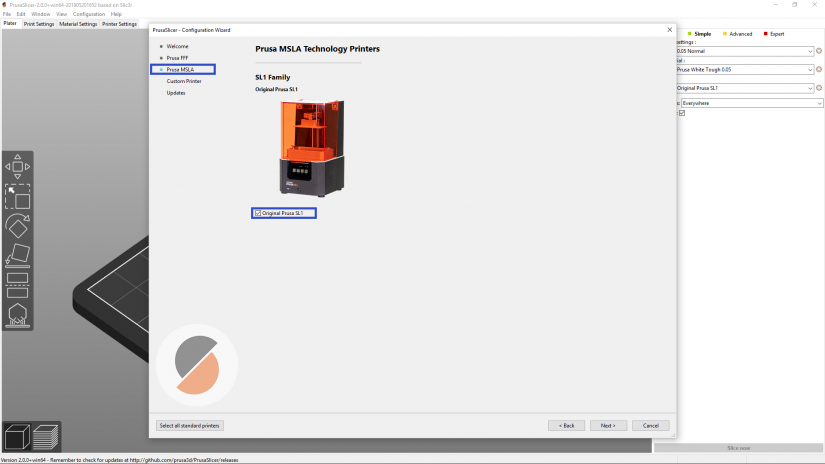
2. In the Configuration Wizard, select Prusa MSLA and check the Original Prusa SL1 box. Click Next, then click Next, and click Finish.
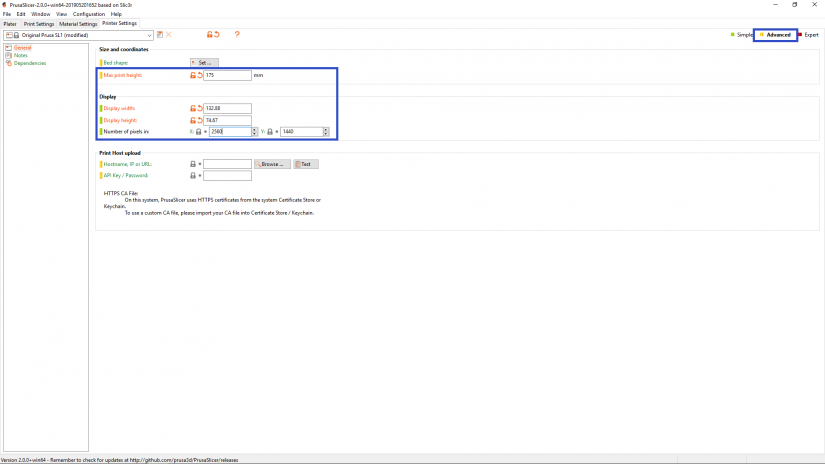
2. Select Advanced on the right of the screen. In the Size and coordinates and Display sections, enter the following data:
- Max print height: 175 mm,
- Display width: 132.88 mm,
- Display height: 74.67 mm,
- Number of pixels in: X: 2560, Y: 1440.
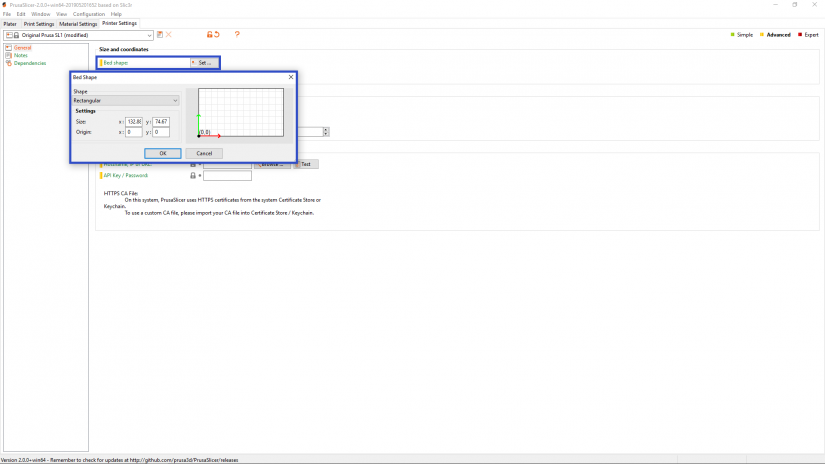
3. Next, click Set to determine the platform's size and shape and enter the following data:
- Shape: Rectangular,
- Size: X: 132.88 mm; Y: 74.67 mm,
- Origin: X: 0; Y: 0.
Click OK to confirm.
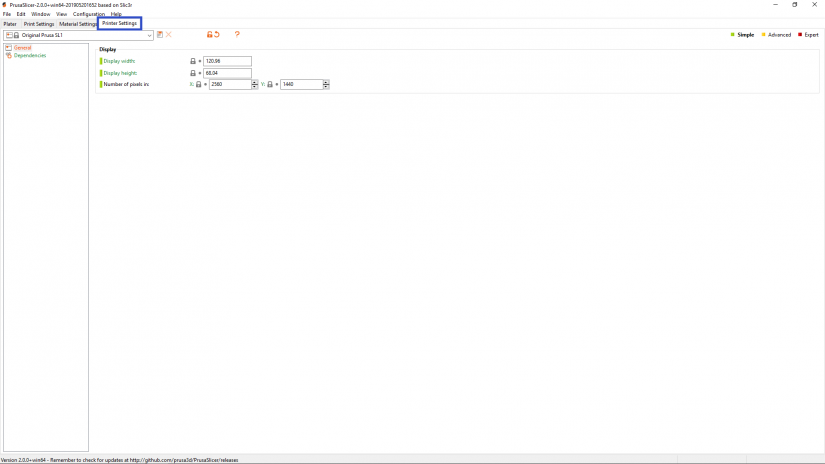
1. Select Printer Settings on the taskbar on the top of the screen.
2. Select Advanced on the right of the screen. In the Size and coordinates and Display sections, enter the following data:
- Max print height: 175 mm,
- Display width: 132.88 mm,
- Display height: 74.67 mm,
- Number of pixels in: X: 2560, Y: 1440.
3. Next, click Set to determine the platform's size and shape and enter the following data:
- Shape: Rectangular,
- Size: X: 132.88 mm; Y: 74.67 mm,
- Origin: X: 0; Y: 0.
Click OK to confirm.
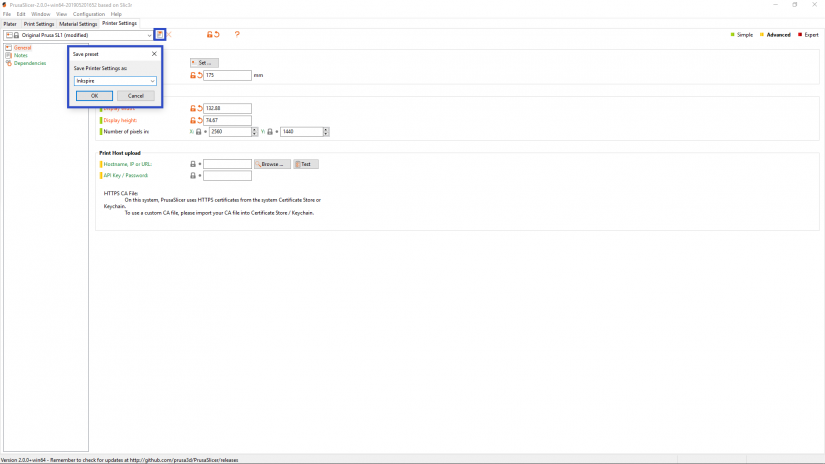
4. Click the Save button next to the name of the printer and type in Inkspire. Click OK to confirm.
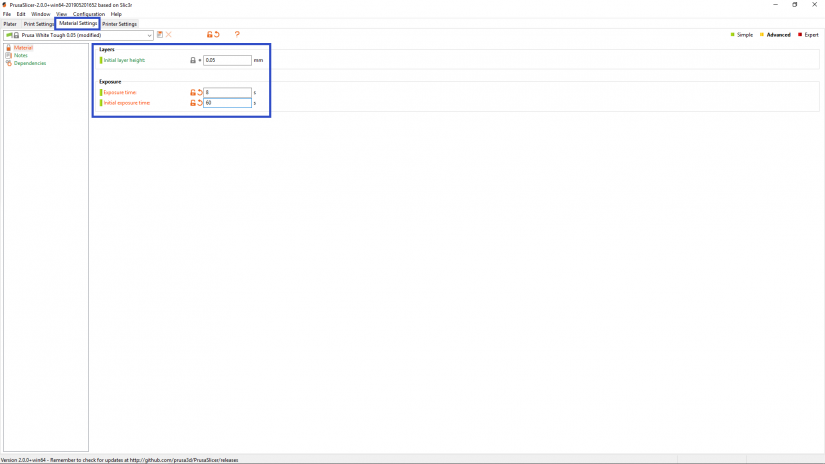
1. Select Material Settings on the taskbar on the top of the screen. In the Layers and Exposure sections, adjust the print parameters for the resin you're going to use.
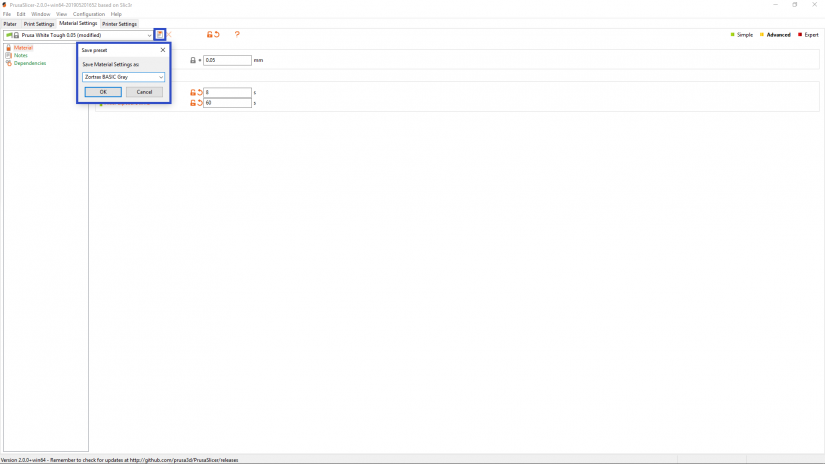
2. Click the Save button next to the name of the resin and type in the name of the resin you're going to use.
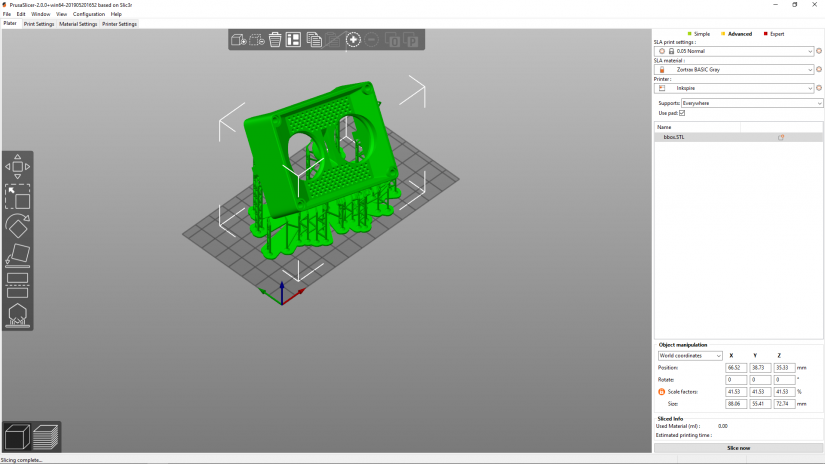
1. Upload a model into the workspace and adjust its basic settings, including size, orientation, and position of supports. Next, click Slice now.
1. Upload a model into the workspace and adjust its basic settings, including size, orientation, and position of supports. Next, click Slice now.
2. Once the model has been sliced, click Save in the menu on the right. When saving the file, choose the SL1 saving format from the drop-down list. Your file is ready to print.
Save the SL1 file on the USB flash drive, and then plug the USB drive into the port at the front of the device.

