Zortrax inCloud is a cloud-based platform for efficient management of your 3D printers and teamwork focused on model production. It’s available to everyone who has registered their Zortrax machines through the Zortrax ID system. The inCloud provides a variety of features which optimize the workflow with printers and teams of people involved in various 3D printing projects. Depending on the number of printers you or your team work with, you can choose a subscription plan that will be suited to specific needs. All plans include a determined amount of transfer required for uploading files through the cloud service*, and a number of spots for adding devices and users to the main panel. Thanks to Zortrax inCloud, you can access and monitor all your Zortrax devices from any place you want. Zortrax inCloud User Guide is available for download at the: User Guides section.
*Any time users transfer a file from Zortrax inCloud to a printer, they use up an adequate amount of transfer. The transfer in each subscription plan renews every month, however, purchasing additional GB of transfer is still possible during the ongoing work.
Dashboard
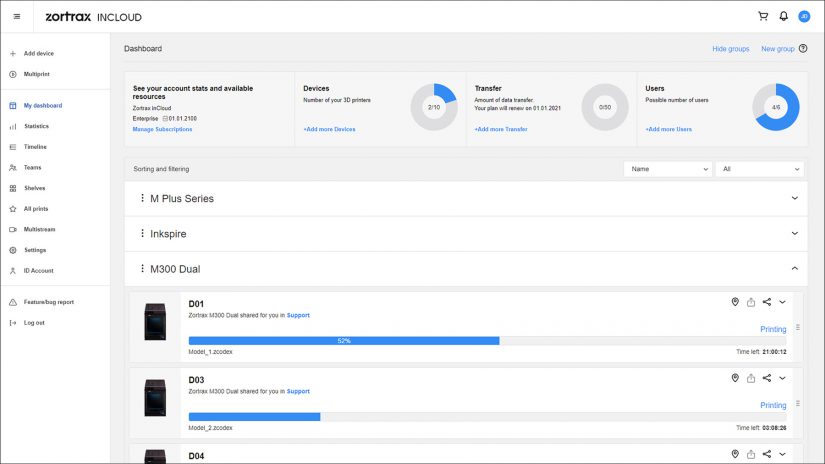
Dashboard is the main panel where you can start all your Zortrax inCloud activities and easily find all necessary functionalities. You can add a device you have registered on your ID account with the Add device button in the top right corner of the page. In the pop-up window, click Add device next to the selected device you want to add to inCloud.
All added printers will appear on the Unassigned list. You can arrange those devices in one or more groups, and change the name of the group you have created. At the top of the page, there is information about your current subscription plan and available transfer.
The Find device option allows you to quickly determine a device’s location. Click on the location pin next to the device you want to locate. Next, you will receive a notification whether the device has entered the location mode. If device location is possible, special animation will flash on the printer’s screen which will help you quickly find the device you’re looking for.
Multiprint
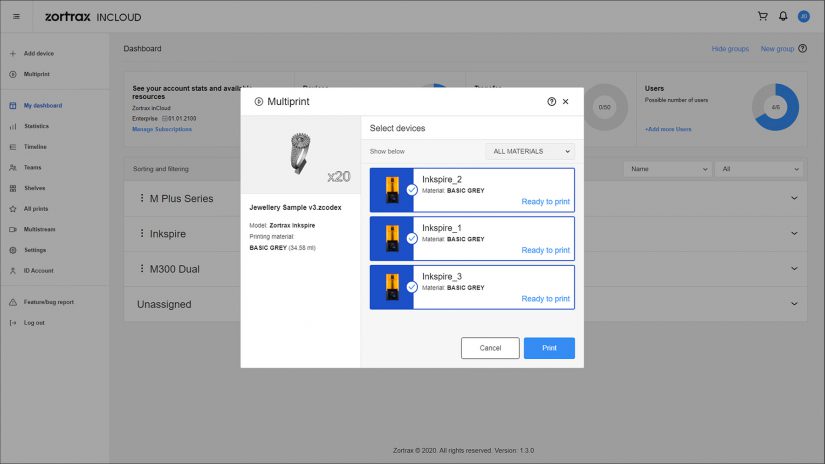
The Multiprint makes it easier to run 3D printing farms as it lets you print the same model with all your 3D printers. This solution is targeted at mass production processes. As you upload a model, the printing process is initiated on the selected devices at the same time. Simply choose a file and select the printers you want to use to begin the production.
Statistics
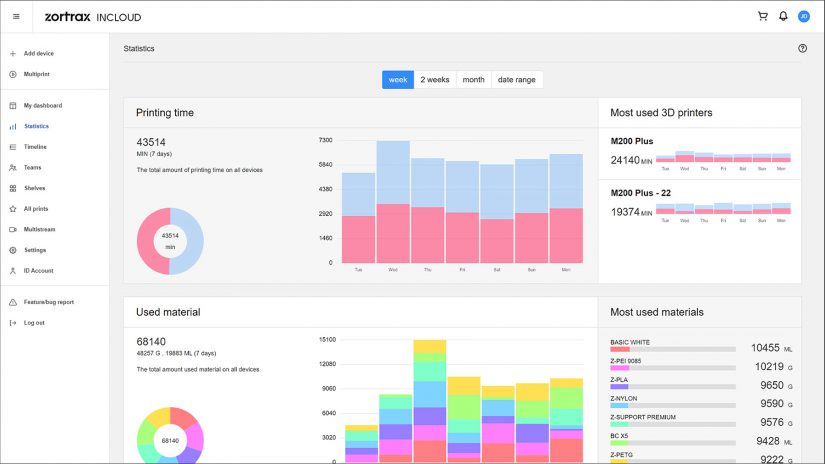
The Statistics tab gathers various data related to devices and users. You can choose the date range for the stats you want to preview. Statistics include total printing time with all added devices, most used 3D printers, total amount of used materials, as well as printers which re- quire maintenance or firmware update. There is also information about transfer used up by each printer and user. Admins have access to data from the entire Organization and all other users, including data on users’ printing time and material usage.
Timeline

Timeline shows all activities connected to each added printer. There you can see which printer is currently working, which is idle at the moment, which part of the project is currently being completed, and which users have been involved in the process. It is possible to see all models printed with each device. Move the mouse over the selected field to display more details related to the printer’s work. You can easily scroll through the whole timeline of a printer.
Teams
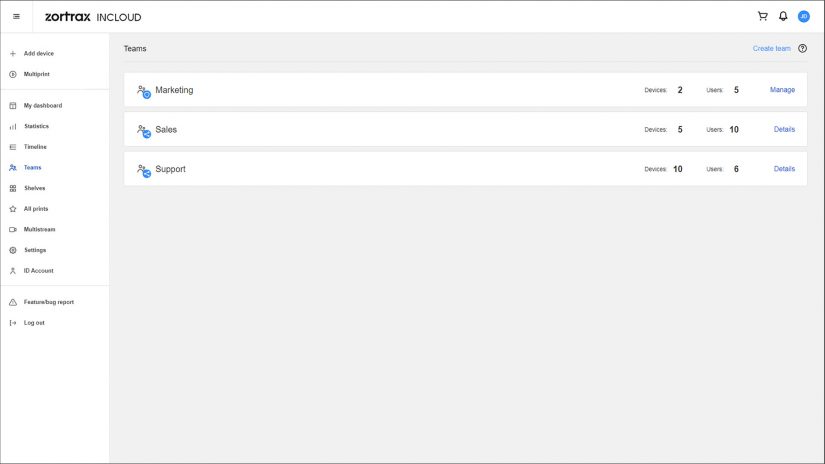
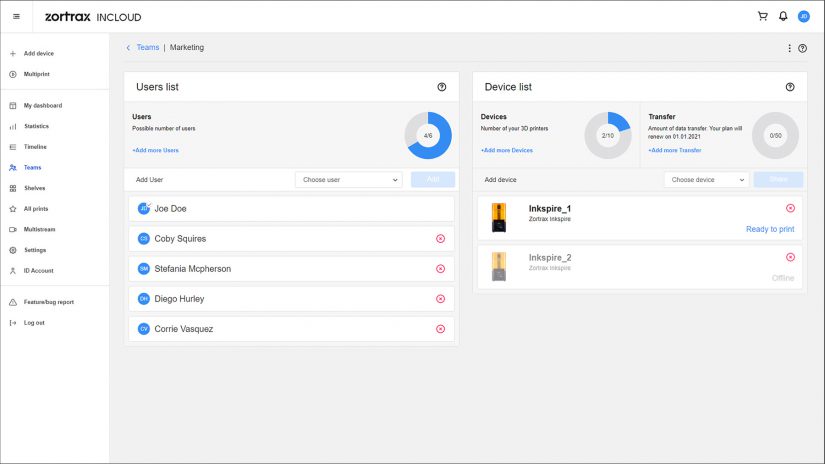
The Teams tab supports teamwork among people employed in one company or involved in the same project. If you want to cooperate with other people, you can create a team and share the added printers with authorized users. Your teammates will be able to manage and print with the shared devices from their own individual accounts. It is possible to move users from one team to another, and dynamically reassign the available devices. Remember that each printer can have only one administrator who can control all the work at any point during the project.
There are two options that allow users to share devices with others. With the Share device option you can select a Team and a user who will receive access to a printer. The Copy link option lets you send a direct link to the selected device.
Shelves
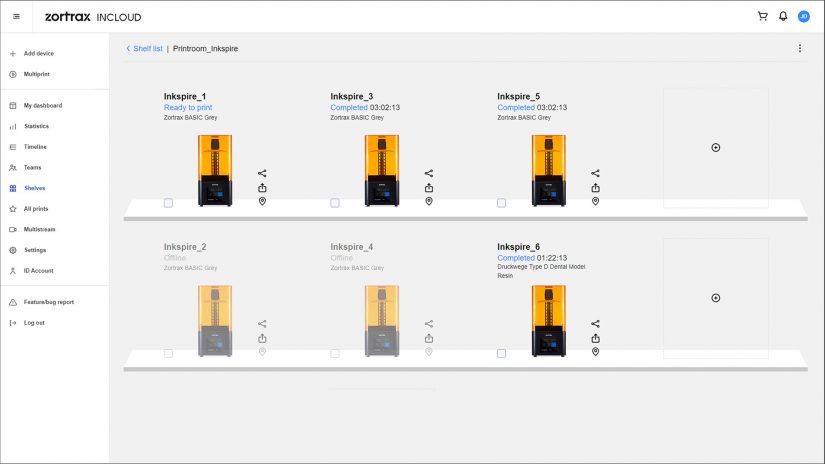
The Shelves tab lets you arrange all added printers in such a way to match the exact setup in your print room. You can easily assign a place to each added device.
Open the Shelves tab and click the Create shelf in the top right corner of the window. In the pop-up window, enter the shelf’s name, choose the number of columns and rows, and click Add.
Select the Manage option to open the Shelf. You can add a device in the selected place with the + button. Once you add a device, a miniature of the printer model will appear on the shelf, including its current status and information about the loaded material.
All Prints
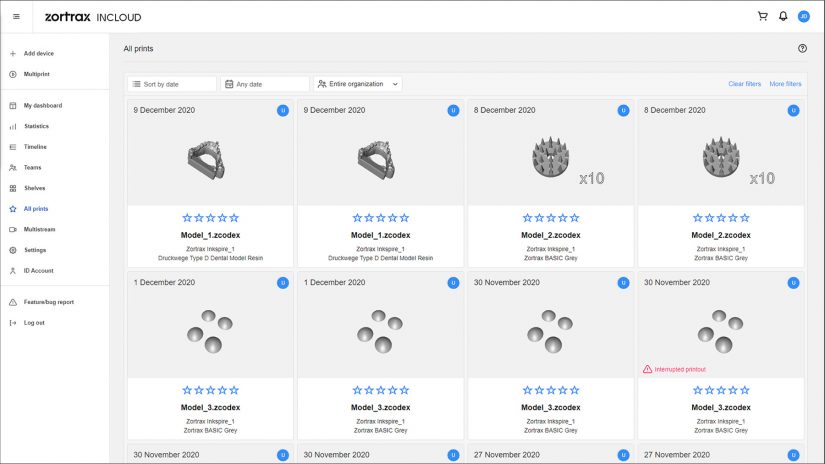
In the All Prints tab, you can preview all printed models with detailed information. The list shows thumbnails of all models, file names, and the date of completion of the project.
Administrators can preview all prints done in the entire Organization. Filters let you choose whose prints will be visible in the tab.
When you click on a model’s thumbnail, you will be able to see all details regarding the print, including printing time and its outcome (Success/Failure). Additionally, each project can be evaluated with the star rating system.
Printer details
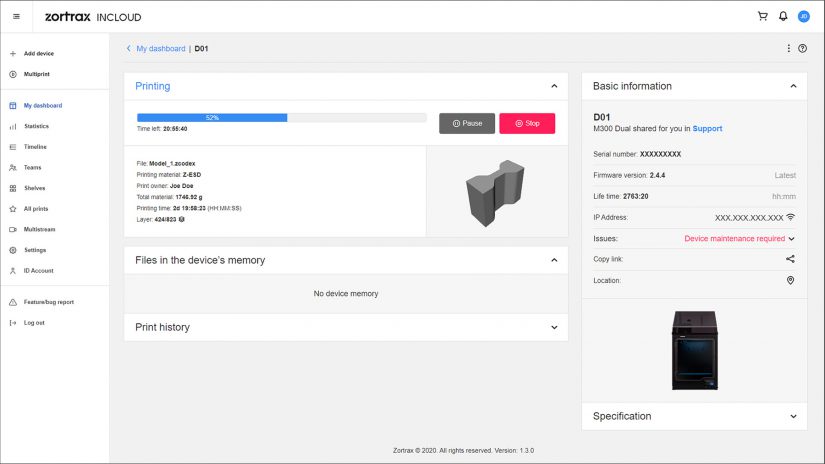
Once you click your printer’s name, you will be redirected to the Printer details tab. This is a space that aggregates all information related to the device, including the serial number and firmware version. Here you can upload files to the device’s storage, create a new catalog for your files, and remotely start the printing process. There is also information about device logs and the whole print history. You can edit device’s details, for example, change the name, assign it to a different group, or leave a note for your teammates with key information about the device or project.
Settings
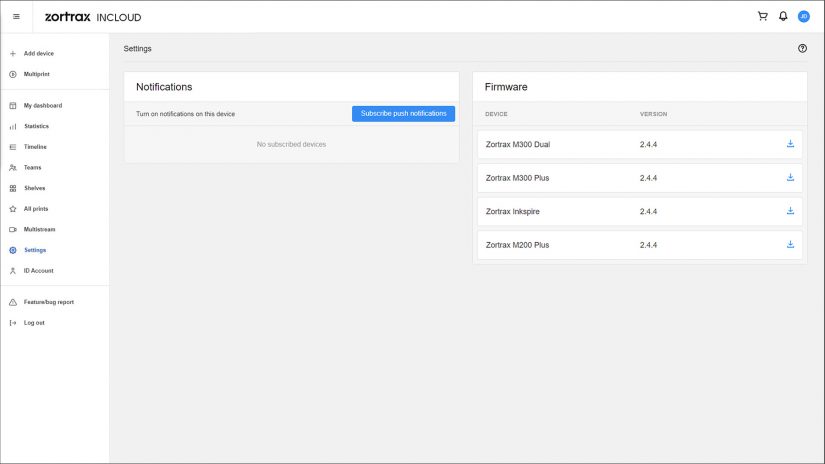
This menu allows you to change the notification settings and download the newest firmware update for your device.
Adding a profile picture
Click on the icon with user’s initials in the top right corner of the page. Click the camera symbol, and in the pop-up window, select a picture from your hard drive or add one using the drag&drop method.
