This part of the Z-SUITE 2 manual shows how you can upload and delete 3D models and how to make changes to their position or size. You can also learn how to use other options connected to copying, splitting or auto-arranging models when preparing them for printing. The remaining parts of the manual are available at: Basic Features, Print Preparation, Support Adjustments, Tips & Tricks.
Adding a Model in the *.STL, *.OBJ, *.DXF or *.3MF Format
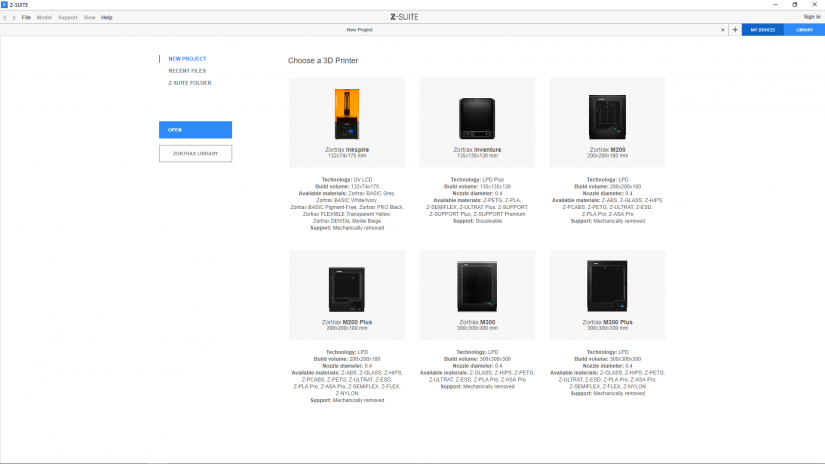
1. On the welcome screen, select the model of the printer you are going to use*.
*The welcome screen will not be displayed once you choose the default printer in the
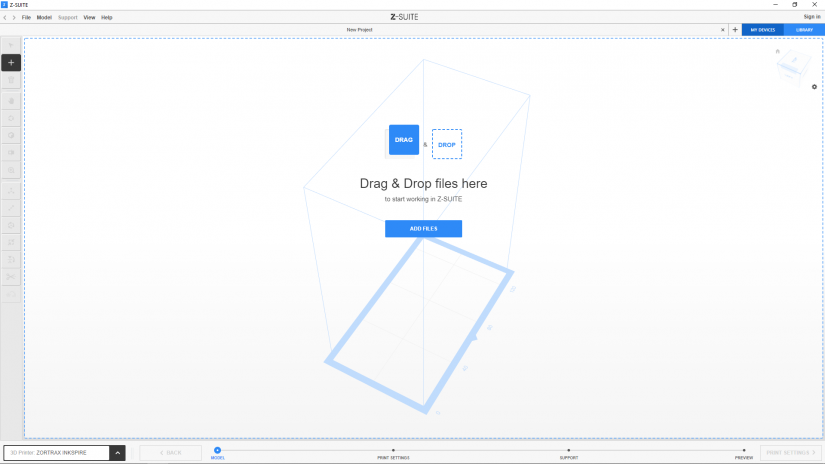
2. Use the “+” icon or the ADD FILES TO PRINT button to upload a model. You can use the drag and drop option too.

3. You can also upload a previously saved project using the Import option from the Model menu available in the top menu bar.
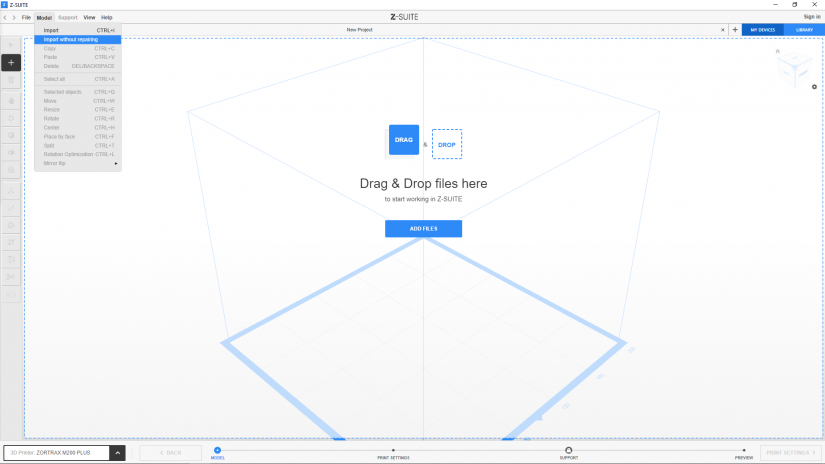
4. The option Import without repairing allows you to upload a model without repairing its mesh. In this way, the program will not check the object's mesh for defects.
1. On the welcome screen, select the model of the printer you are going to use*.
*The welcome screen will not be displayed once you choose the default printer in the
2. Use the “+” icon or the ADD FILES TO PRINT button to upload a model. You can use the drag and drop option too.
3. You can also upload a previously saved project using the Import option from the Model menu available in the top menu bar.
4. The option Import without repairing allows you to upload a model without repairing its mesh. In this way, the program will not check the object's mesh for defects.
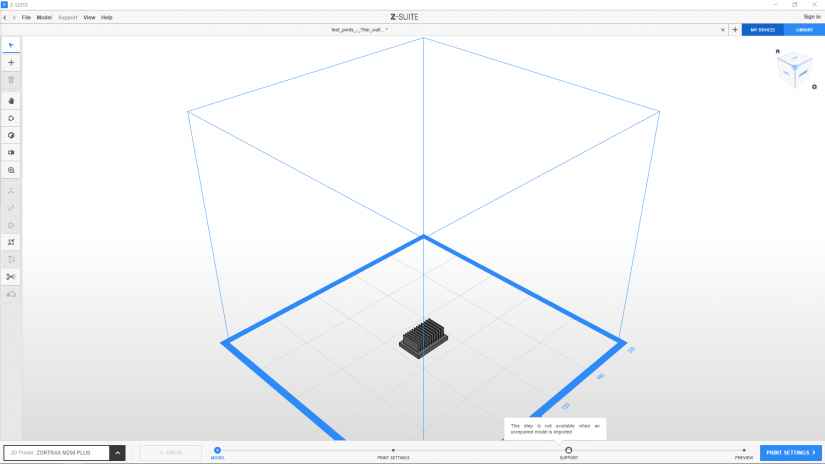
5. Once you upload a model without repairing, the SUPPORT step will be disabled and the program will not add any support structures to your model. In the PRINT SETTINGS step, only the Shell infill option will be available.
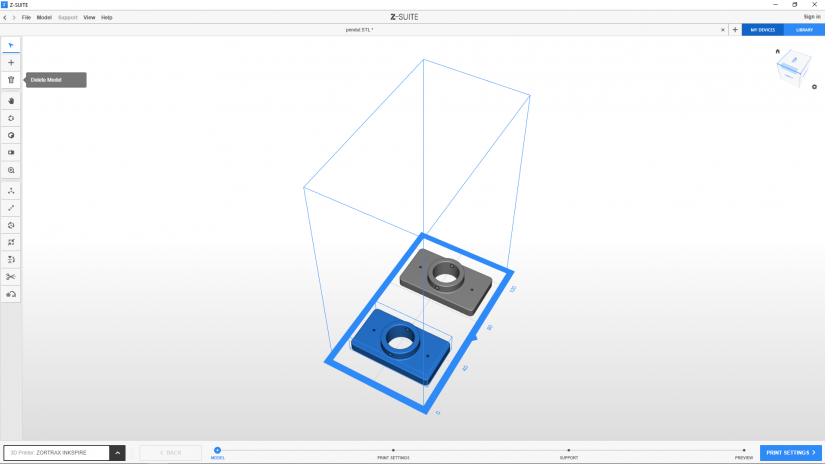
Selecting / Adding / Deleting a Model
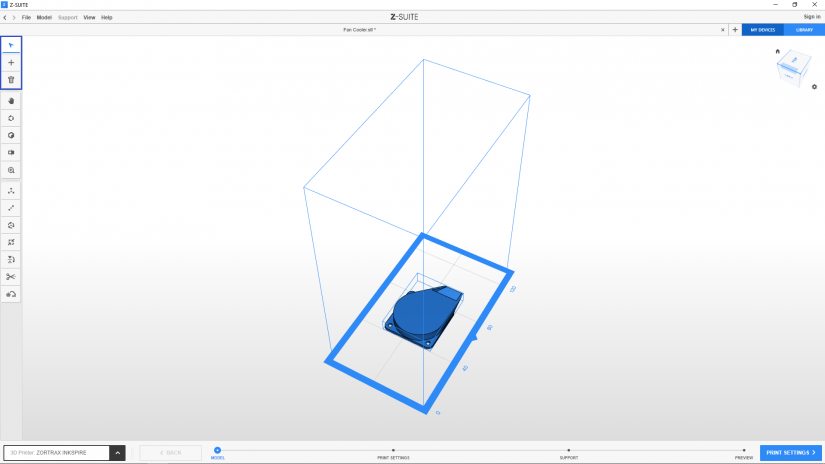
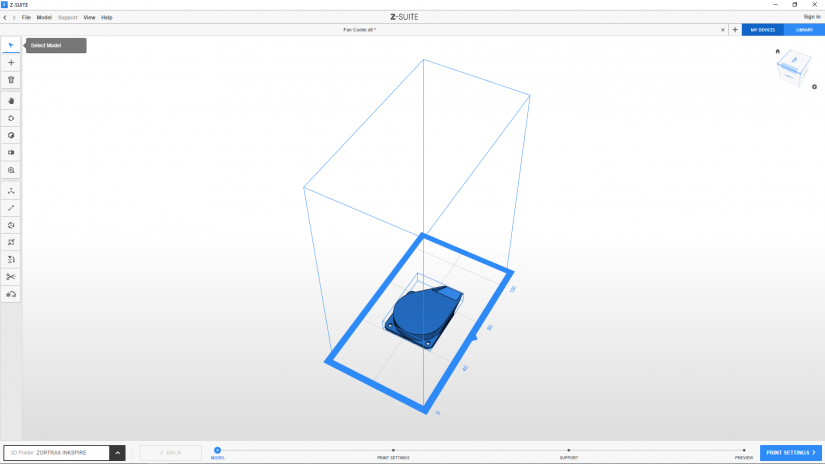

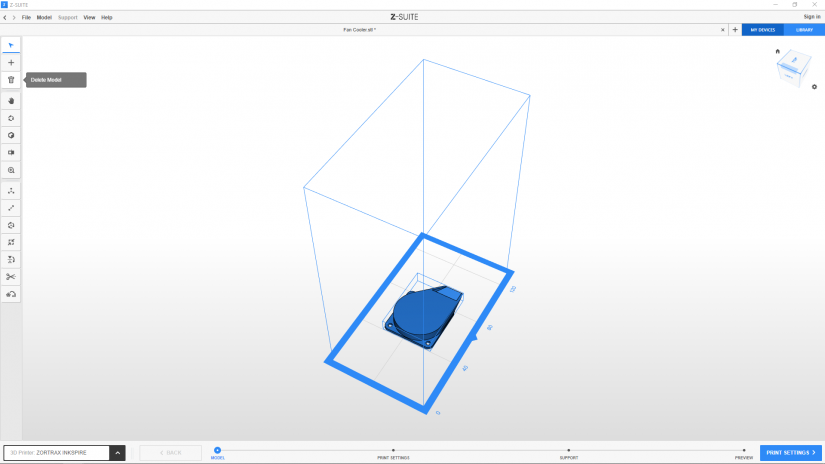
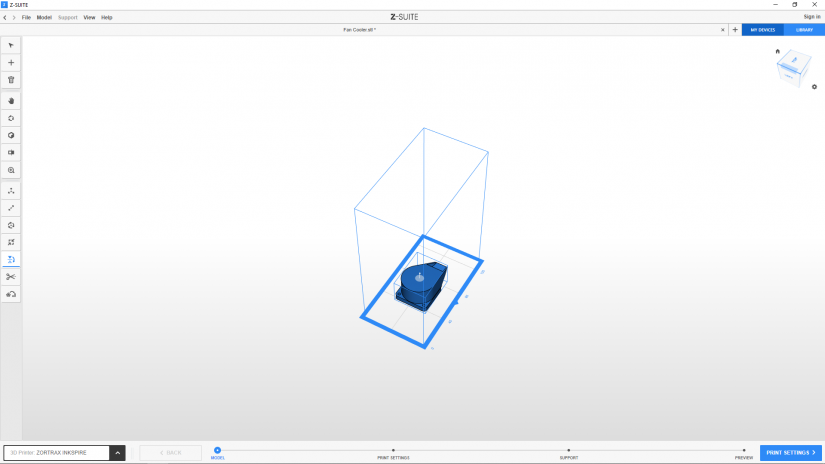
1. To select, add or delete a model, use the icons from the toolbar on the left.
2. Left-click on a model to select it.
3. To add another model, use the “+” icon or the drag and drop option.
4. To delete a model, select it and click the trash icon or press the Delete key on the keyboard.
Workspace View
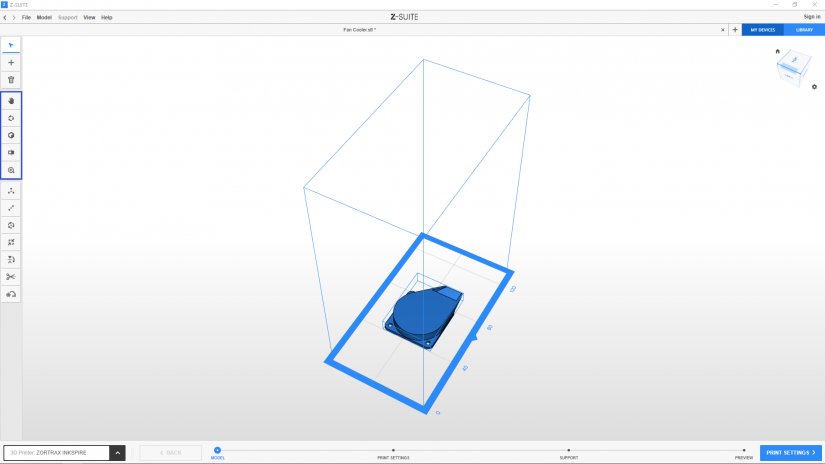
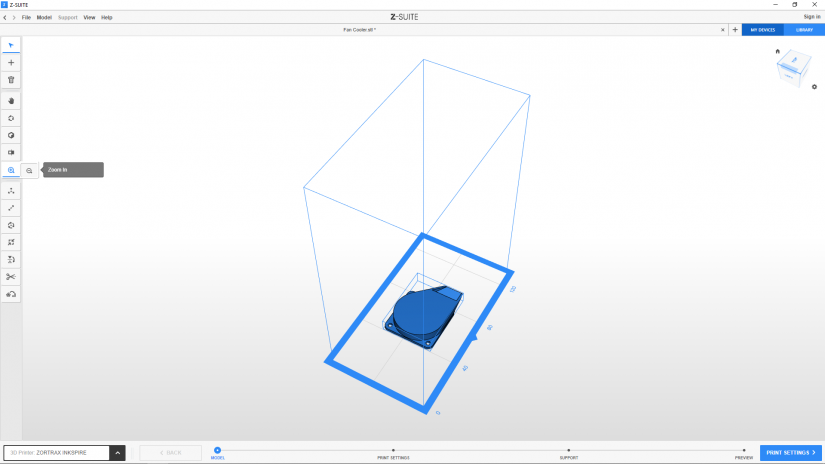
1. If you want to zoom in, move, rotate or change the workspace view, use the icons from the toolbar on the left.
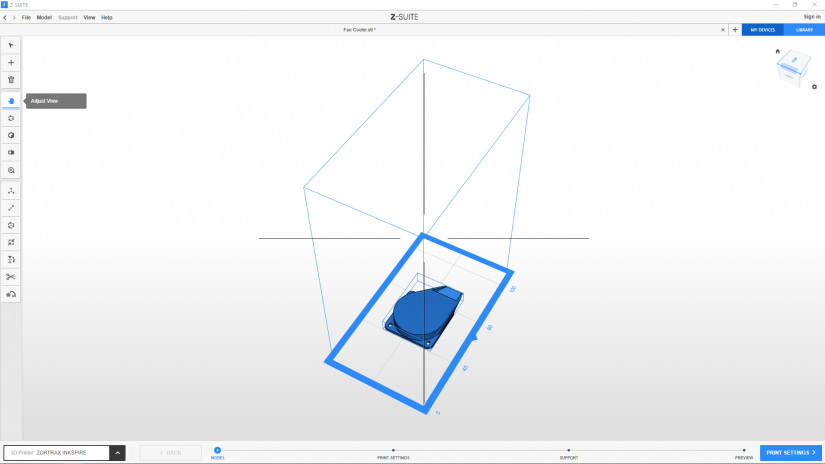
2. Use the Adjust view icon to move the workspace view around the screen. Hold down the left mouse button and move your mouse to relocate the view around the screen.
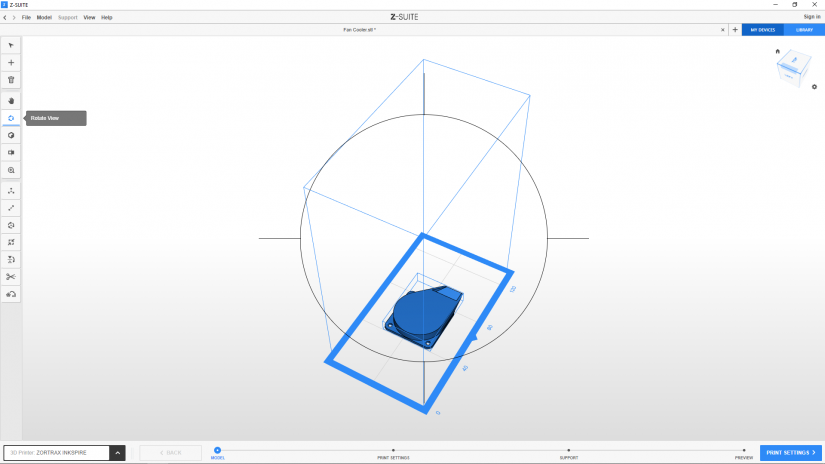
3. Select the Rotate view icon to rotate the workspace view. Hold down the left mouse button and move your mouse to rotate the workspace view.
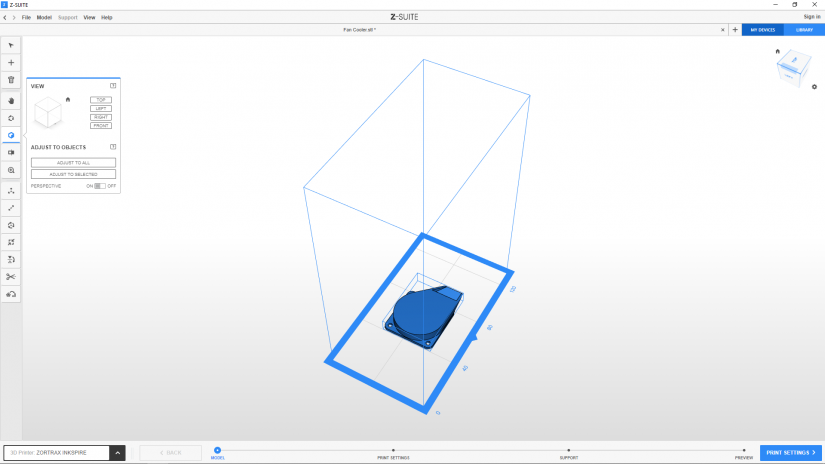
4. Click the Select view icon to change the workspace view. Choose the view type by clicking the corresponding button.
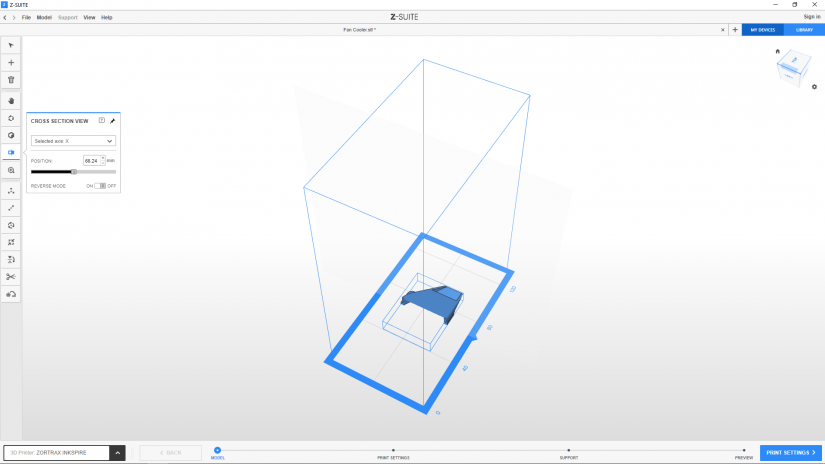
5. Click the Cross Section View to see what the inside of your model looks like. You can cut a model and temporarily hide its fragment from the preview. To cut a model, choose the position of the cutting plane (X, Y, or Z), then adjust the slider or use the +/- icons. Click the Reverse Mode button to hide the other fragment of a model. The Cross Section View tool is available when using all other tools.
1. If you want to zoom in, move, rotate or change the workspace view, use the icons from the toolbar on the left.
2. Use the Adjust view icon to move the workspace view around the screen. Hold down the left mouse button and move your mouse to relocate the view around the screen.
3. Select the Rotate view icon to rotate the workspace view. Hold down the left mouse button and move your mouse to rotate the workspace view.
4. Click the Select view icon to change the workspace view. Choose the view type by clicking the corresponding button.
5. Click the Cross Section View to see what the inside of your model looks like. You can cut a model and temporarily hide its fragment from the preview. To cut a model, choose the position of the cutting plane (X, Y, or Z), then adjust the slider or use the +/- icons. Click the Reverse Mode button to hide the other fragment of a model. The Cross Section View tool is available when using all other tools.
6. To zoom in the workspace view, select the Zoom View icon and click on the workspace with the left mouse button. You can also use the scroll wheel to zoom in and out.
Moving a Model
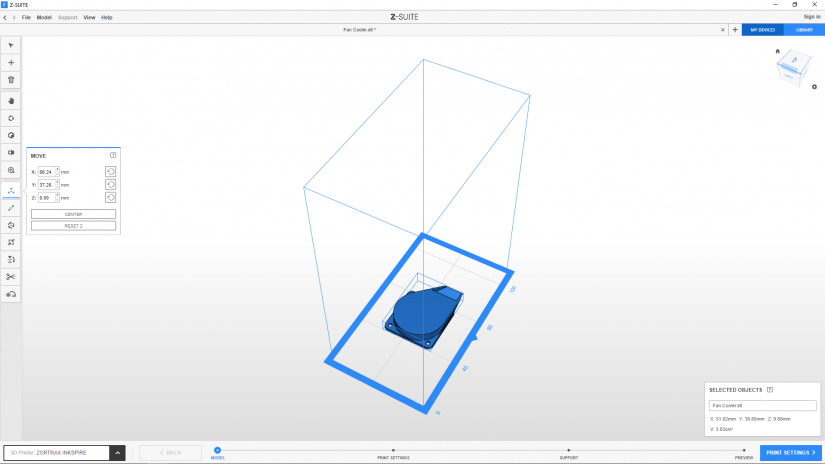

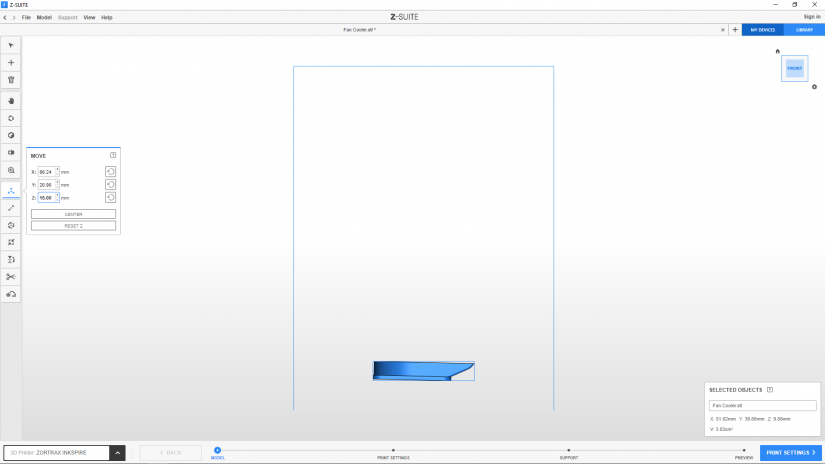
Click the Move Model icon to change a model’s position in the workspace in one of the three axes. Next, select a model and move it manually along the X or Y axis, or both axes simultaneously. You can also use the “+” or “-“ buttons to move a model by millimeters in the selected axis.
The Move Model option also allows you to change a model’s position in the Z axis and, for example, place several models on top of one another. To print several models in this arrangement, you need to remember to generate proper support structures.
You can move your models with the control grips marked red, blue and green. The grips can be enabled in the Preferences menu (see the Basic Features article for more details on the Preferences menu).

Resizing a Model
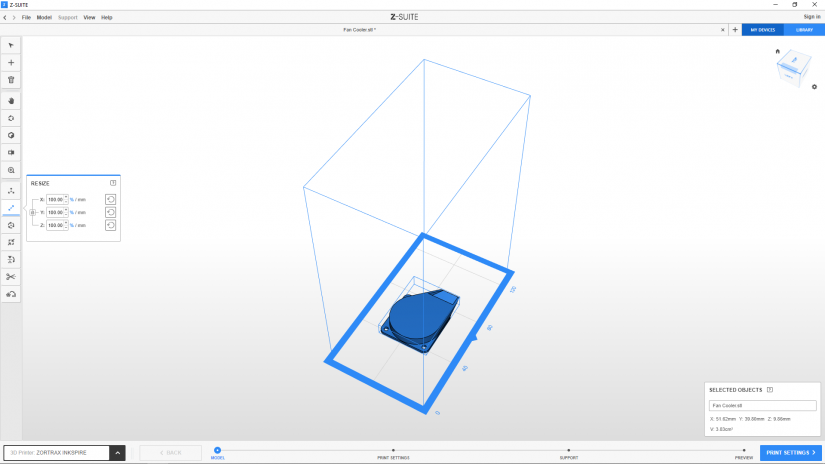
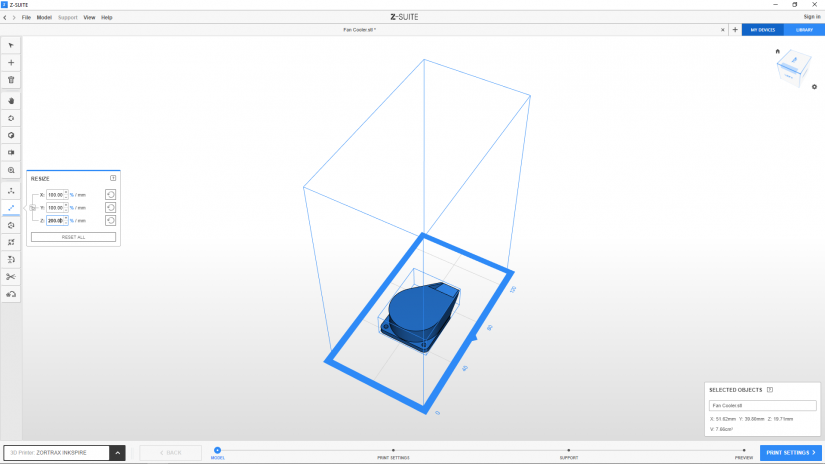

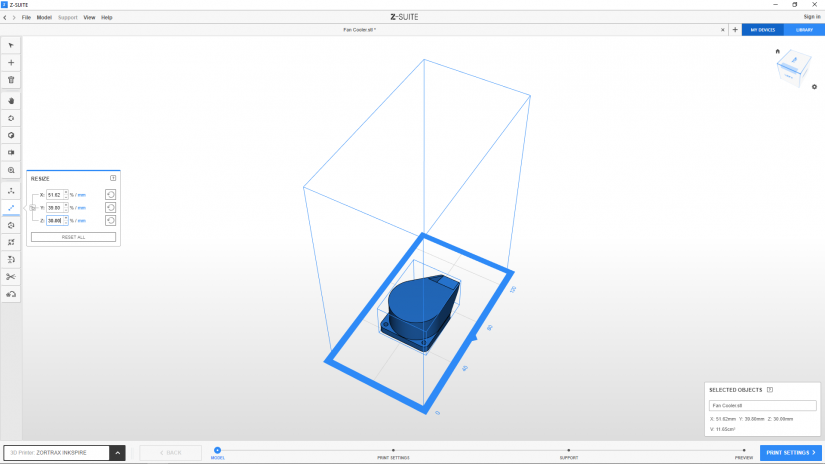
Select the Resize Model icon to resize the X, Y and Z dimensions of a model. You can change the parameters manually or by using the “+” and “-” buttons. Click the padlock icon to scale a model only in a selected axis. To make it easier, you can use the control grips (marked red, blue and green) – click and hold one grip, and move your mouse to change a model’s dimensions.
You can acquire the desired dimensions of a model by typing the exact value in millimeters. Just click the “%” button to switch to “mm.” This option becomes useful whenever you want to change the height or width of a model and be sure of the precise measurements.
Rotating a Model
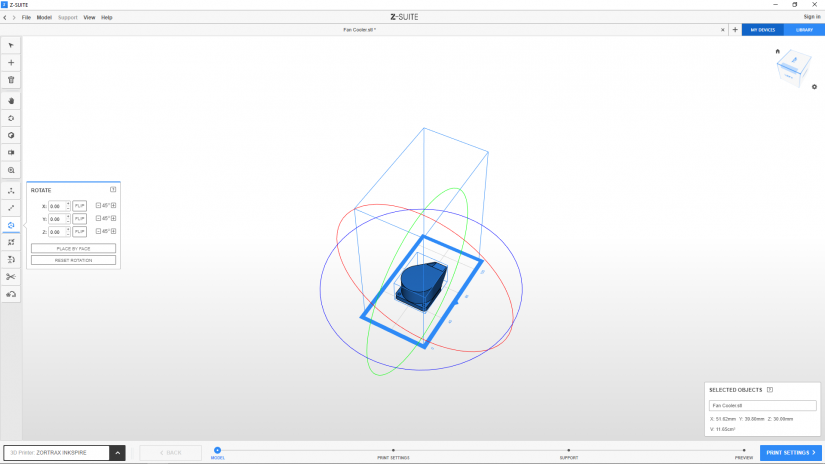


With the Rotate Model option you can rotate a model in the in the X, Y and Z axes. To rotate a model, adjust the value in an appropriate field using the “+/-“ buttons. Additionally, this option allows you to change a models’ position by 45°. You can also rotate a model using the control grips marked red, blue and green. By clicking the FLIP button, the program can reverse your object’s structure, as in a mirror.
The Place by face tool allows you to rotate a model so that the selected face of the model is placed on the platform’s surface.
You can revert to a model’s initial position by clicking the Reset Rotation button.
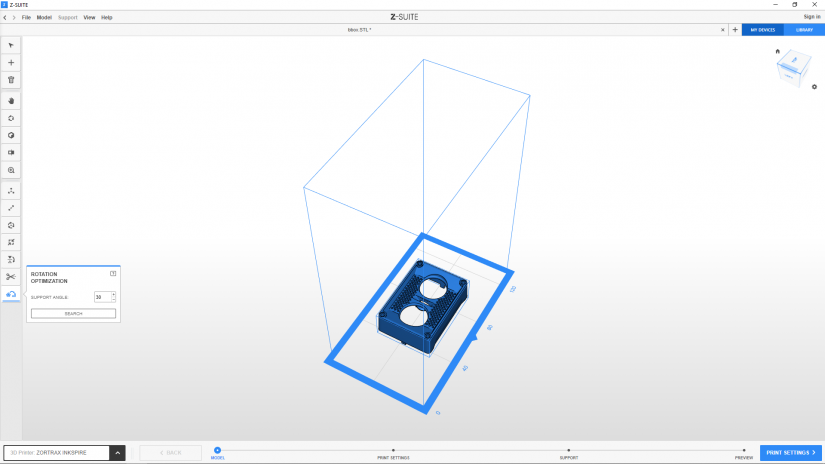
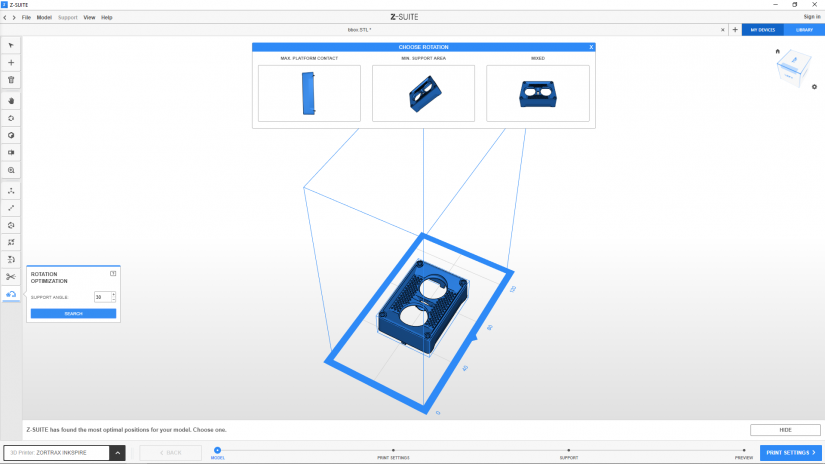
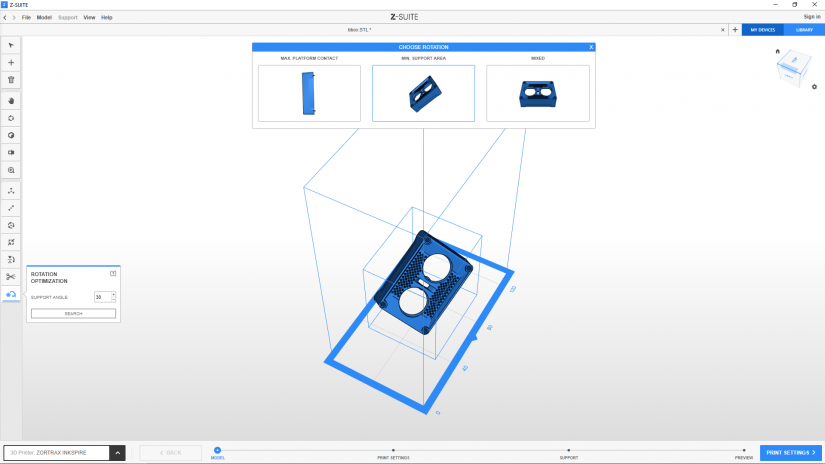
Rotation Optimization
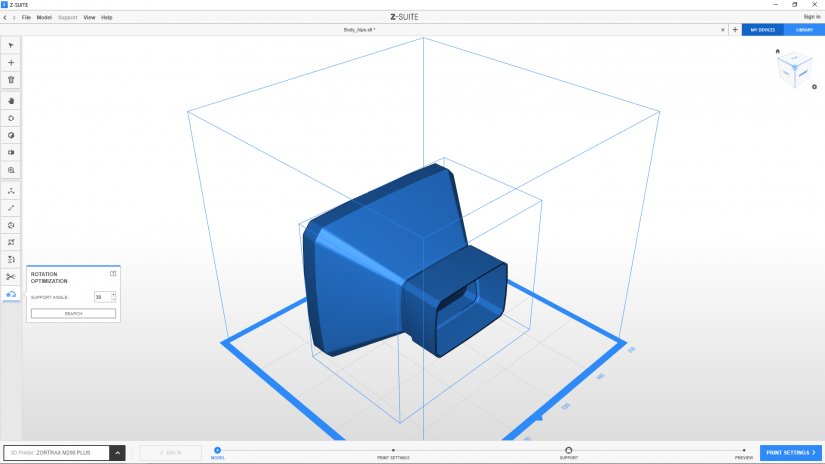
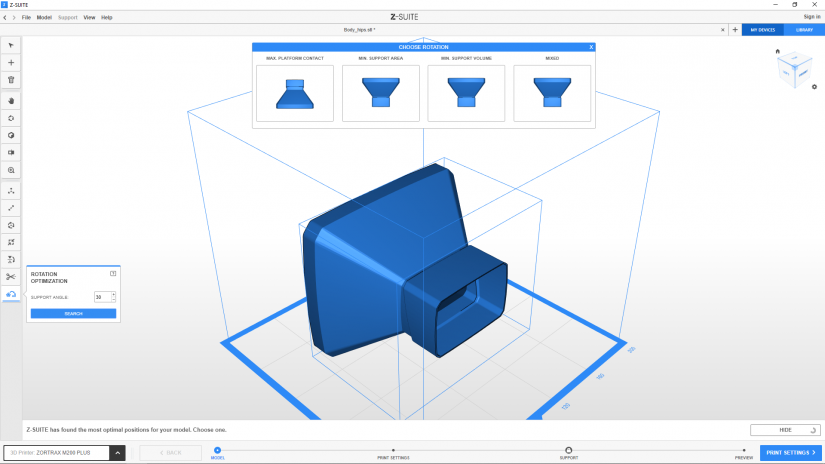
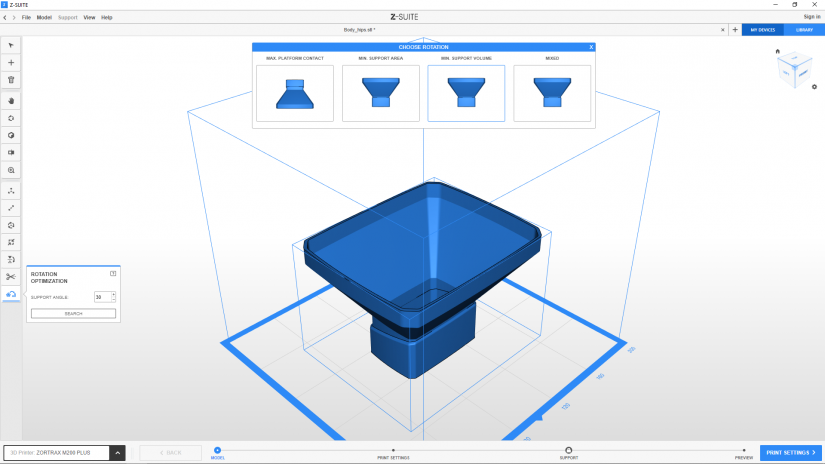
FDM Technology
The Rotation Optimization tool allows you to choose one optimal position for a model according to your chosen parameter: Min. Support Area, Min. Support Volume, Max. Platform Contact, and Mixed. Each parameter helps you achieve different results and improve the efficiency of 3D printing in a different way. The parameters depend on the printing technology and Zortrax printer you’re going to use. You can either focus on better surface quality, reduce material usage, optimize the number of needed support structures, or speed up the printing process.
Once you select the Support angle and click Search, the program will show you 4 available types of rotation. Choose one position and move on to the next step of preparing your model for printing.
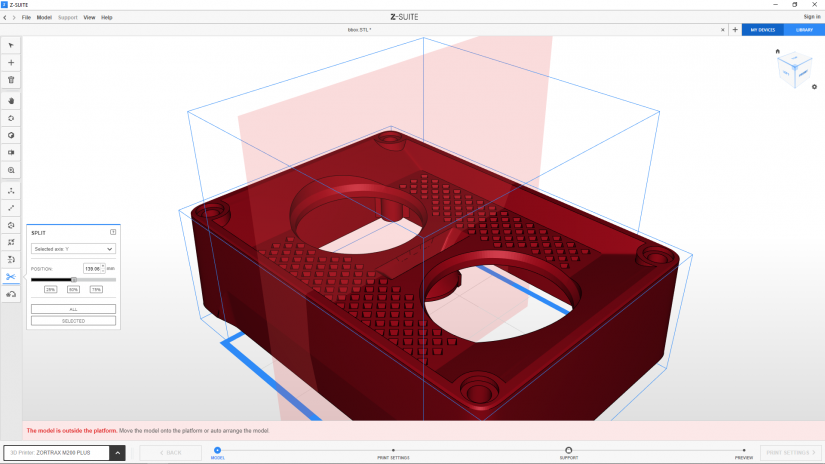
Splitting a Model
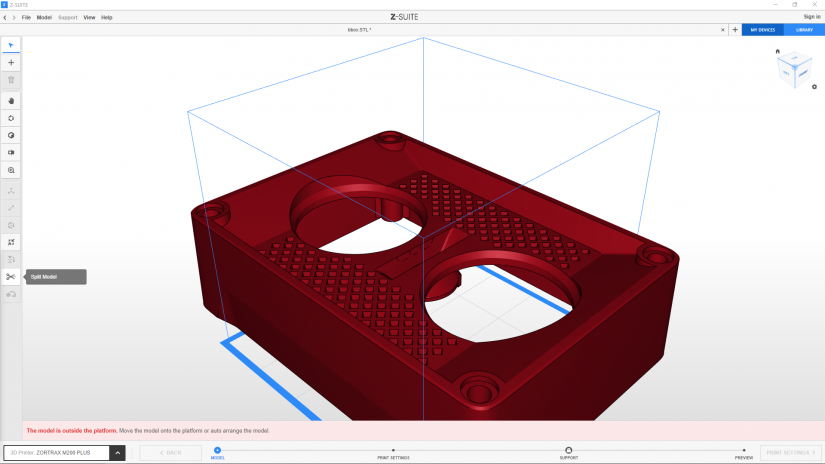
1. If your model does not fit the workspace, you can split it into smaller parts and print them together or separately. Click the Split icon to split a model.
1. If your model does not fit the workspace, you can split it into smaller parts and print them together or separately. Click the Split icon to split a model.
2. From the drop-down list, select the axis along which you want your model to be split. Next, adjust the slider or use the “+”/”-” buttons to place the cutting point on a model. You can also use the buttons with the "%" sign to split the model into equal halves or quarters.
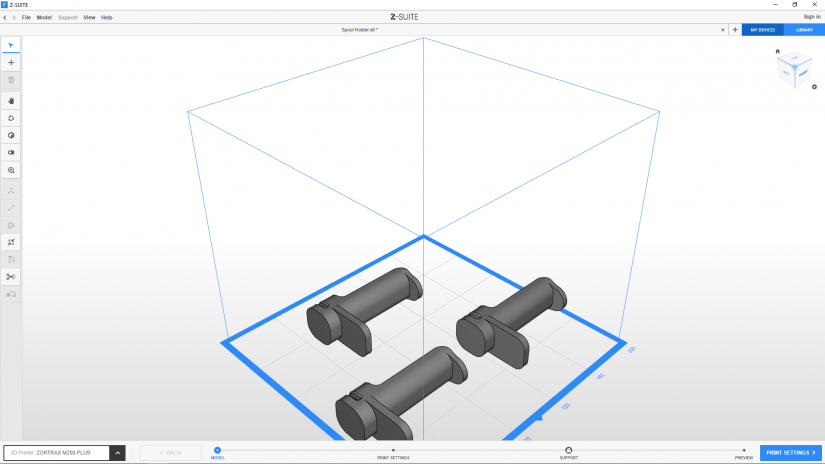
Placing (multiple) Models
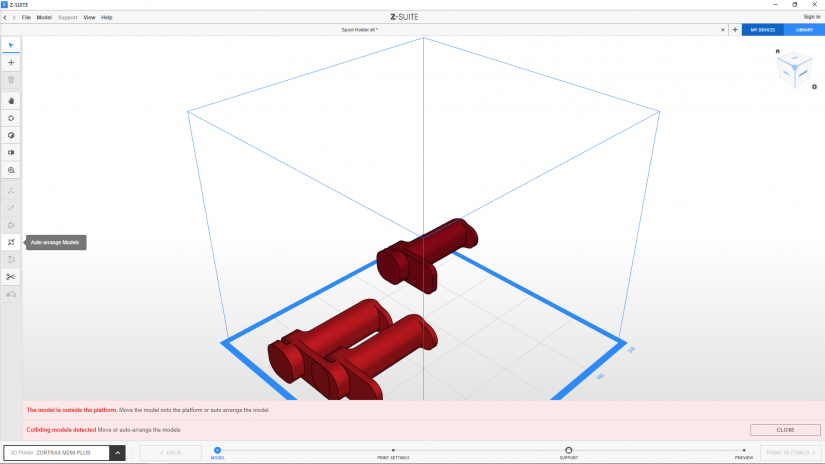
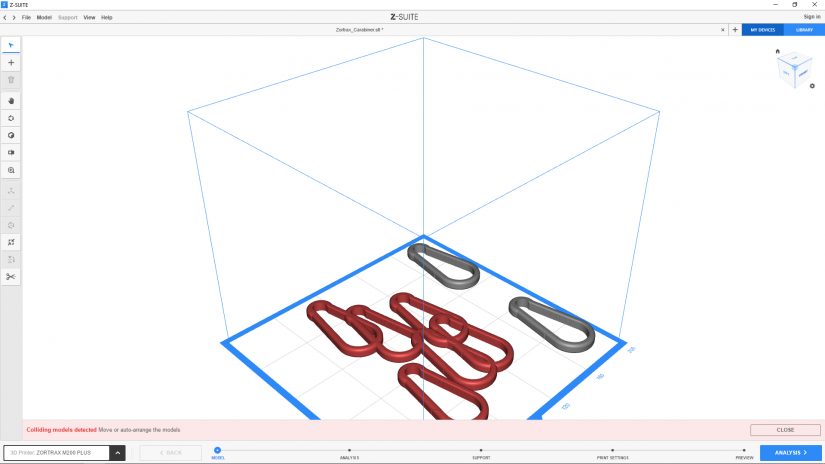
1. Upload two or more models to the workspace and click the Auto-Arrange Models icon in the left menu bar.
If one of the models turns red, it means that it is outside the workspace. If two or more models turn red, it means that they overlap.
1. Upload two or more models to the workspace and click the Auto-Arrange Models icon in the left menu bar.
If one of the models turns red, it means that it is outside the workspace. If two or more models turn red, it means that they overlap.
2. Resize, move, or properly arrange models in the workspace with adequate spaces kept between them.
Copying and Deleting a Model
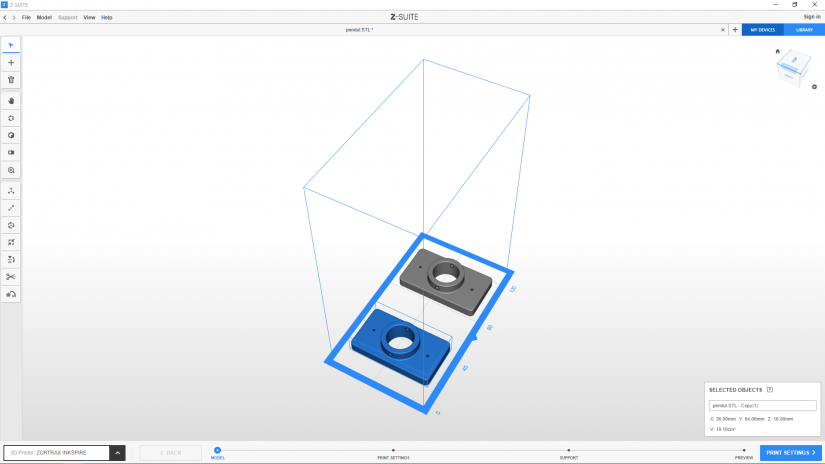
1. Select a model and press CTRL + C and then CTRL + V keys to copy it.
2. Select a model and click the trash icon or press the Delete key on the keyboard to delete it.
Preparing to Print

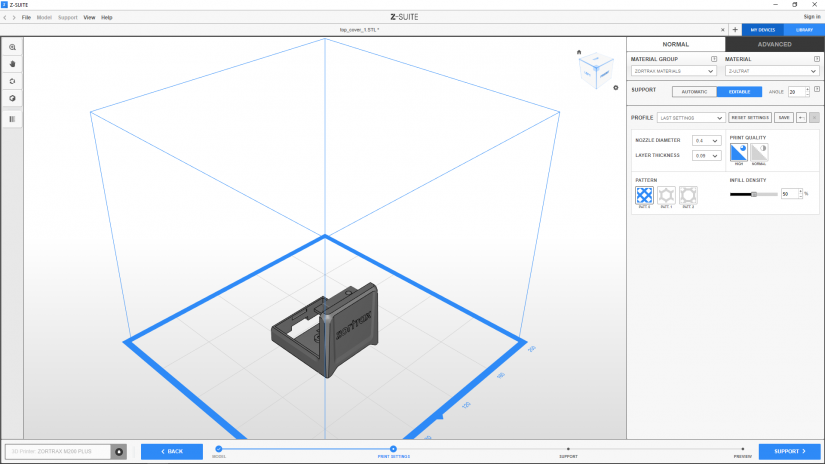
Once you determine a model’s size and position in the workspace, you can change and adjust the Print settings in the next step. See the Print Preparation article for detailed instructions.

