When modeling your custom 3D parts, you have to remember that different 3D printing technologies – FDM and UV LCD – have certain limitations. These limitations result from printers’ hardware, materials’ properties and the nature of the printing process itself, and in consequence, influence the type of geometries possible to print. That’s why, you have to be able to predict what factors can impact the quality of your printed part and adjust the design accordingly before the printing process. Proper design techniques will help you optimize the design and increase its printability rate, but also improve the strength of the printed model.
There are several design methods that can help you avoid quality issues and produce the desired results. This article provides the most important design guidelines you have to consider to succeed with your custom designs.
Wall Thickness
One of the most important factors of an item you design for FDM 3D printing is wall thickness. You should note that walls must be thick enough to be printed correctly, that is, not less than 0.8mm. However, such walls will only consist of two paths of material, which can, in fact, make your printed part fragile and easy to break. It is recommended to design walls thicker than 0.8mm as there will be more space for infill inside them. This will increase durability of the printed model.
Still, it is possible to print thinner walls. The Shell option available in Z-SUITE allows you to print parts with only one path of material and no infill. You can use it if you’re interested in evaluating the model’s aesthetics, but not its durability.
Sharp Corners
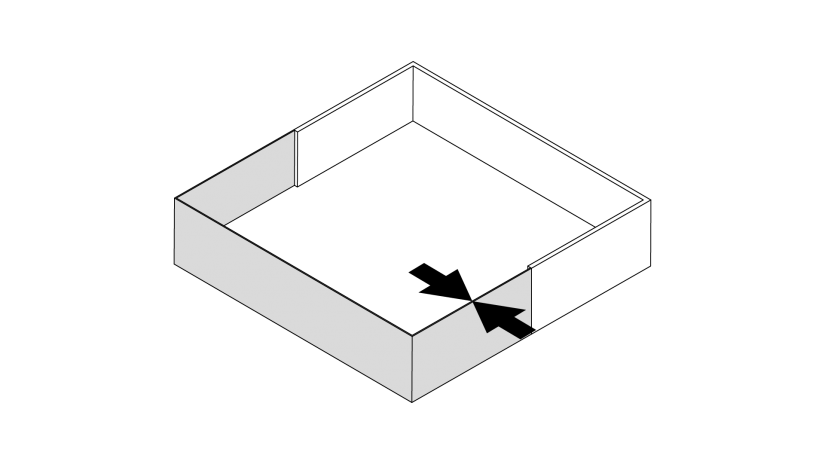
In both FDM and UV LCD technology, a design with square shapes and sharp corners can pose some problems during the printing process. As layers at the corners are printed and then solidify, stress concentration in these areas increases and may cause quality issues. That’s why, if it’s possible for the model’s functionality and aesthetics, it is recommended to fillet all inner and outer corners of the model. Once you round the bottom corners, the stress will be spread over a wider area, which will reduce the risk of warping or curling, and in general, make the part easier to print. It is advisable to fillet the rest of inner and outer corners as well. As a result, at slightly rounded corners there will be a larger contact surface between individual layers and model’s durability will be highly improved. It especially applies to designing enclosures and hollow models.
Ribs & Gussets
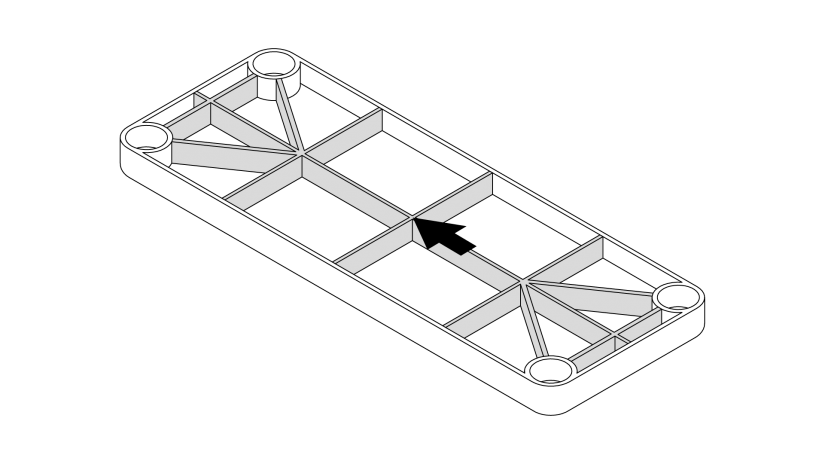
1. Parts which require even better strength and stiffness can be designed with additional features called ribs. Ribs are thin elements resembling walls, which provide internal support to the whole model. If your model is going to bear loads or has to withstand long wear, you should add long and short ribs so that they connect to the model’s walls on both sides (see the graphic). By incorporating ribs into the design, the stresses applied to the 3D printed part will be distributed over the whole part, which will make it less prone to cracking. Ribs don’t have to be as thick as main walls, and can constitute 75-80% of the main wall thickness.
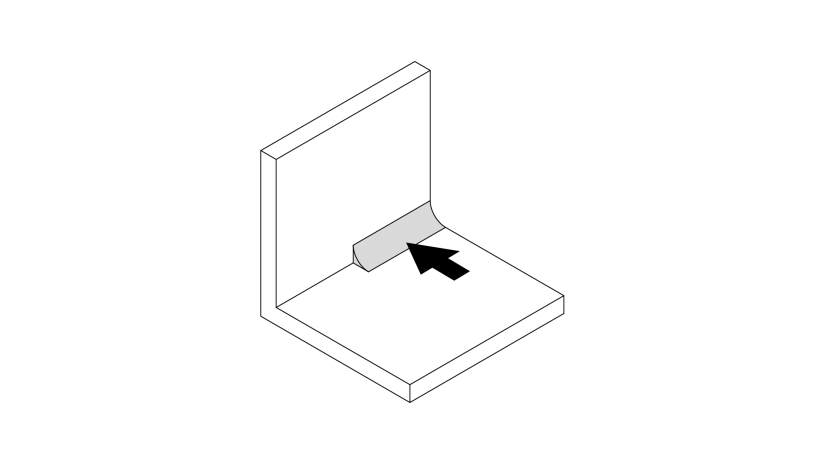
2. Gussets are small features which also resemble walls. They can be used to reinforce unsupported elements in the design, for example, single internal walls or bosses (bosses are discussed later in this article). Properly designed gussets should adhere to the element they support, making it stiffer and more stable in the base of the model.
1. Parts which require even better strength and stiffness can be designed with additional features called ribs. Ribs are thin elements resembling walls, which provide internal support to the whole model. If your model is going to bear loads or has to withstand long wear, you should add long and short ribs so that they connect to the model’s walls on both sides (see the graphic). By incorporating ribs into the design, the stresses applied to the 3D printed part will be distributed over the whole part, which will make it less prone to cracking. Ribs don’t have to be as thick as main walls, and can constitute 75-80% of the main wall thickness.
2. Gussets are small features which also resemble walls. They can be used to reinforce unsupported elements in the design, for example, single internal walls or bosses (bosses are discussed later in this article). Properly designed gussets should adhere to the element they support, making it stiffer and more stable in the base of the model.
Holes

1. There are two basic rules for integrating holes into the design of printed parts which will be fastened to other parts with screws. Depending on the fastening method, you have to design proper holes and follow appropriate guidelines:
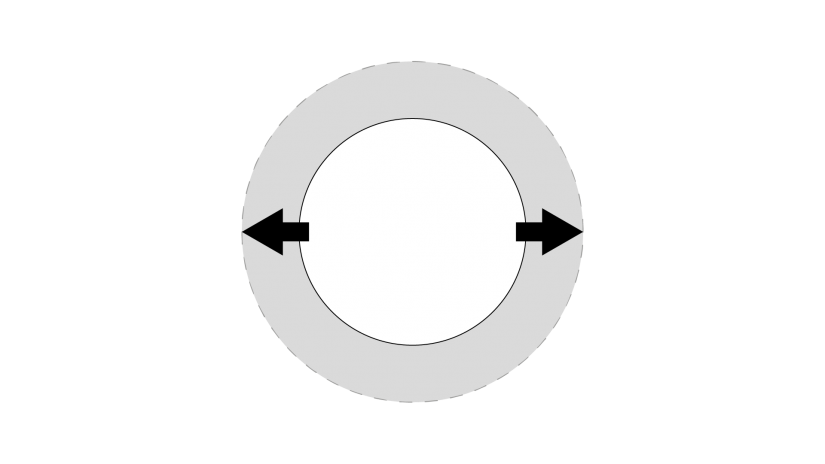
2. If you want to hold two parts together using screws/bolts and nuts, design a hole that will be 0.25mm bigger than the diameter of the screw/bolt. This way the screw/bolt will freely pass through the hole and will not damage the part. This type of connection can be assembled and disassembled repeatedly,
1. There are two basic rules for integrating holes into the design of printed parts which will be fastened to other parts with screws. Depending on the fastening method, you have to design proper holes and follow appropriate guidelines:
2. If you want to hold two parts together using screws/bolts and nuts, design a hole that will be 0.25mm bigger than the diameter of the screw/bolt. This way the screw/bolt will freely pass through the hole and will not damage the part. This type of connection can be assembled and disassembled repeatedly,
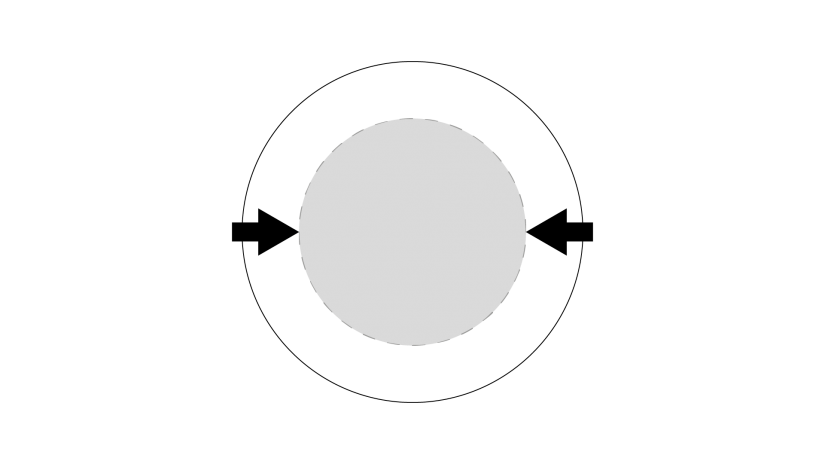
3. If you want to secure one part to another, design a hole that will be 0.25mm smaller than the diameter of the screw you’re going to use. This way the screw will bite into the edges of the hole, providing a more secure connection.
Bosses
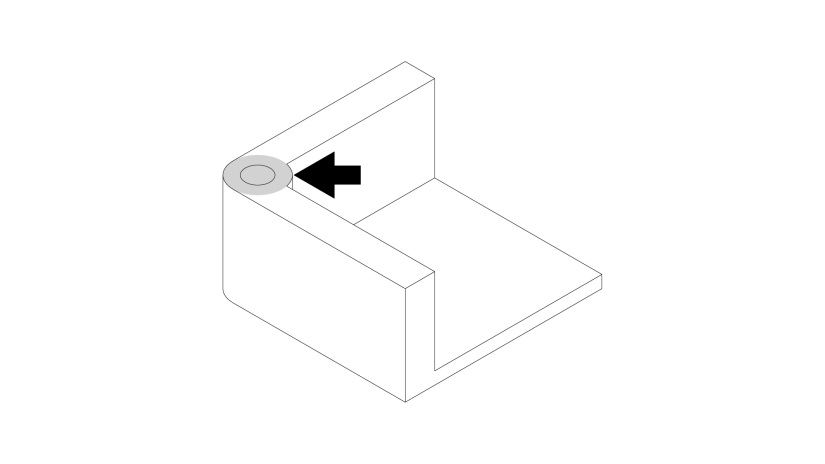
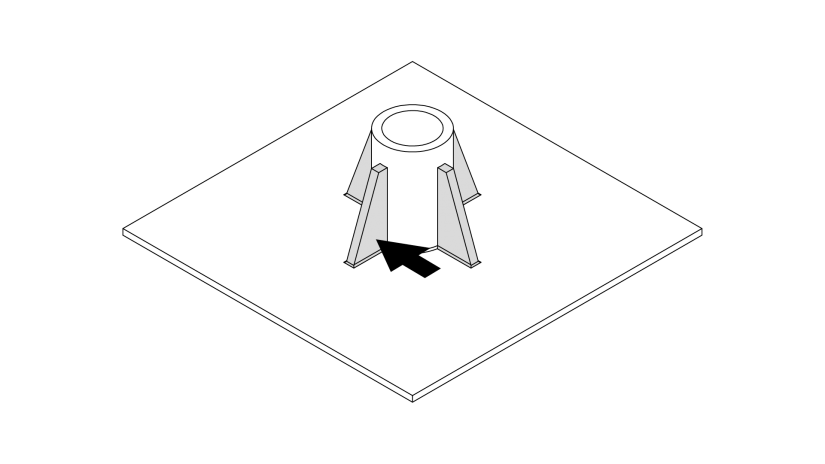
While incorporating fastening holes in your design, you should remember that you will insert threads of screws or bolts in them once the part is printed. The holes can potentially crack and break, or you can notice bulges on the part’s surface once you tighten the screws. That’s why, to avoid having a damaged print, fastening holes should be reinforced with the use of bosses. To do so, increase the wall thickness around holes by one diameter of the screw/bolt that you’re going to use. By adding bosses to the design, you provide more strength to the area with holes and to the whole model as well.
Build Direction

Before starting to design a part for FDM 3D printing, you should bear in mind that FDM parts are anisotropic. It means that their mechanical properties depend on the direction of printing. In this case, layers are applied onto one another in the Z-axis. Therefore, while designing, you should always know the intended purpose of your 3D printed item and what type of forces it will carry and in which directions. If you want your part to have high tensile strength, design and print it in such a way that layers are parallel to the tensile forces. On the other hand, if you want your part to exhibit high flexural strength, design and print it in such a way that layers are perpendicular to the bending forces. In short, you should evaluate the direction in which your part will be either bent or elongated, and adjust the design accordingly, following the above rules.
In the case of UV LCD printing, build direction is not as important because resins exhibit isotropic properties. Resin prints have nearly the same properties in all three axes. That’s why, bending or elongating in different directions will not impact the durability of printed parts.

