Axes maintenance is a procedure that can help you resolve problems connected with the extruder and the quality of your printed parts. If the extruder does not move properly along the guide rails and it makes unusual noises, or if layers in your models become shifted, the axes in your printer need maintenance work. Follow the steps from this manual to see the correct maintenance procedure. Keep in mind that you do not have to follow all steps at once.
Belts Maintenance
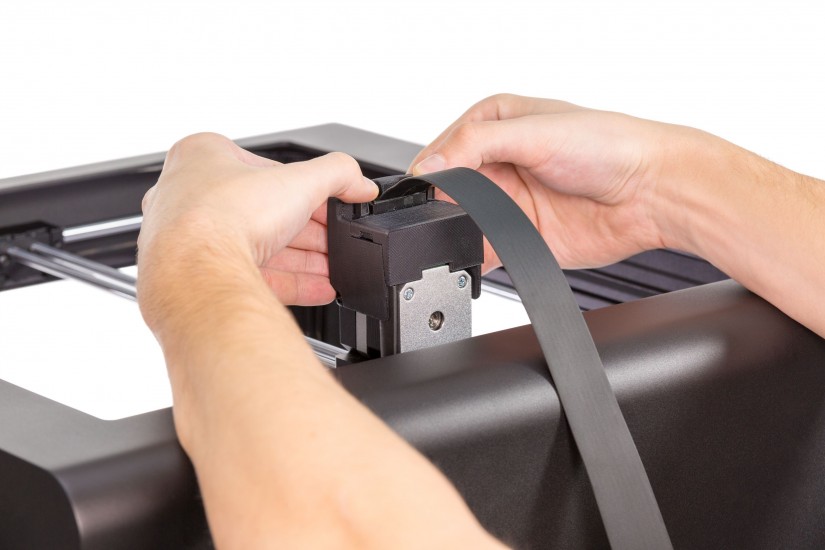
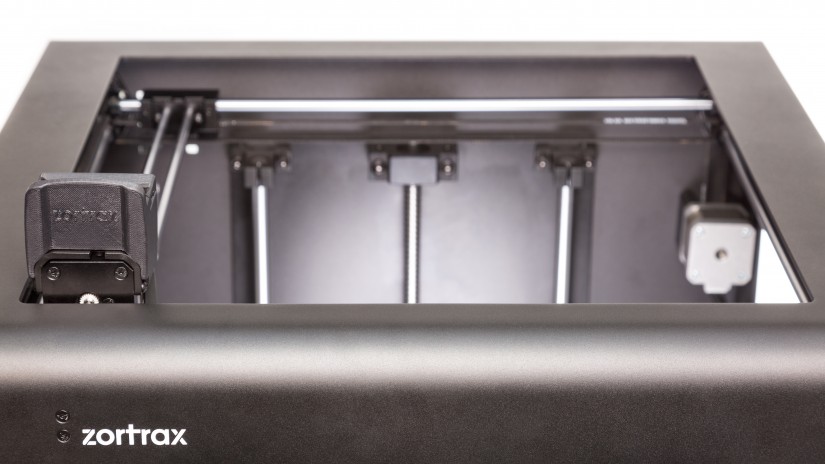
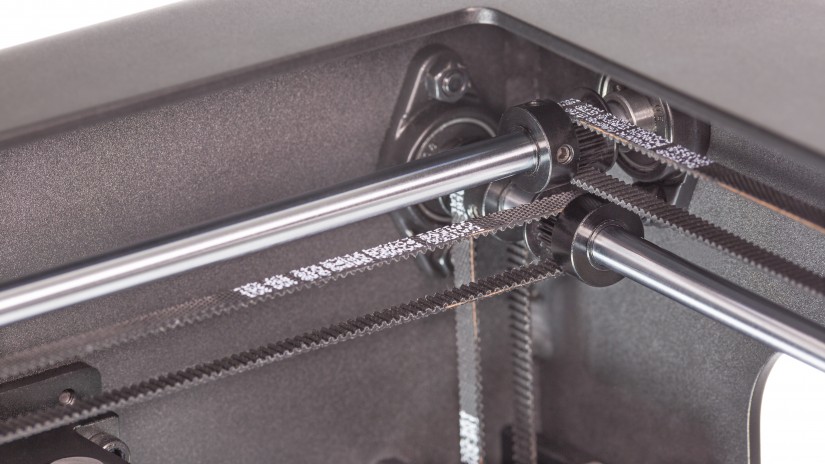
There are short and long belts in your printer. The belts have to tense in order to produce successful prints.
Tug each belt gently to check its tension. If the belt is loose, follow the next steps from this manual.
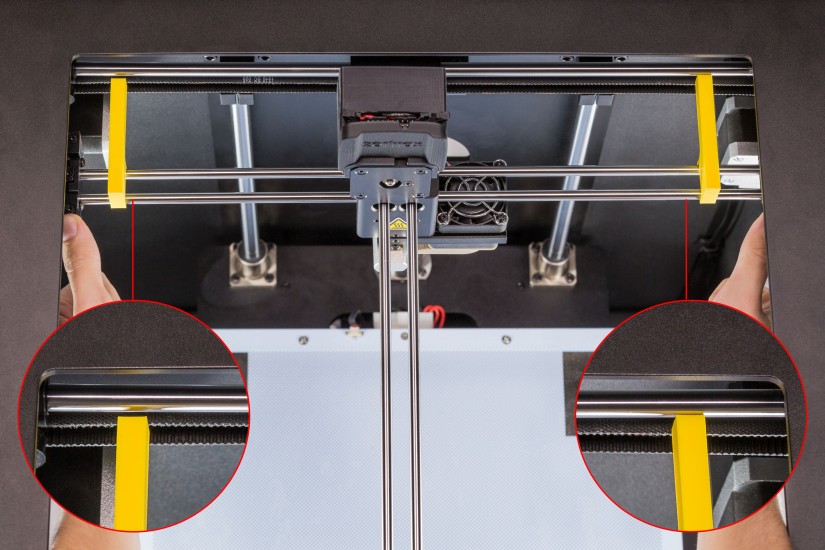
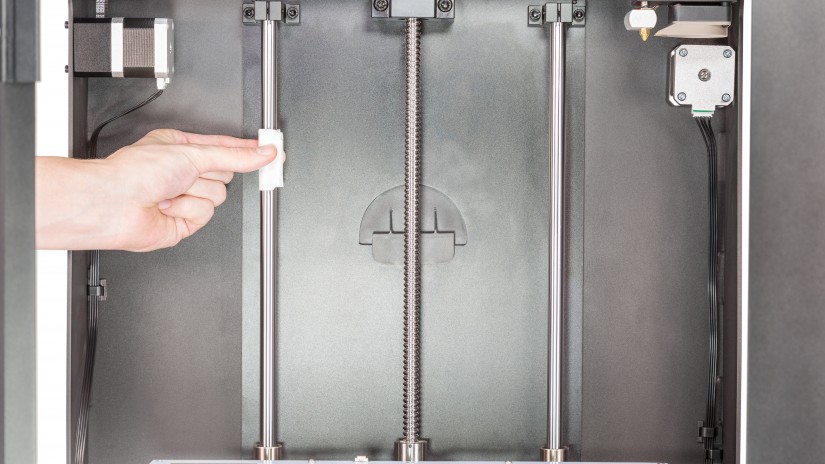
Tensing up the Long Belts
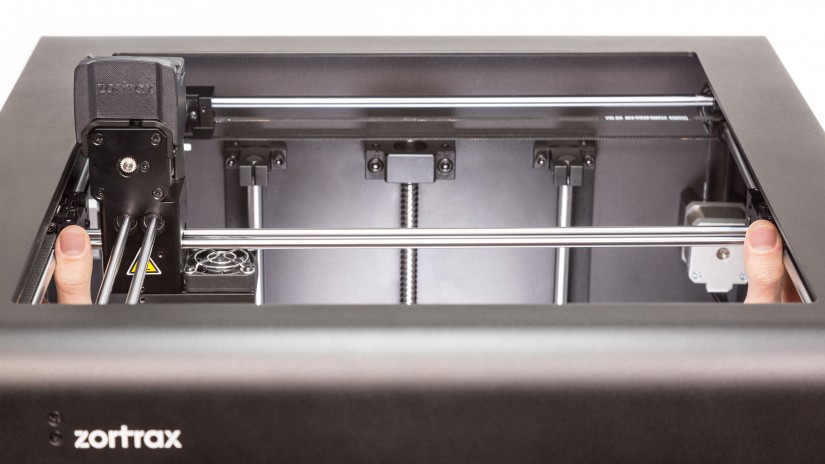
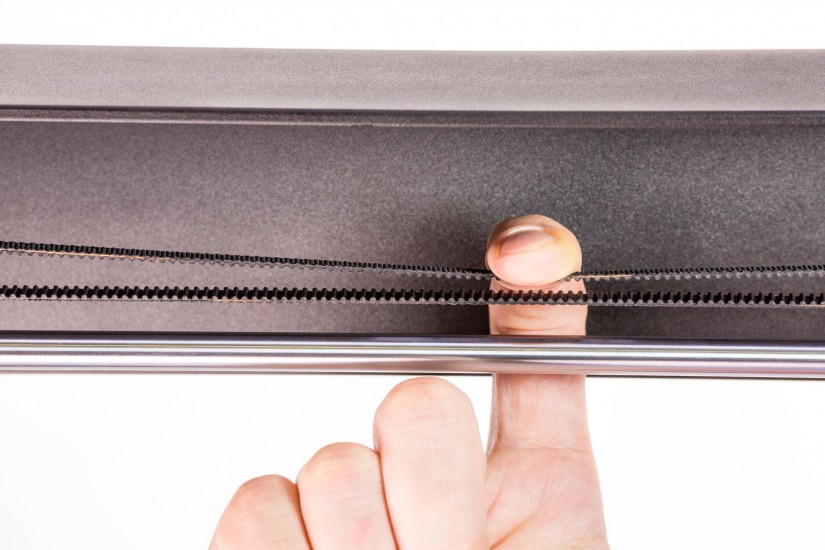

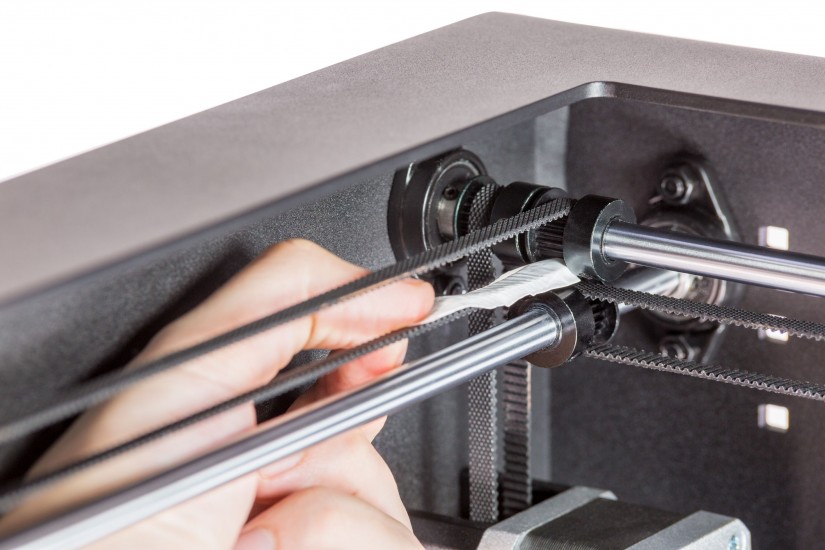
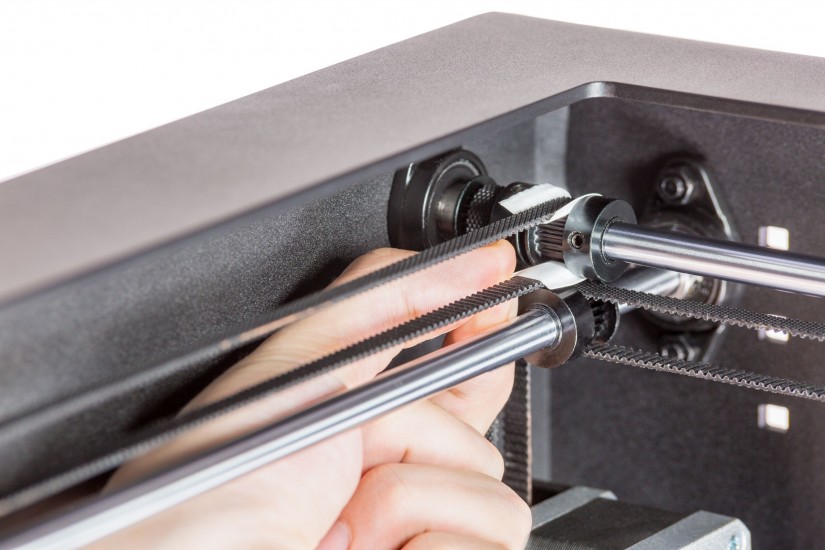
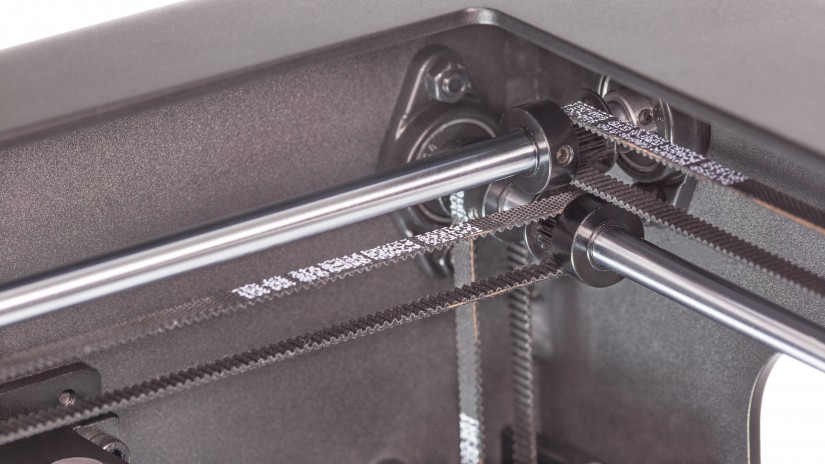
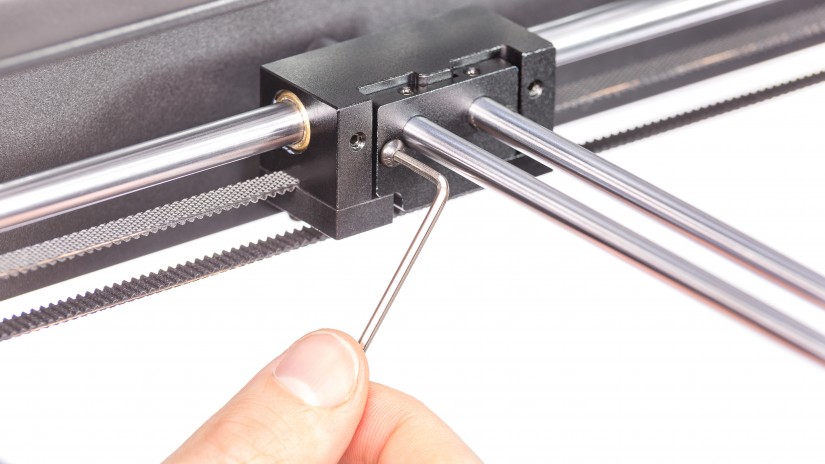
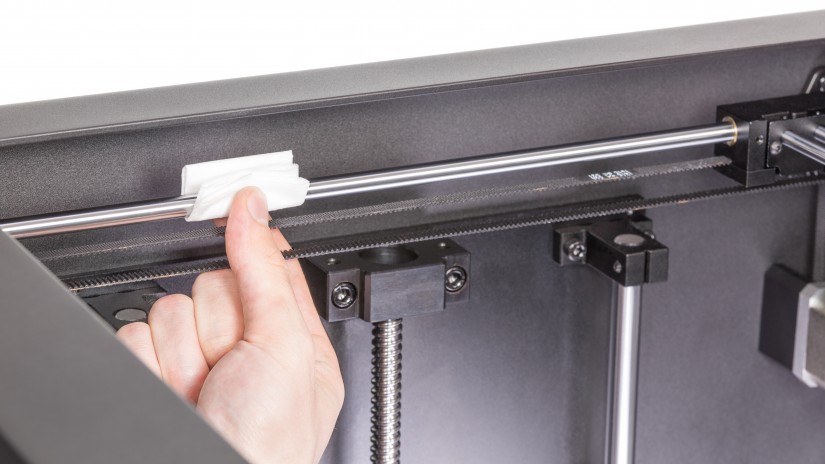
Tug each belt gently to check its tension. The first photo shows the correct tension.
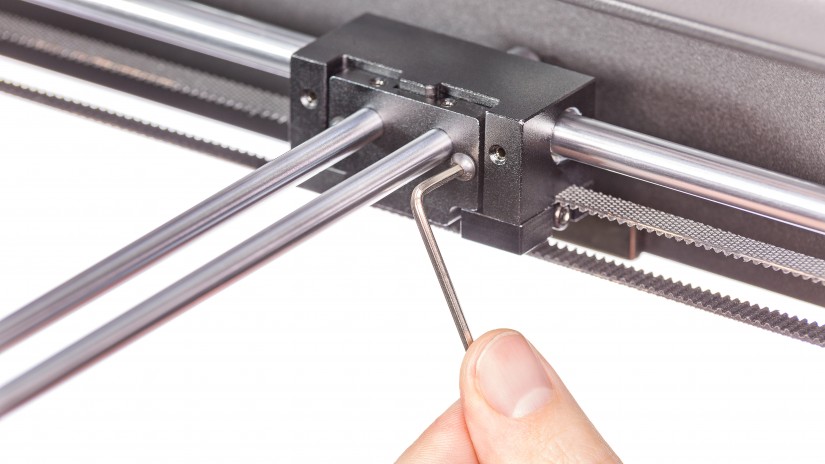
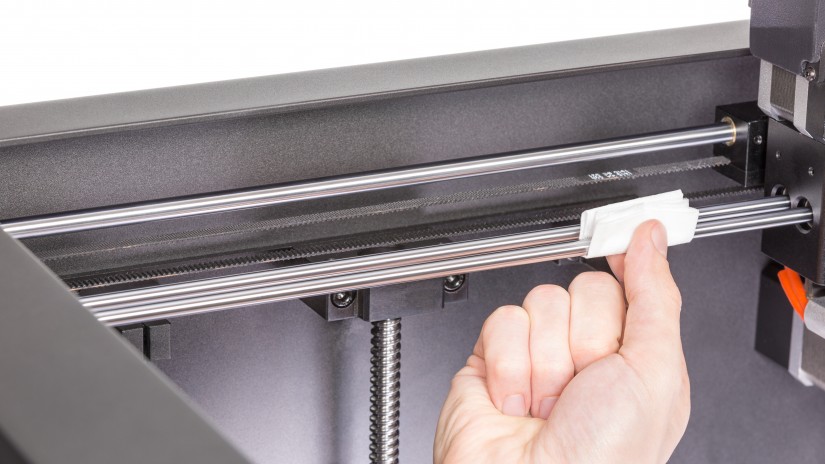
If the belt is loose as it is shown in the second photo, move on to the next step.
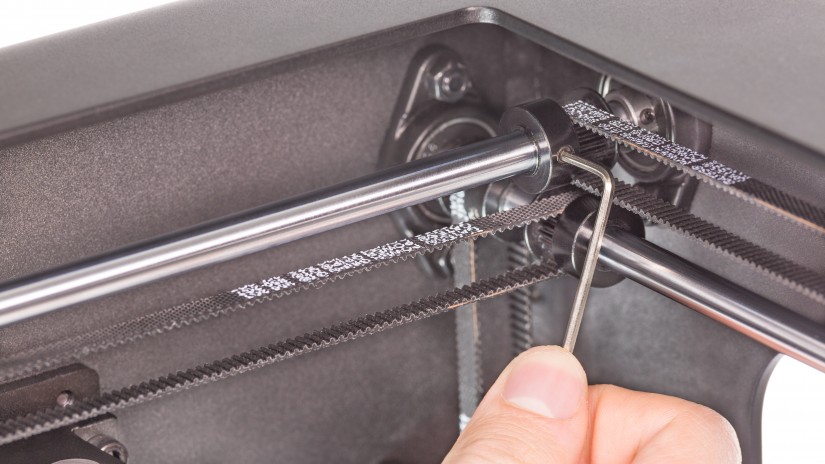
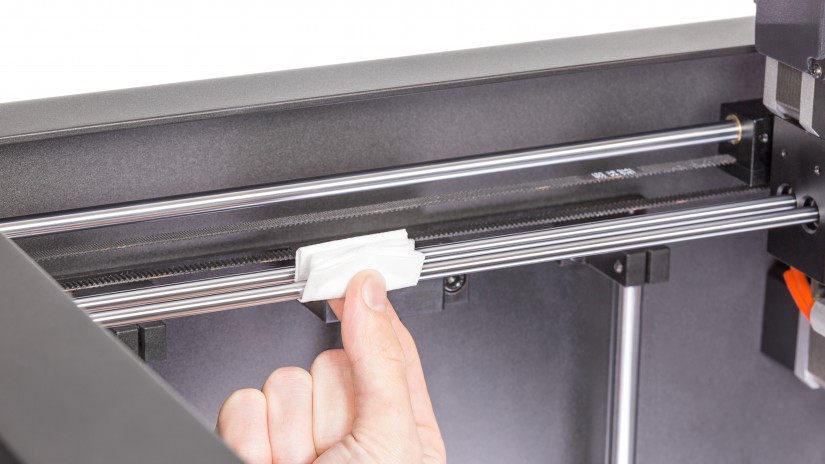
Take a piece of tape and put it on the belt. Then move the extruder manually back and forth so that the tape gets on the rack. Remove the tape.
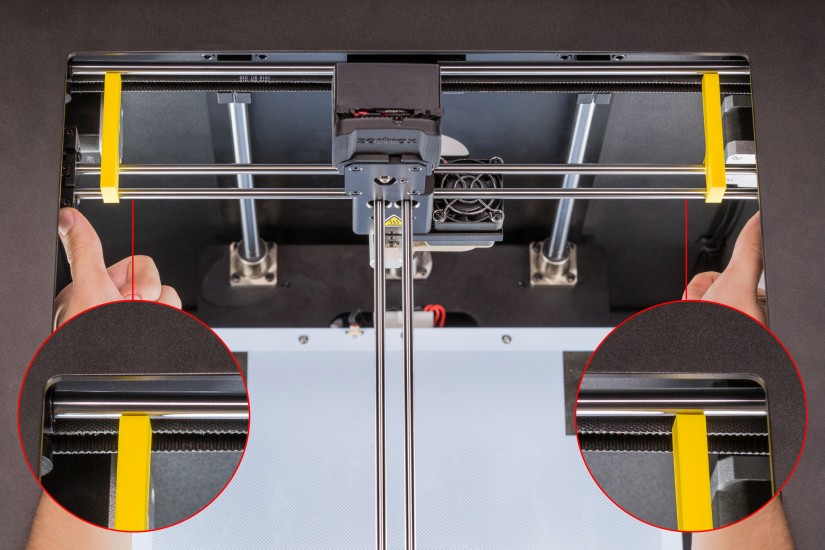
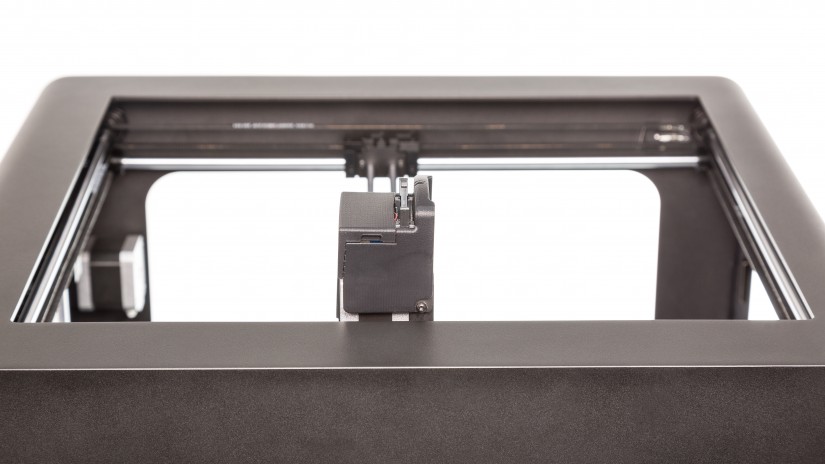
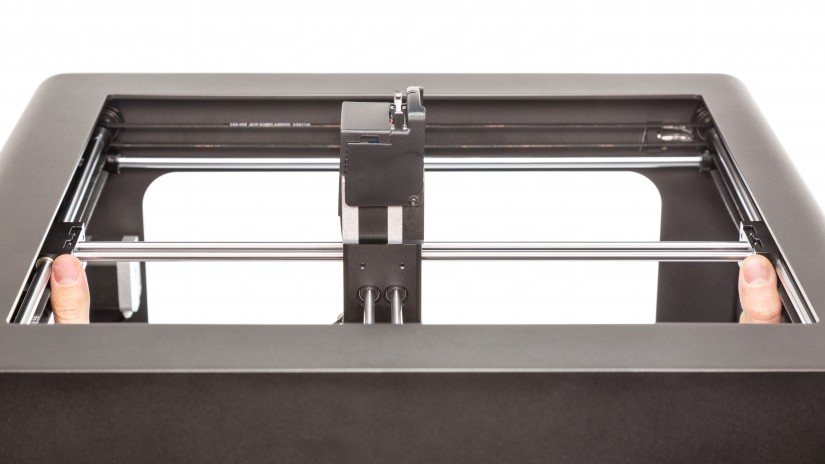
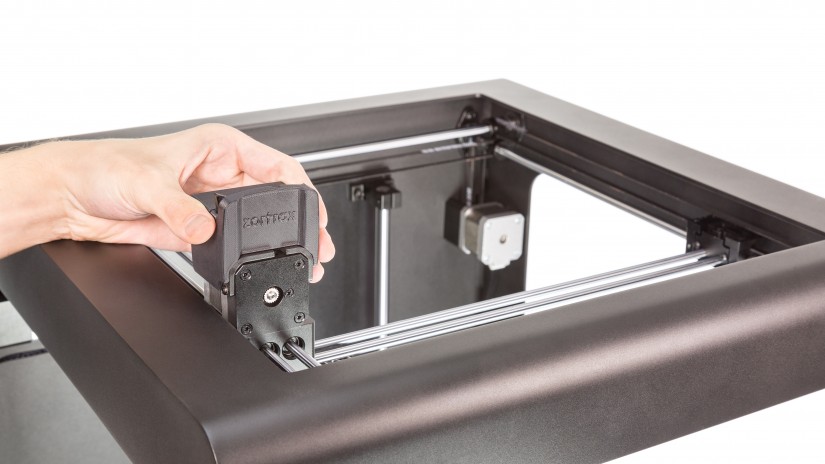
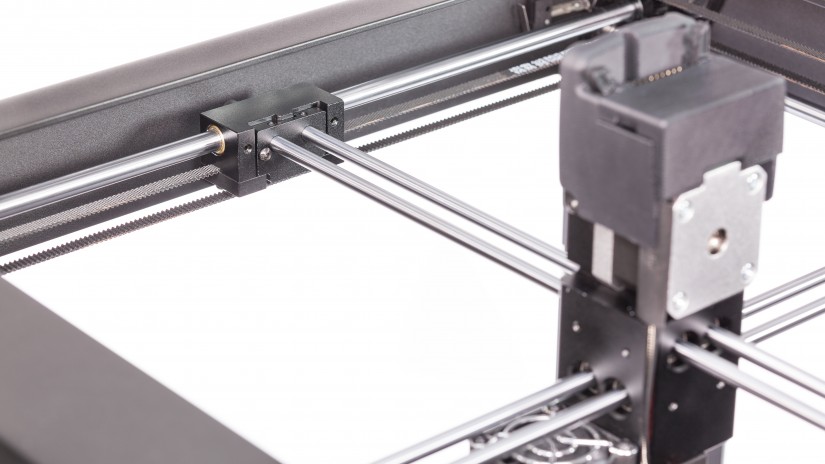
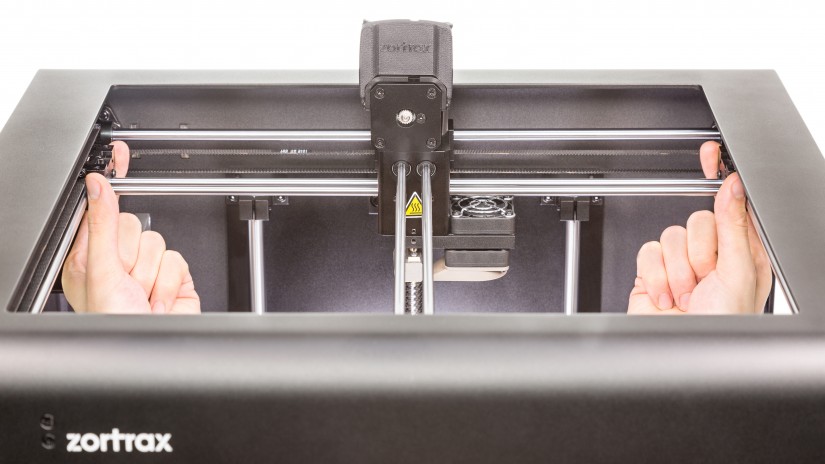
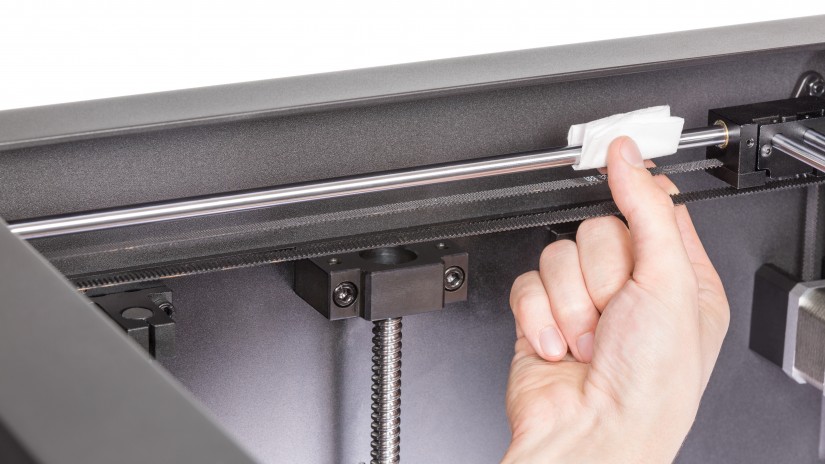
Put the jigs on the extruder guide rails and move the extruder manually so that the jigs are touching the X axis. This way, you will check if the extruder guide rails are parallel to the X axis.
If the extruder guide rails are not parallel to the X axis (second photo), follow the steps from the manual: Axes Maintenance – method with jigs.
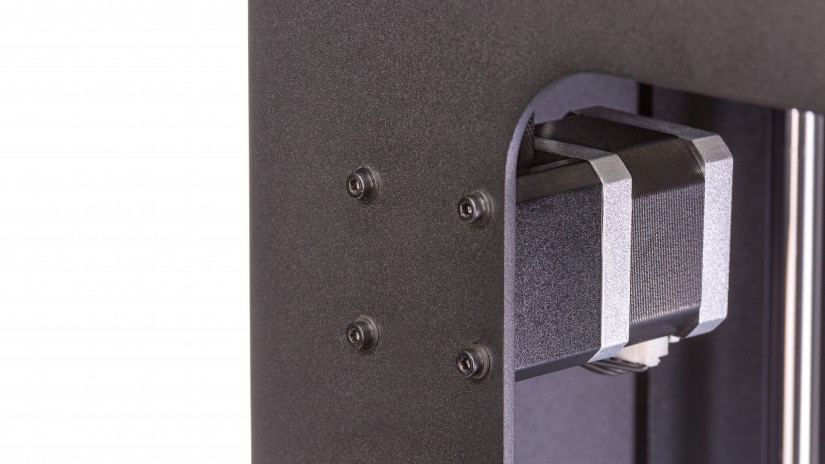
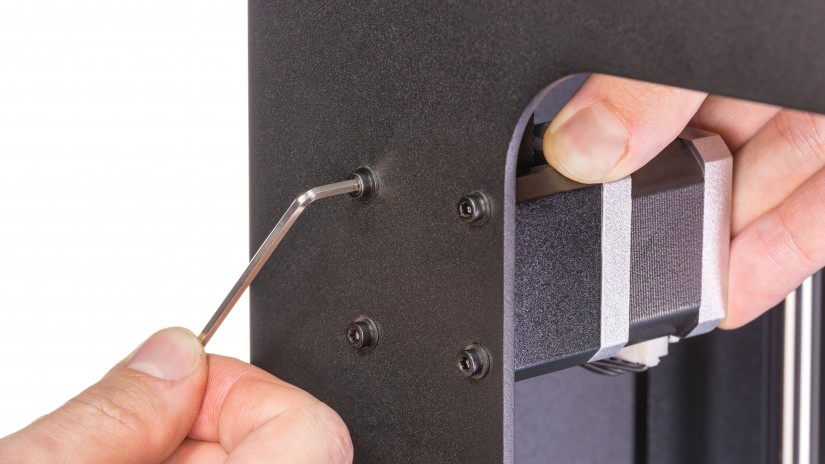
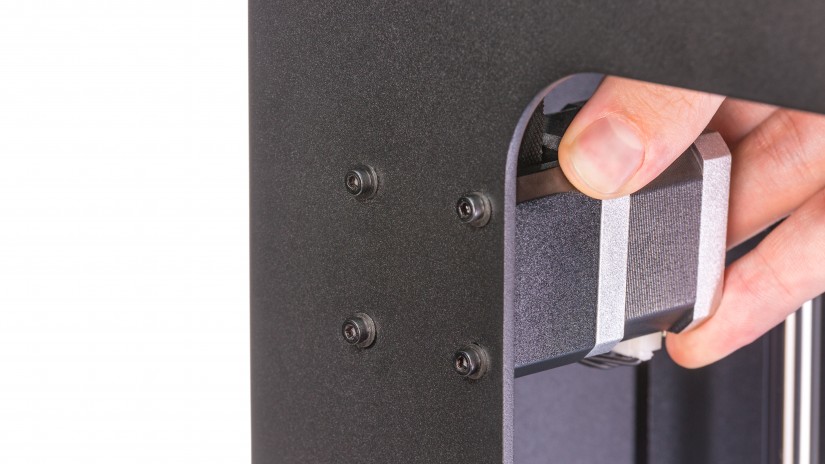
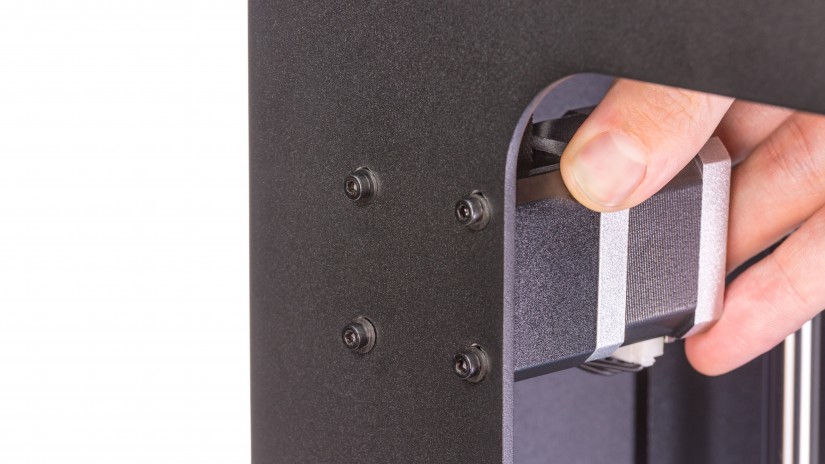
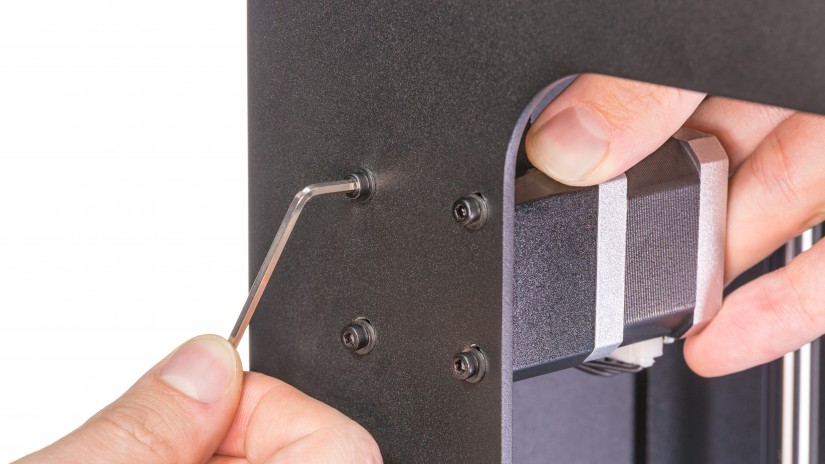
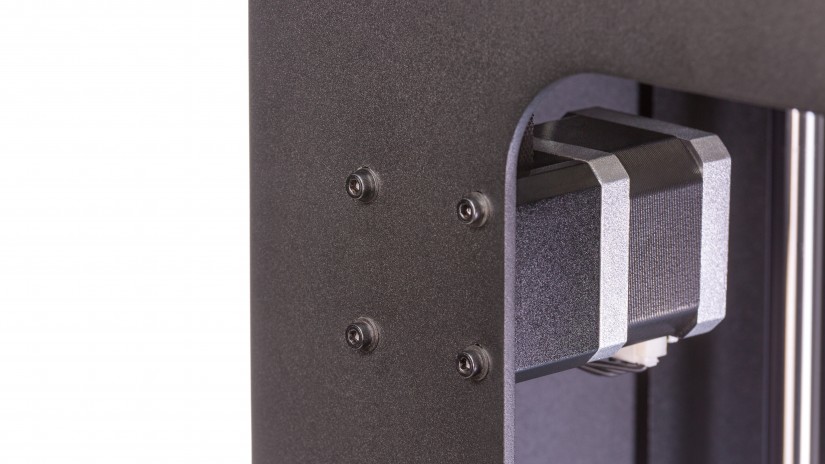
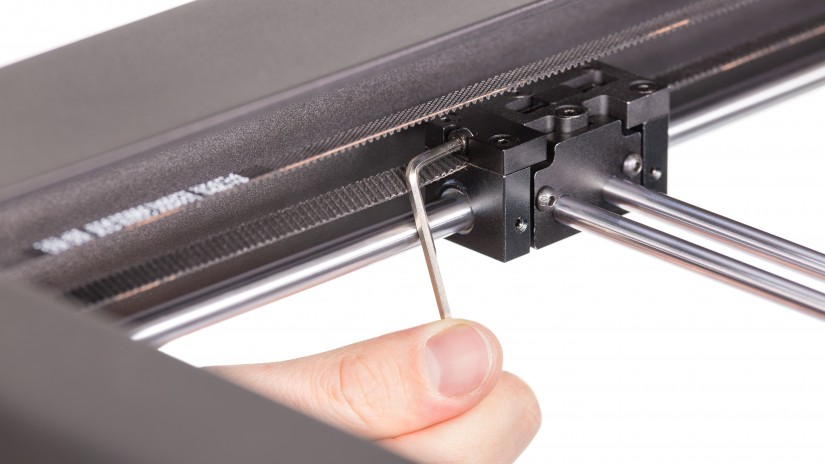
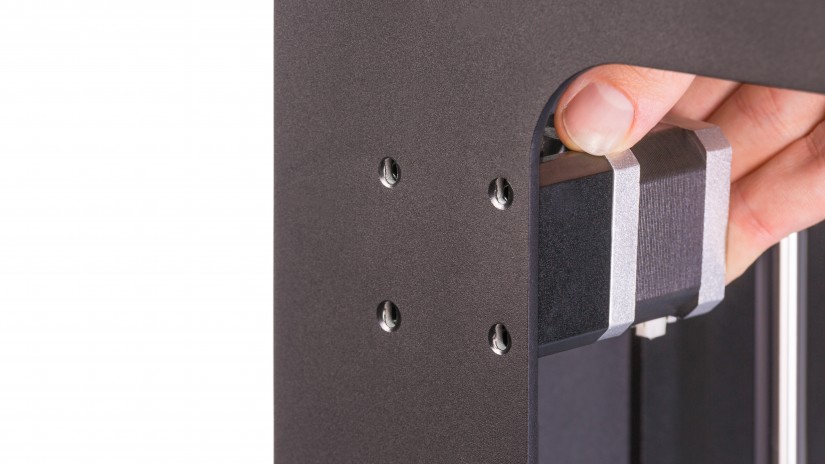
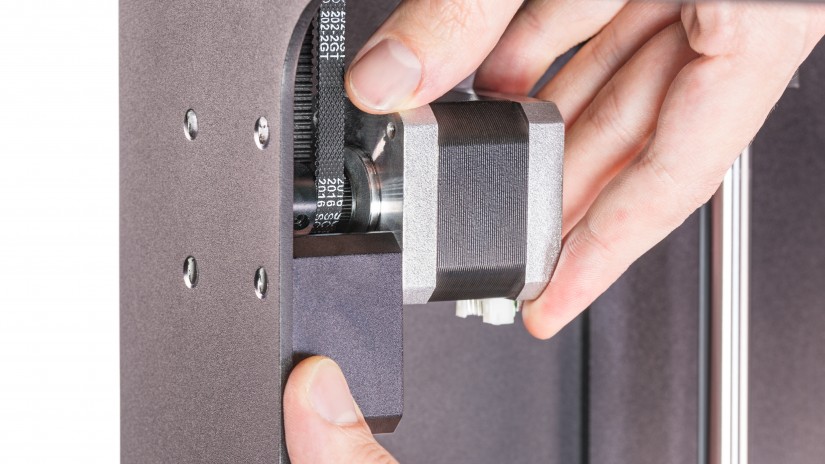
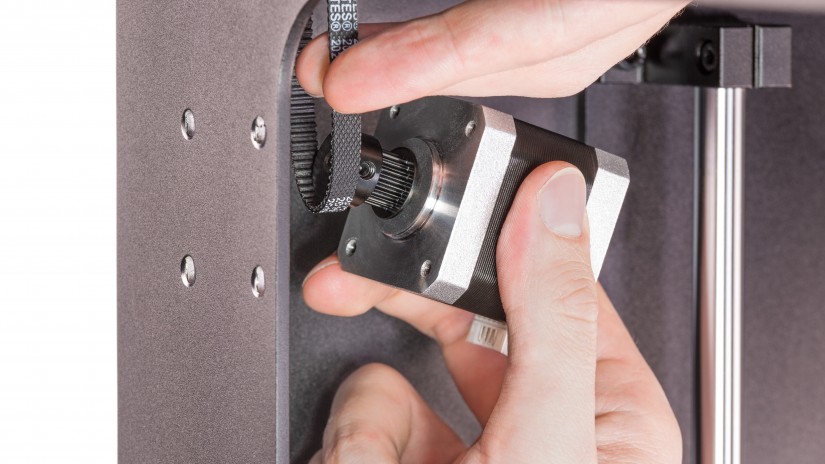
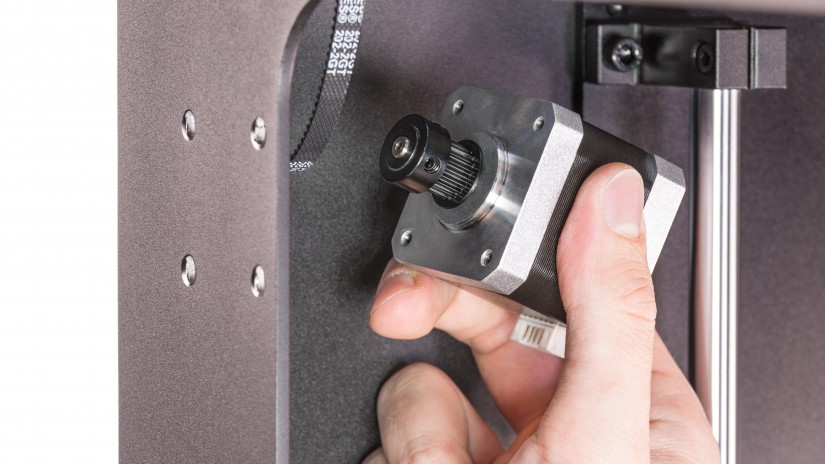
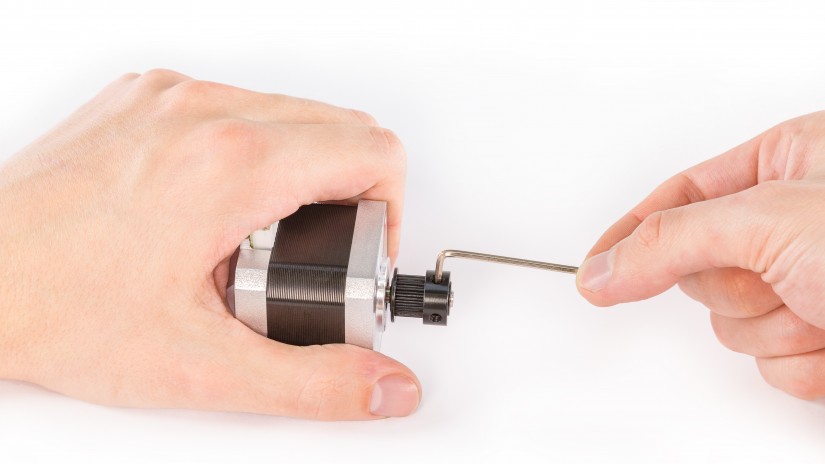
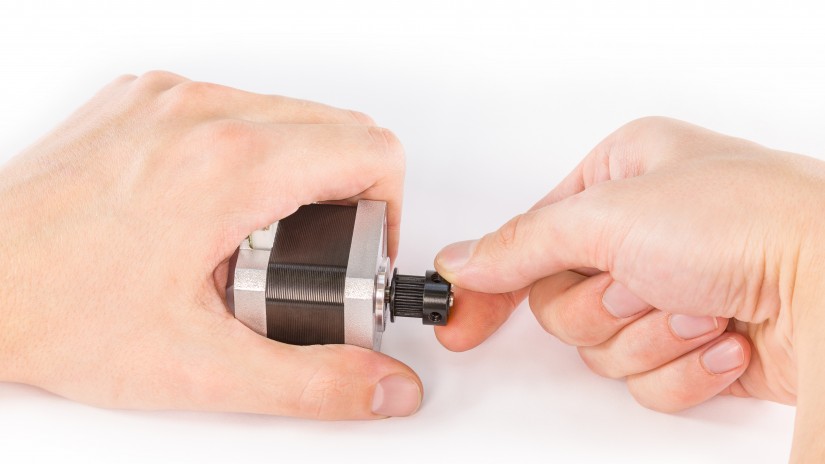
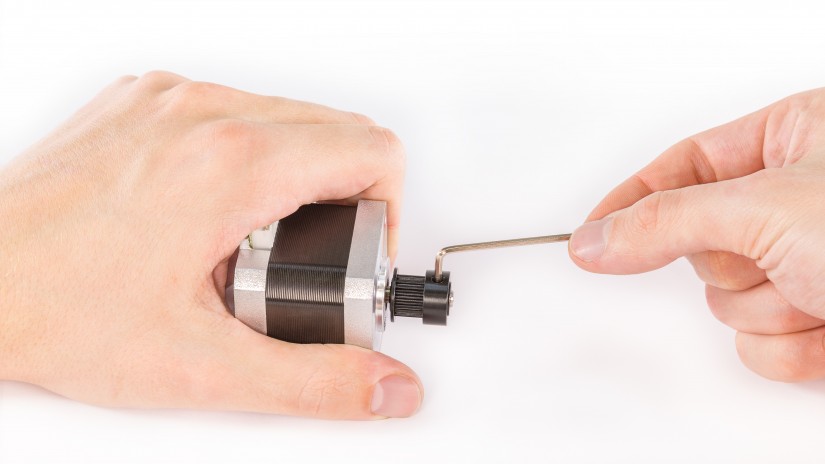
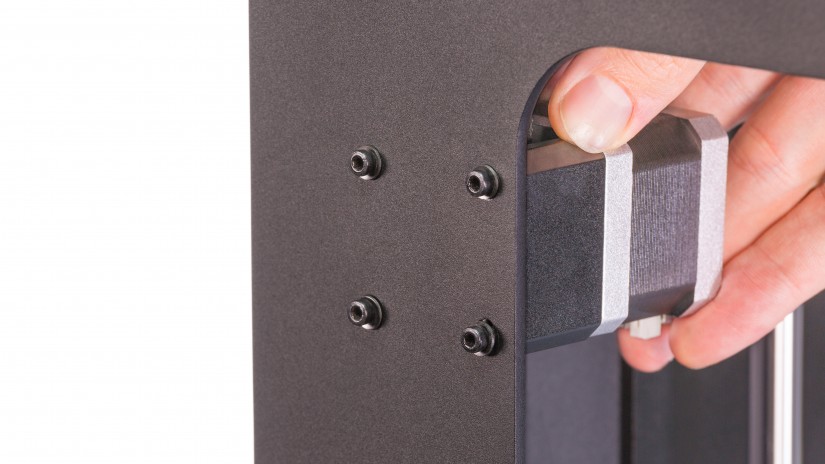
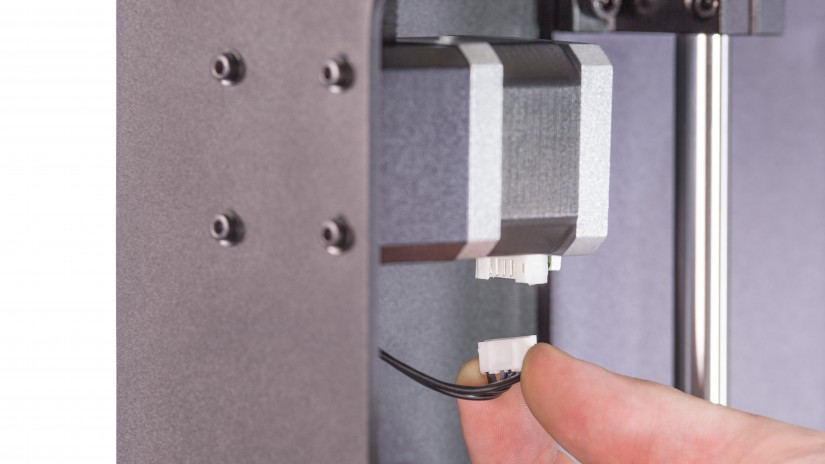
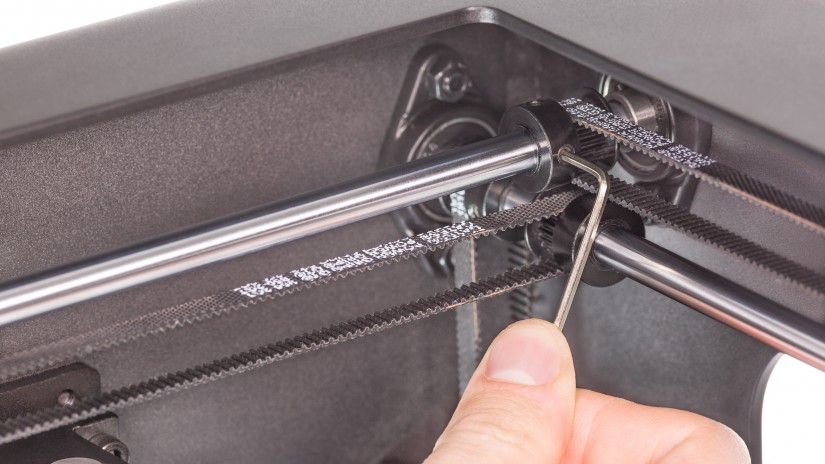
X/Y Axis Motor Pulleys Maintenance
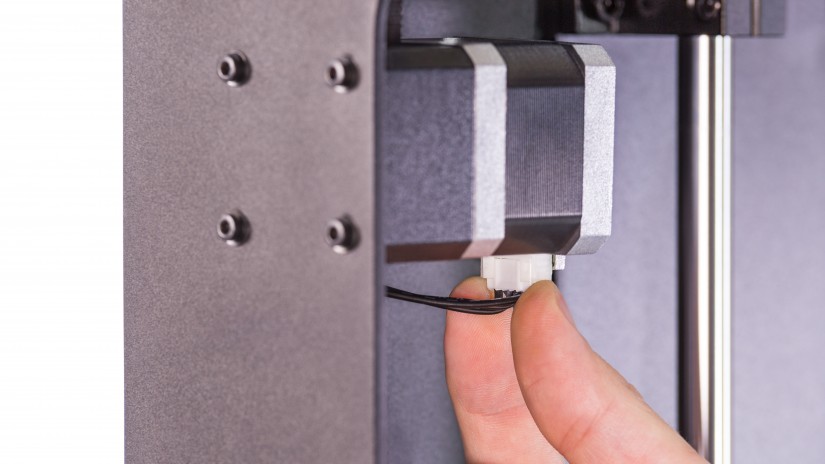

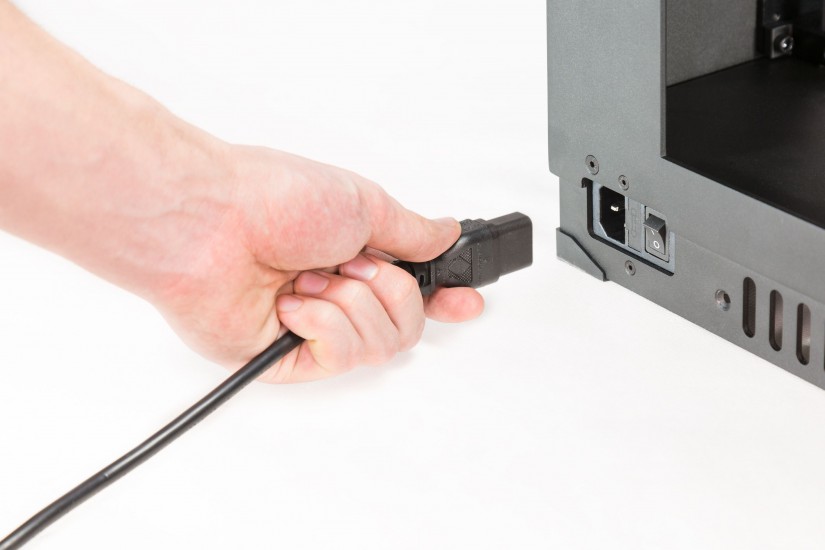
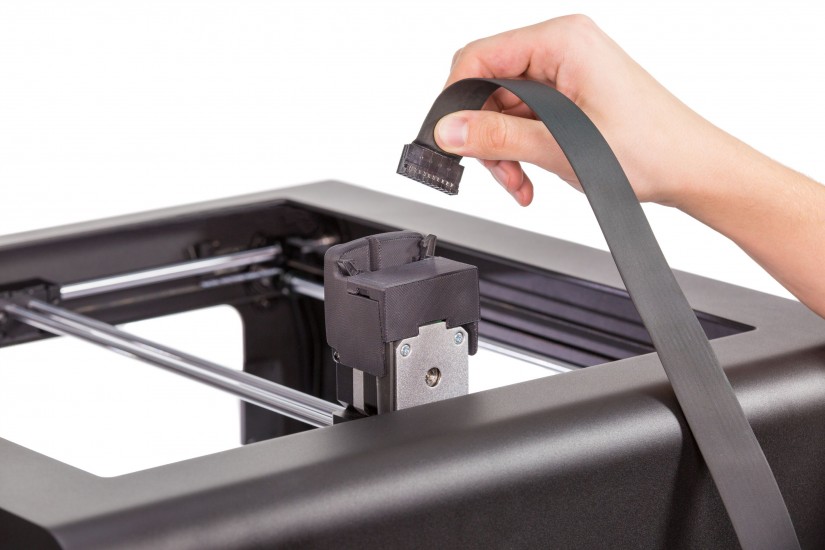
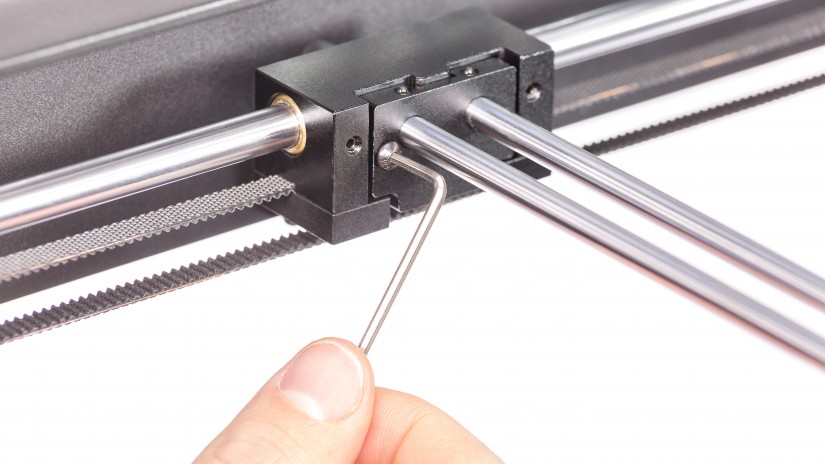
If the motor is running but the belt placed on the motor pulley does not move, the screws on the pulley have to be tightened. First, unplug the motor cable.

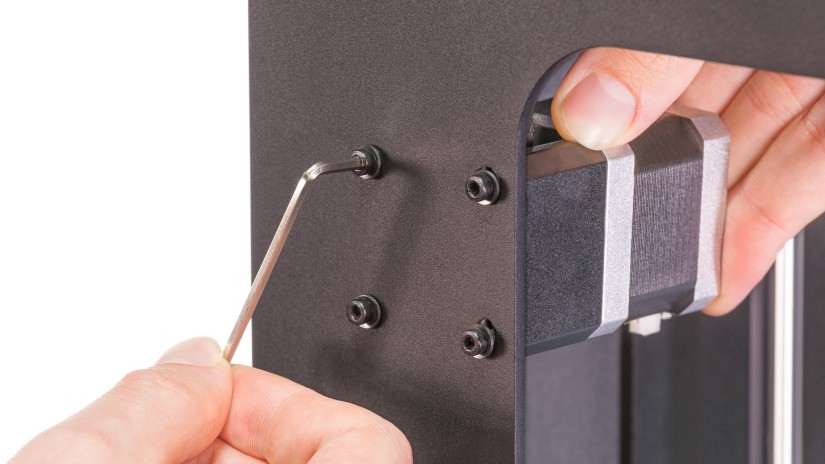
X/Y Axes Maintenance
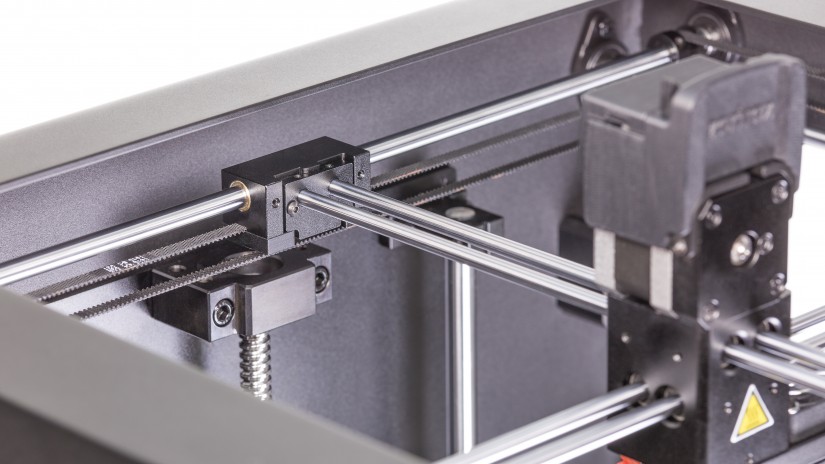
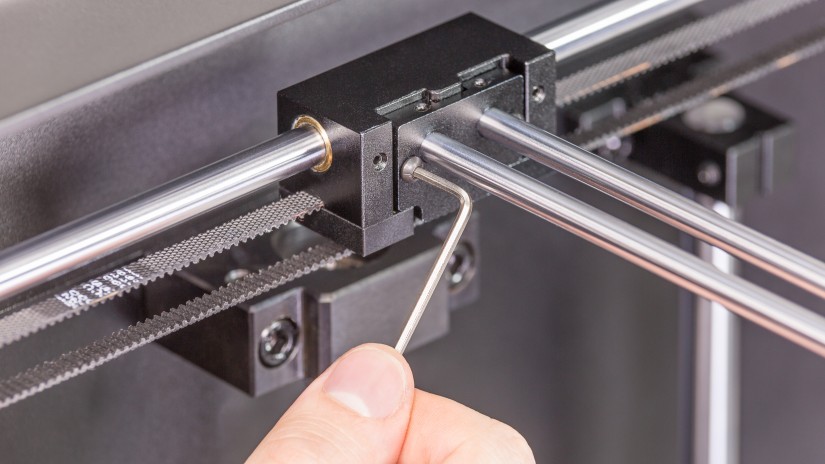
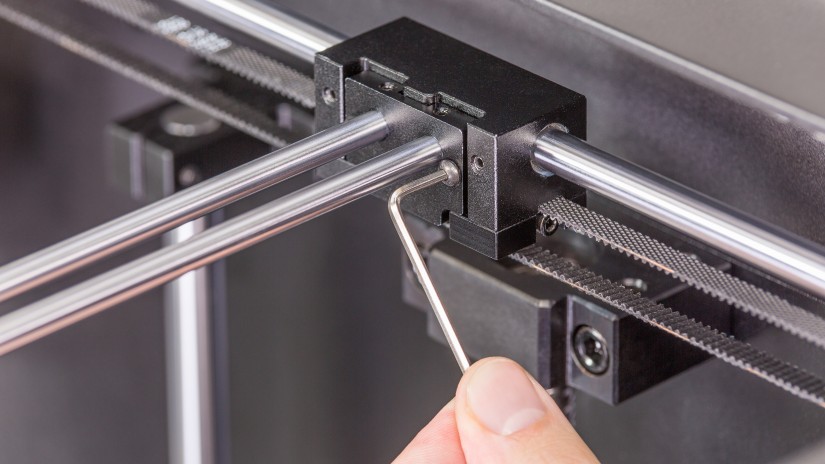


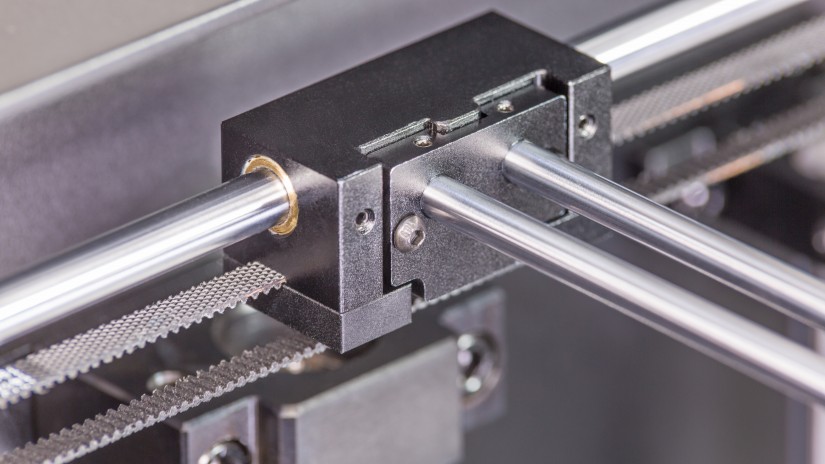
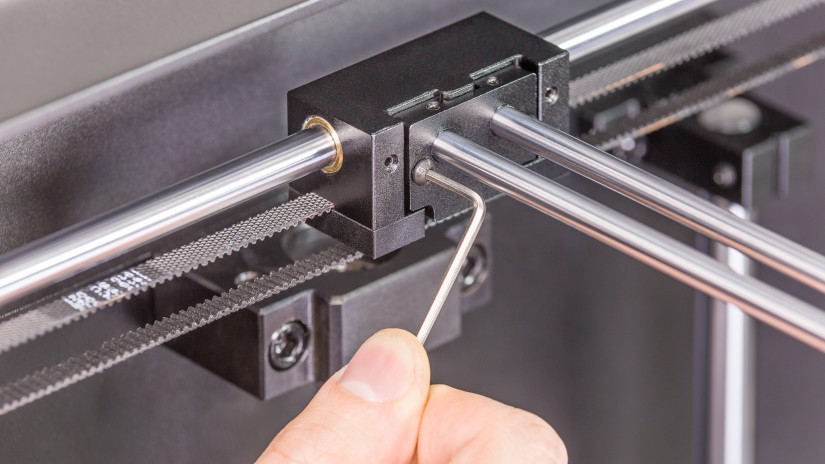
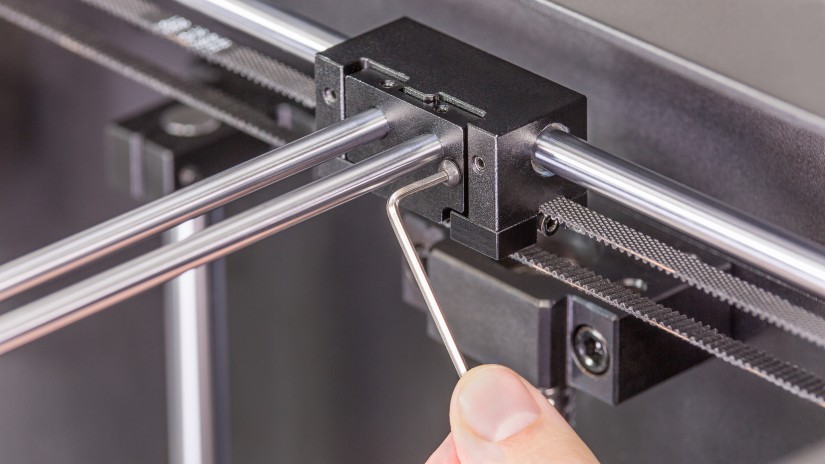
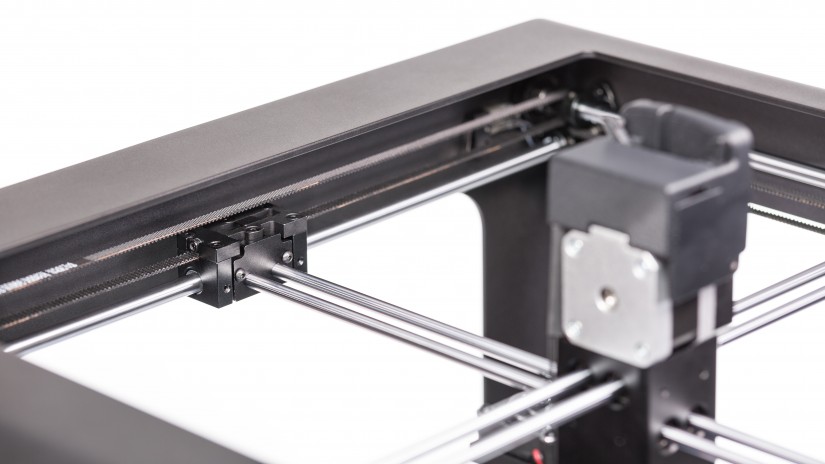
Move the extruder back and forth by pushing the blocks so that the front of the X axis block assumes the most optimal position. Next, tighten the two screws on the block.
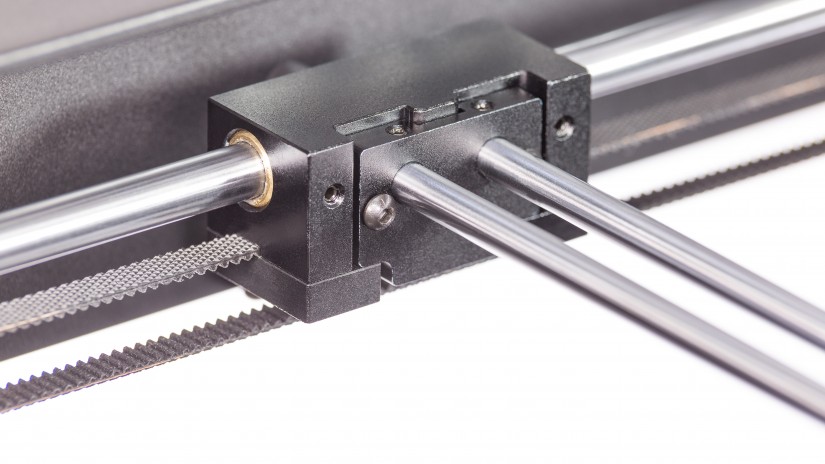
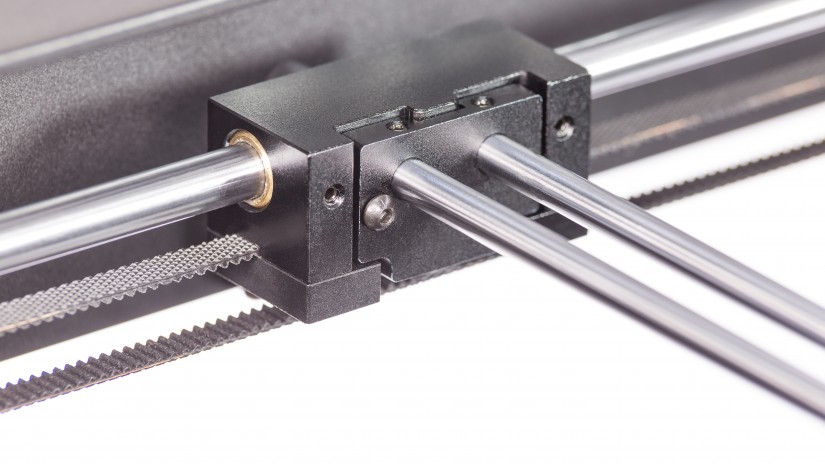
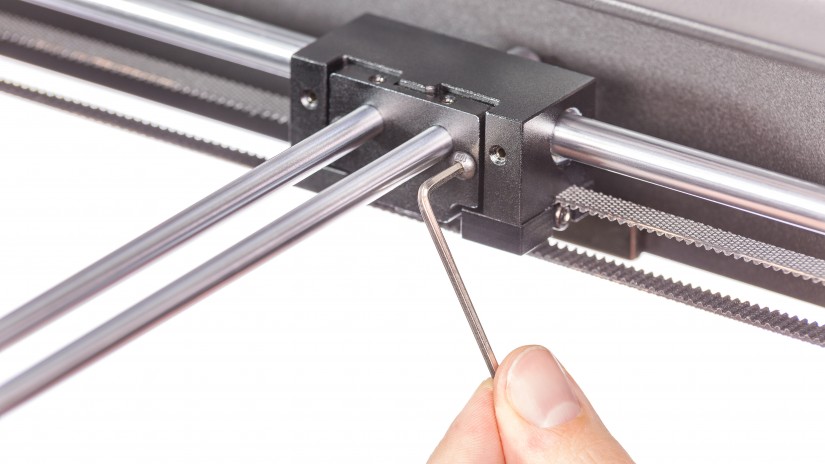
Move the extruder back and forth by pushing the blocks so that the front of the opposite axis block assumes the most optimal position. Next, tighten the two screws on the block.
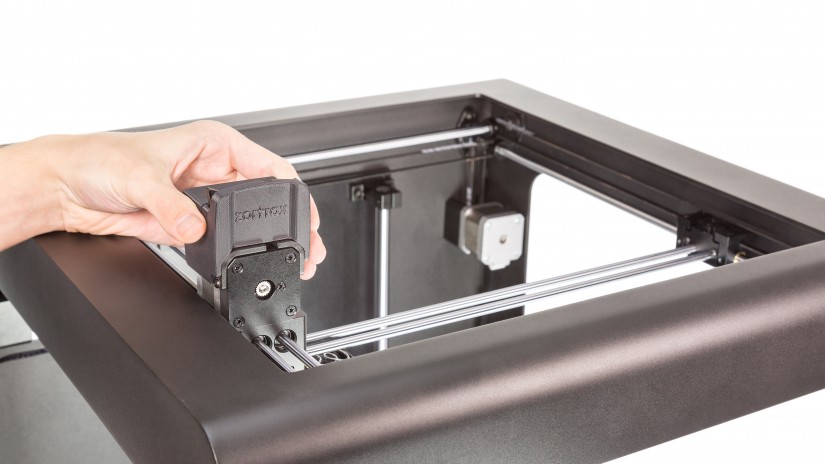
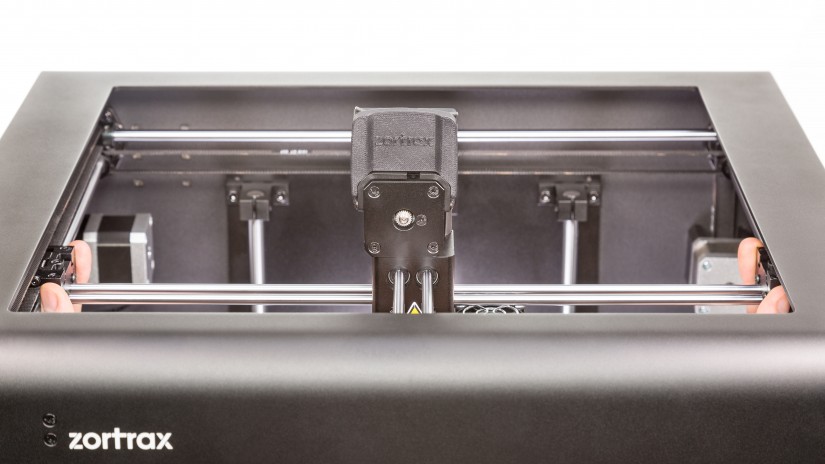
Put the jigs on the extruder guide rails and move the extruder manually so that the jigs are touching the X axis. This way, you will check if the extruder guide rails are parallel to the X axis.
If the extruder guide rails are not parallel to the X axis (second photo), follow the steps from the manual: Axes Maintenance – method with jigs.


